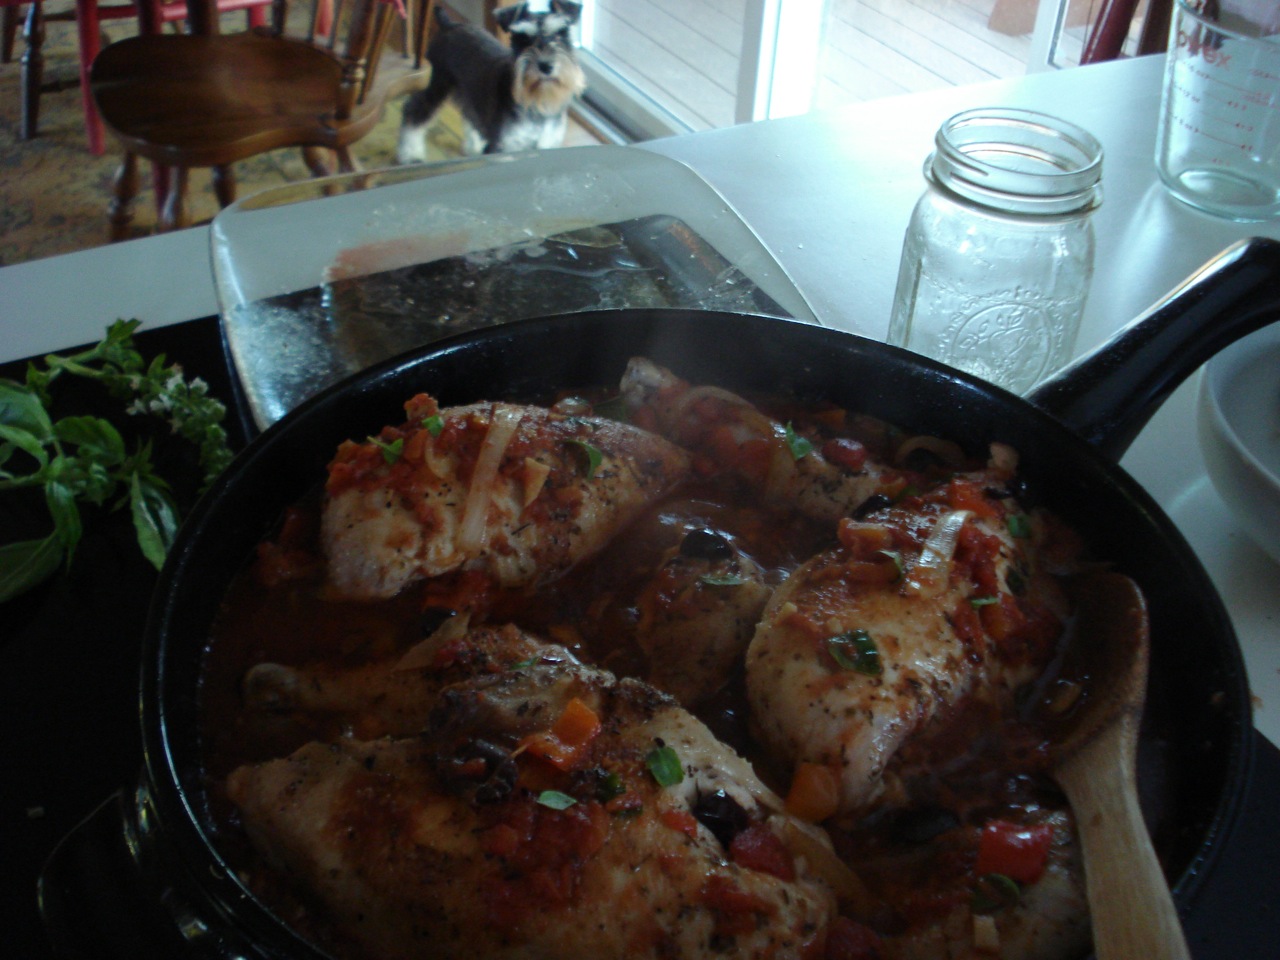
Chicken Cacciatori

1 chicken cut into parts (legs, thighs, breasts, wings)
chicken-herb-rub to coat chicken (or simply use salt & pepper)
3 tablespoons butter, ghee, or coconut oil
1 large bell pepper (any color), chopped
1 medium onion, chopped
3 garlic cloves, finely chopped
3/4 cup dry white wine (optional)
1 (28-ounce) package diced tomatoes with juice
3/4 cup chicken broth (increase to 1 & 1/4 cups if omitting wine)
1/4 cup chopped kalamata olives (or 3 tablespoons drained capers)
1 & 1/2 tsps dried oregano
1 tsp crushed red pepper flakes
1/4 cup coarsely chopped fresh basil leaves, divided
- Sprinkle the chicken with chicken herb rub (or salt & pepper) to coat.
- In a large saute pan, heat the butter or oil at medium high.
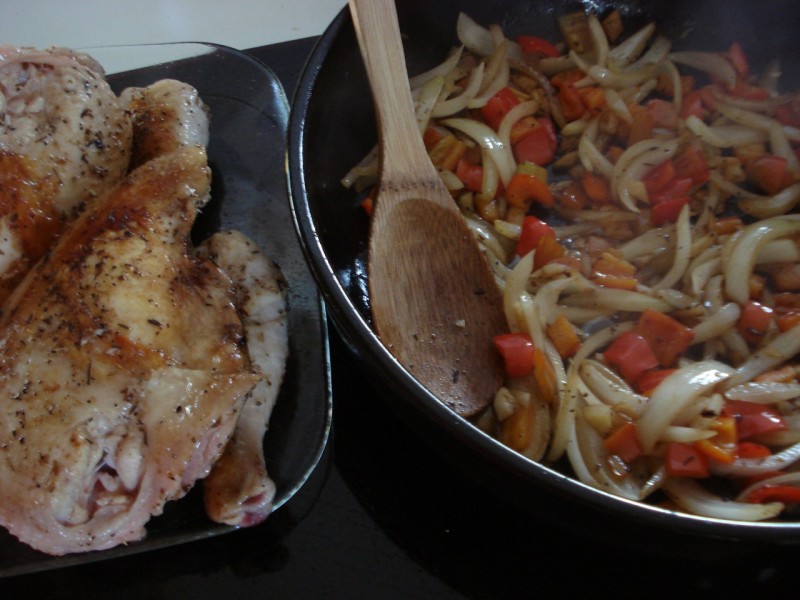
- Cook the chicken parts until just browned — about 5 minutes per side (if all the chicken does not fit in your pan, cook in 2 batches).
- Transfer the chicken to a plate and set aside.
- Add the bell pepper, onion, and garlic to the same pan and saute over medium heat until the vegetables are tender — about 5 minutes.
- Add the wine (if using) and simmer until reduced by half, about 3 minutes.
- Add the tomatoes with their juice, broth, olives (or capers), oregano, crushed red pepper flakes, and about half of the basil leaves.
- Return chicken parts to the pan and mix with sauce to coat.
- Bring sauce to a simmer and continue simmering (covered) over medium-low heat until the chicken is cooked through — 20 to 30 minutes.
- Transfer the chicken to individual plates or a large platter.
- If necessary, boil the sauce until it thickens slightly — about 3 minutes.
- Spoon sauce over the chicken, garnish with the remaining basil leaves and serve.
_____________________________________________________________________
SIDE NOTES:
~ Technically, you can use any 8 pieces of chicken you have. In other words, it can be legs and thighs only or any combination of parts — depending on what you have on hand.
~ Always a crowd pleaser.
Enjoy! =)
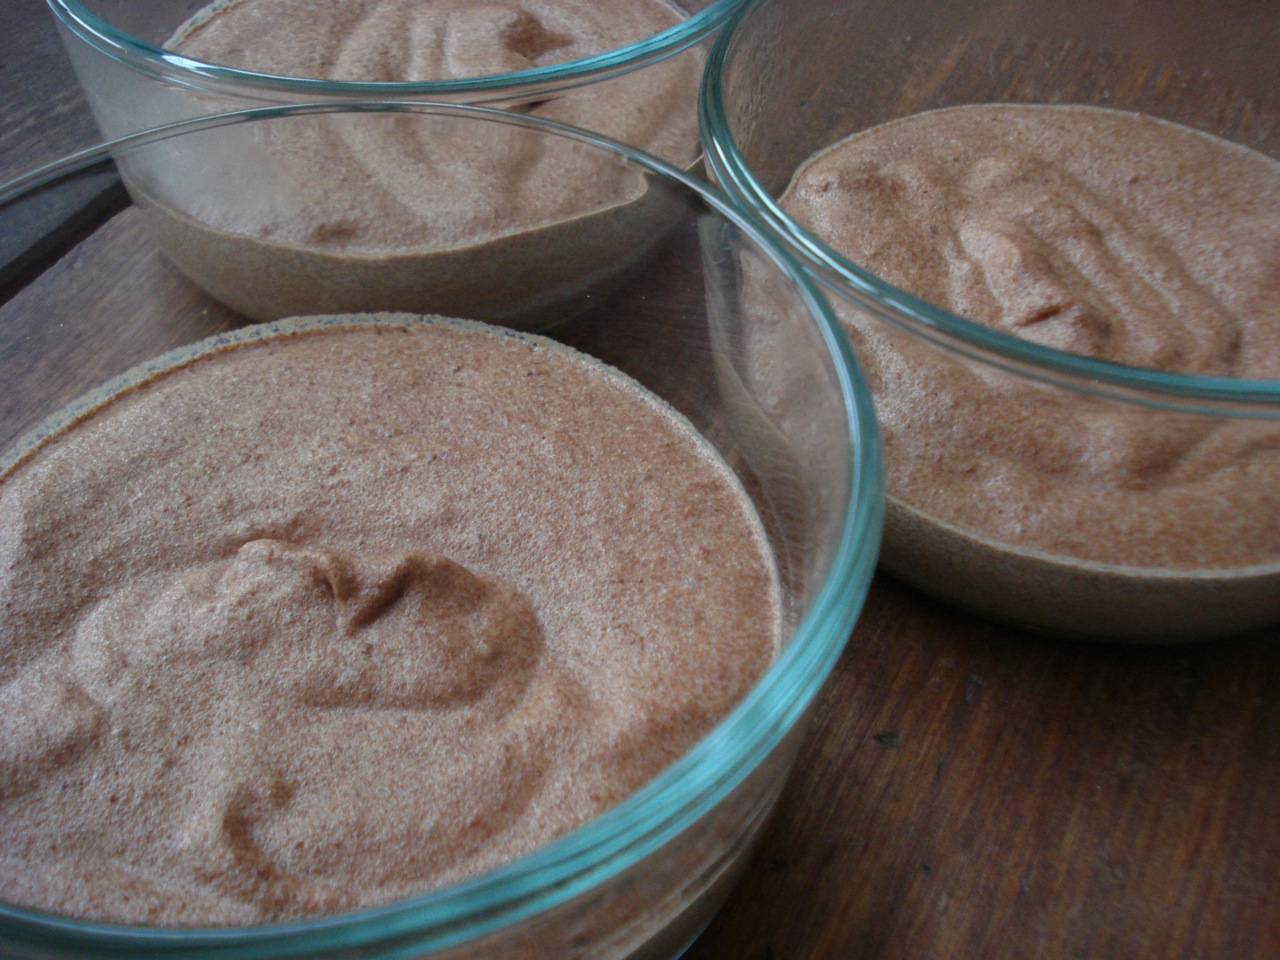
Chocolate Mousse
6 ounces semisweet or bittersweet chocolate, coarsely chopped or broken in pieces
4 TBSP butter
1 tsp pure vanilla extract
2 TBSP strong coffee (brewed) —OR— 4 tsps light rum or brandy
4 large eggs, separated
2 TBSP natural sugar
1/2 cup heavy cream
- Melt chocolate in a double boiler (or simulated double boiler – see below).
- Whisk butter into melted chocolate, 1 TBSP at a time.
- Stir in salt, vanilla and coffee (or rum/brandy) until completely incorporated.
- Whisk in yolks one at a time, making sure that each is fully incorporated before adding the next.
- Set chocolate mixture aside.
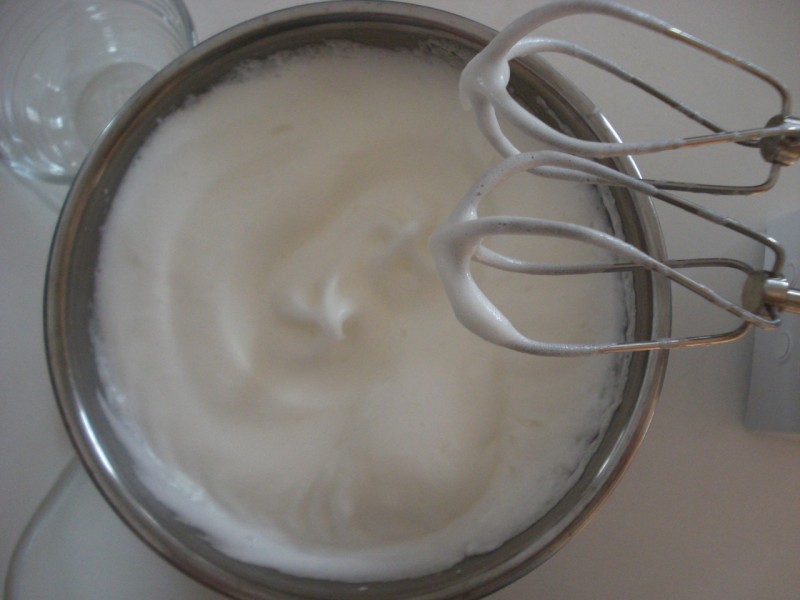
- Stir egg whites in a clean mixing bowl set over saucepan of hot water until slightly warm — 1 to 2 mins.
- Remove bowl from saucepan and beat with electric mixer set at medium speed until soft peaks form.
- Raise mixer speed to high and slowly add sugar, again, beating to soft peaks.
- Whisk a quarter of the beaten whites into chocolate mixture to lighten it, then gently fold in remaining whites.
- Whip cream to soft peaks and gently fold into mousse.
- Spoon portions of mousse into six to eight individual serving dishes or goblets; cover and refrigerate for at least 2 hours (and up to 24 hours).
- Serve with additional whipped cream if desired.
_____________________________________________________________________
SIDE NOTES:
~ You don’t necessarily need an “official” double boiler to make this (personally, I don’t have one). You just need a small pot of boiling water on the bottom, and a larger pot that will sit securely on top (in which you would place the chocolate). Of course, since the pots are not “locked” together the way a real double boiler would be, please be careful that the pot on top doesn’t tip.
~ After 24 hours of refrigeration, the flavor and texture will begin to deteriorate, so it’s best to consume within that time period.
~ Personally, I’m not a big chocolate fan, so can really take or leave desserts like this, but I had never tried to make mousse before and wanted to give it a go. The kids (of course) really liked it =)
~ Use a gluten free vanilla extract if necessary to keep this recipe gluten free.
~ Adapted from “The Best Recipe” cookbook.
Beaten egg whites:
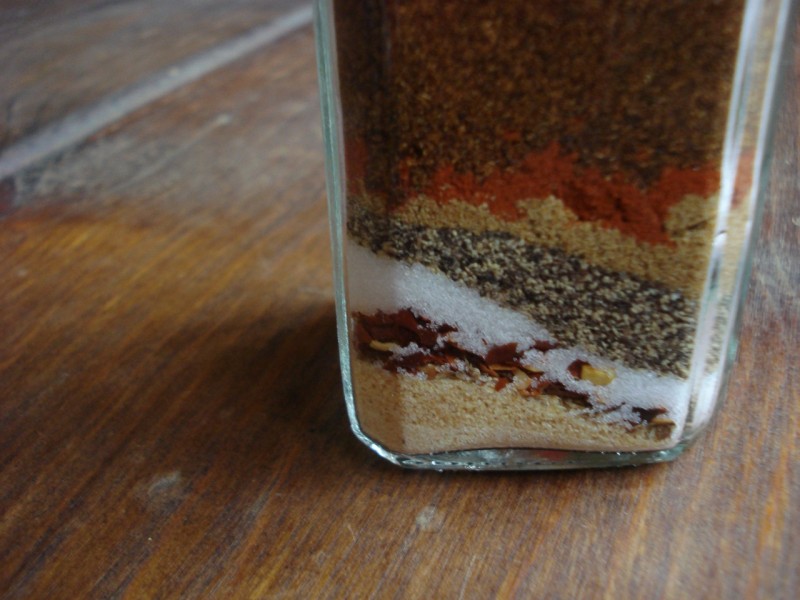
Taco Meat Seasoning

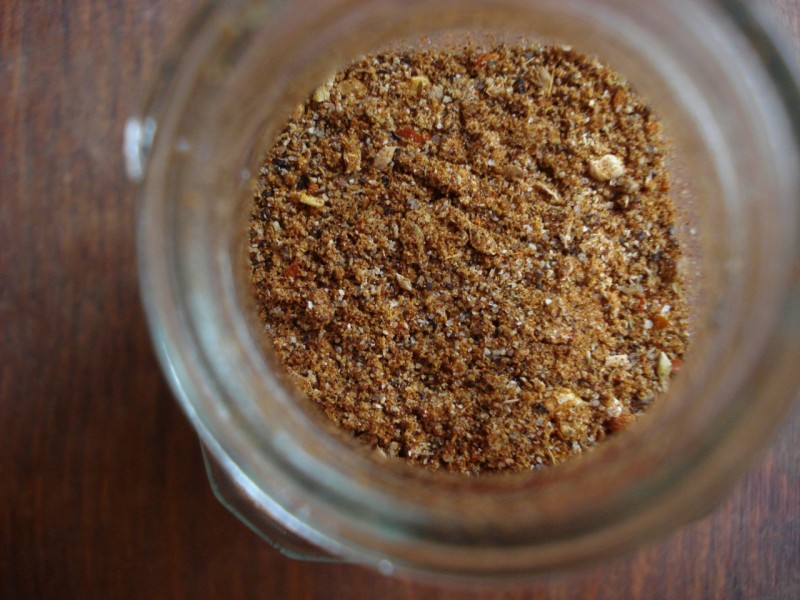
4 TBSP chili powder
2 TBSP ground cumin
4 tsps black pepper
3 tsps pure salt
1 tsp garlic powder
1 tsp onion powder
1 tsp crushed red pepper flakes
1 tsp dried oregano
1/2 tsp paprika
- Combine all ingredients and store in a sealed container.
_____________________________________________________________________
SIDE NOTES:
~ This is a great mix to keep on hand. Simply saute ground beef with a some of this seasoning mix (about 2 tablespoons per pound of meat), and lay out a spread of shredded cheese, lettuce, diced tomato, guacamole, salsa, sour cream, rice if you’d like, and you’re ready for a mexican feast with very little fuss!
~ Why not just keep those pre-made spice mixes on hand instead? Compare the ingredients for your answer…..
I prefer to take a few minutes to mix together my own high quality spices and keep that on hand for convenience — minus all the crud.
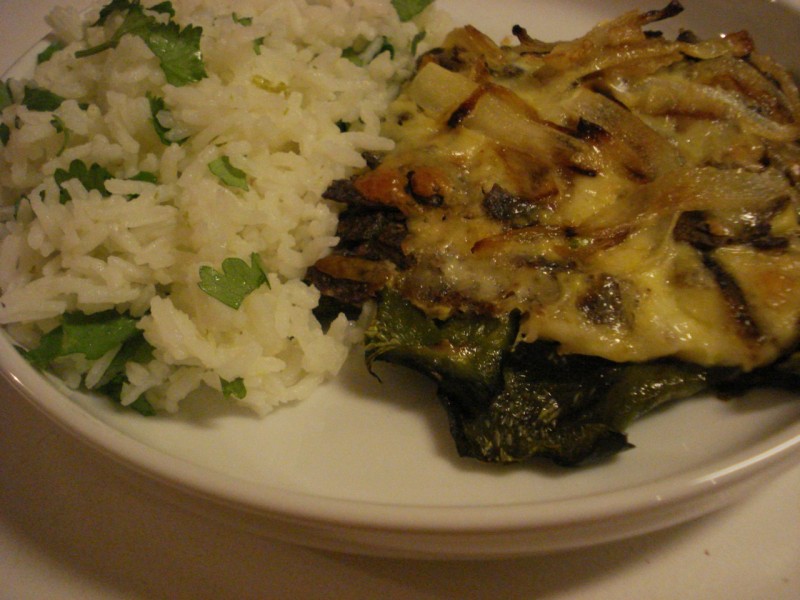
Chiles Rellenos Casserole

2 TBSP coconut oil
1 small onion, chopped
2 cloves garlic, minced or crushed
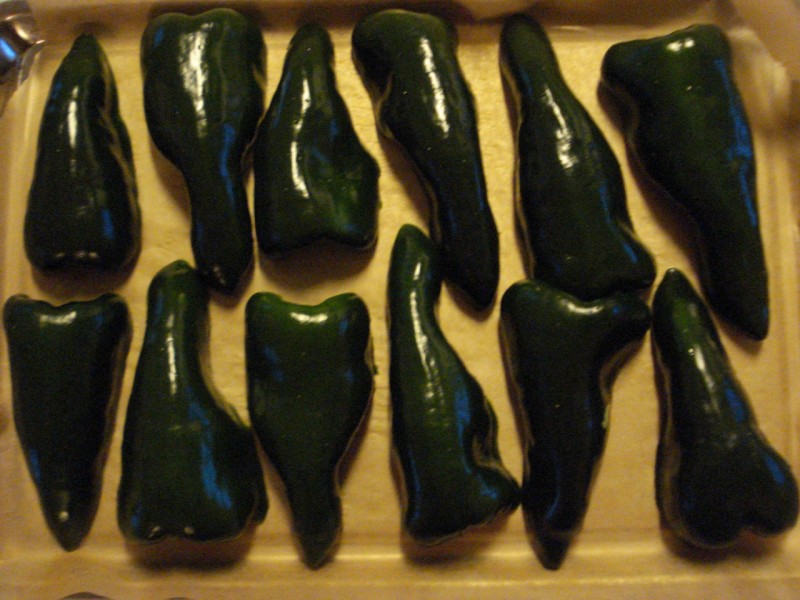
8 New Mexican green chiles cut in half lengthwise, stems / seeds removed and discarded
8 oz Monterey Jack cheese, cut into strips
High quality tortilla chips, crushed (I used blue chips this time)
enough freshly grated cheddar cheese to cover top of casserole (2 – 3 oz)
2 eggs
1/2 cup milk
1/4 tsp pure salt
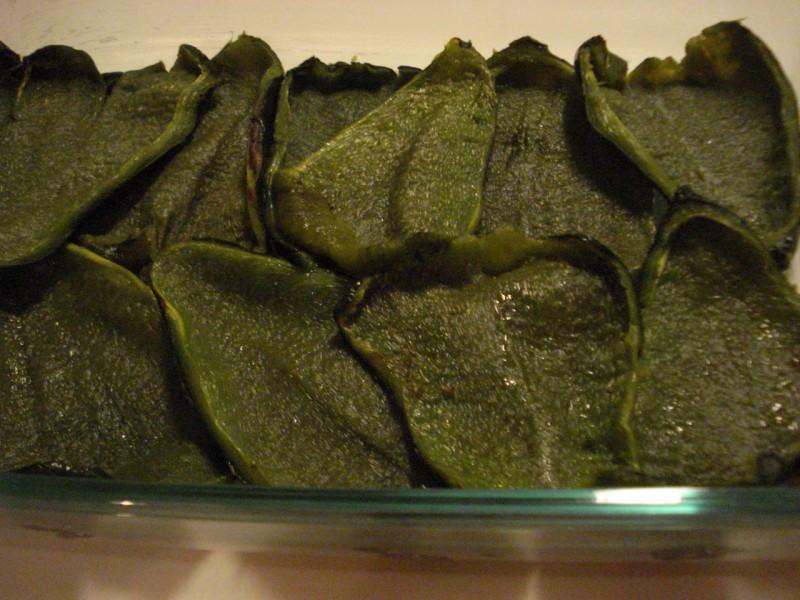
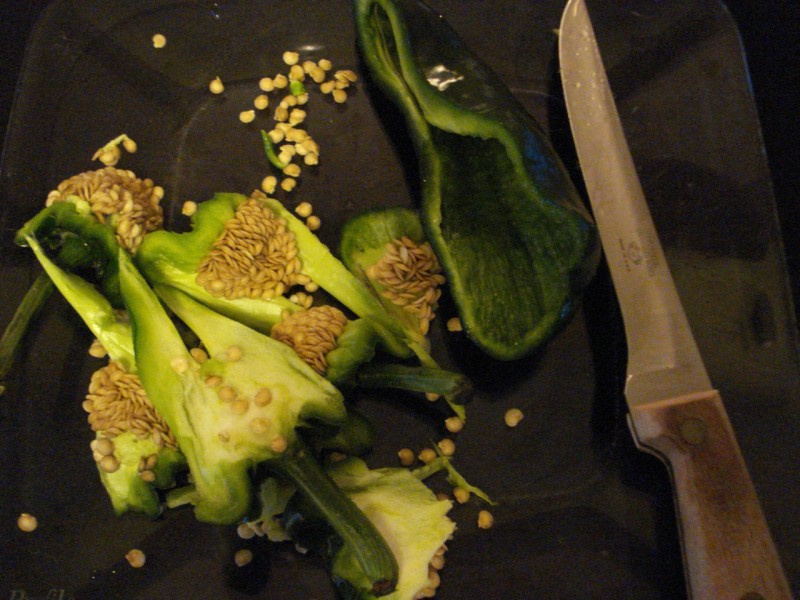
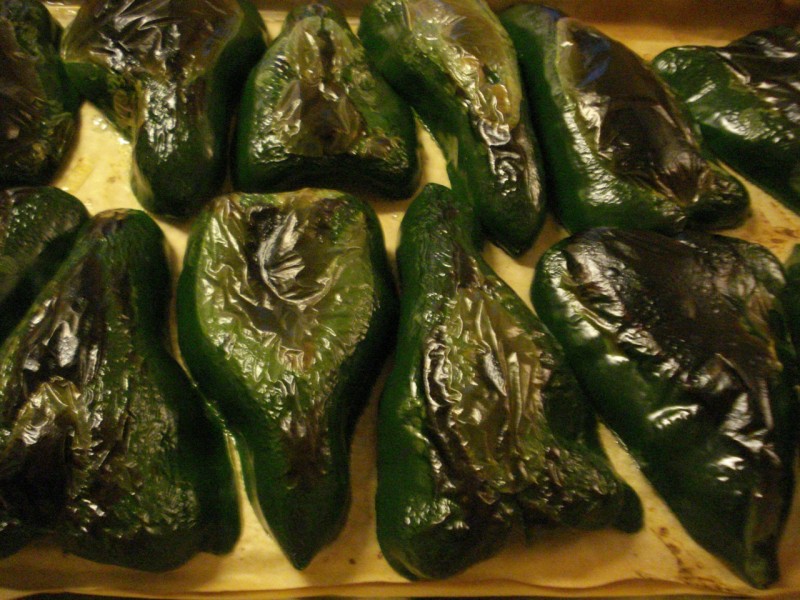
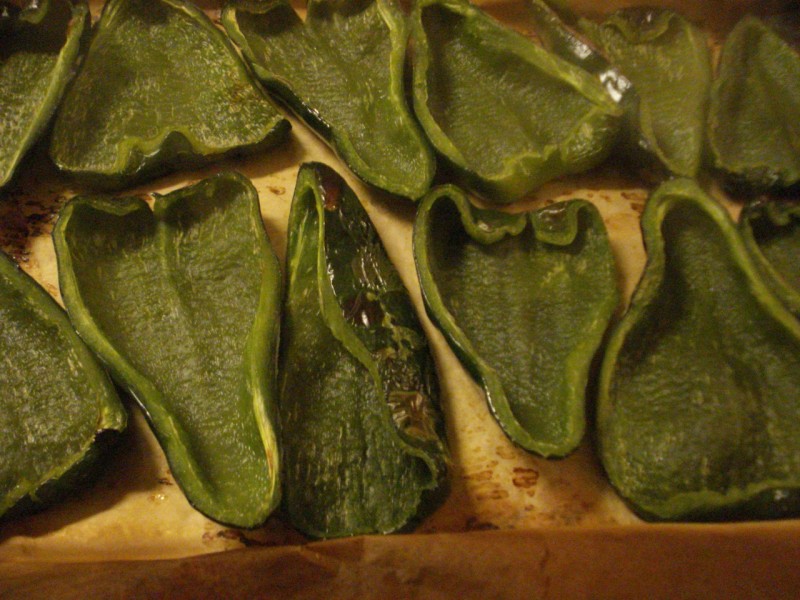
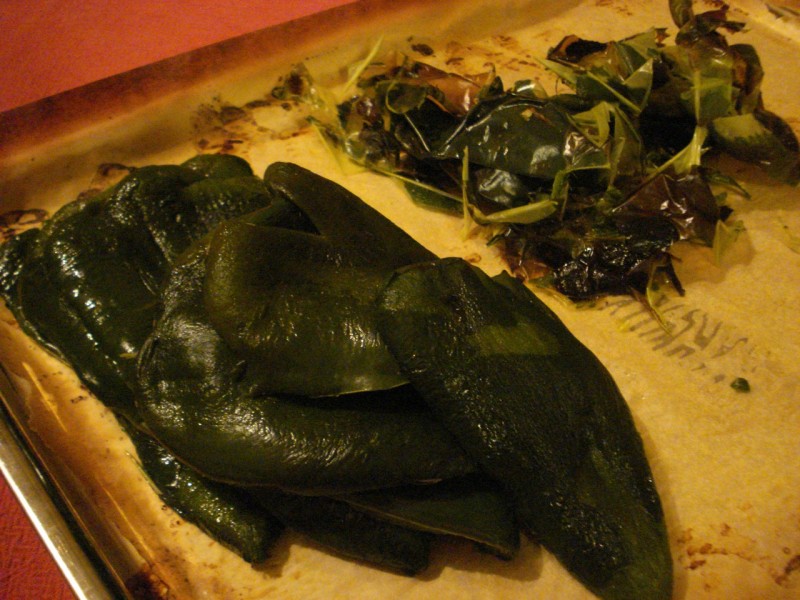
- Roast the peppers, let cool for a few minutes, and peel off their skin.
- Saute the onion and garlic in the oil until soft and lightly browned, about 5 – 7 minutes.
- Remove from heat and set aside.
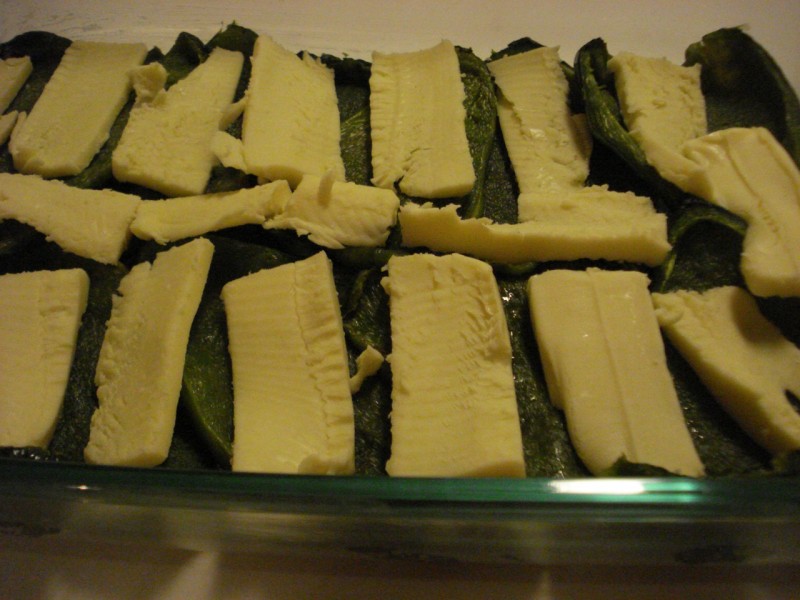
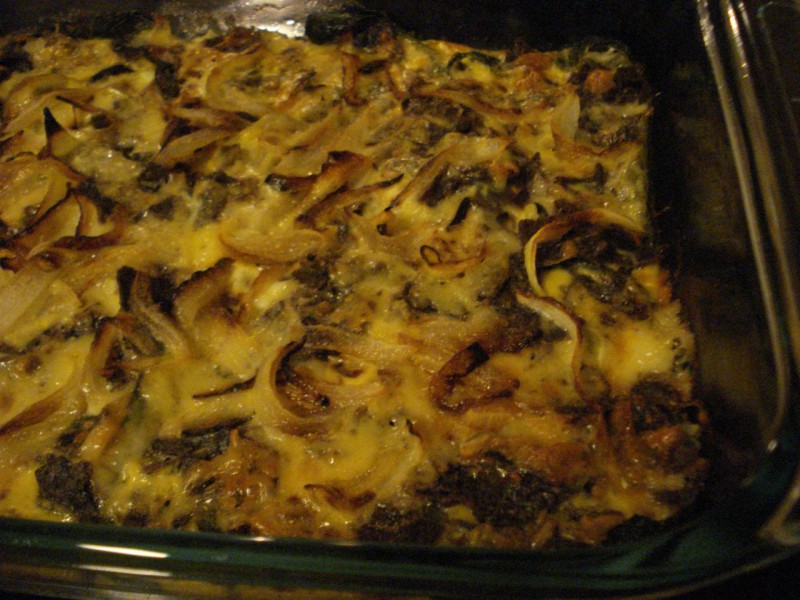
- Lay the chiles side by side in a coconut oil greased 9 x 13 inch casserole dish and lay the sliced Monterey Jack over the peppers.
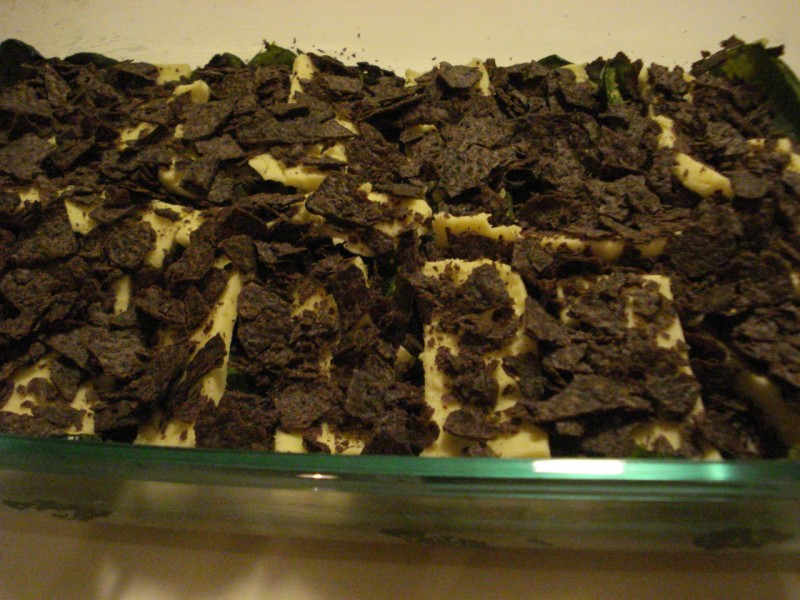
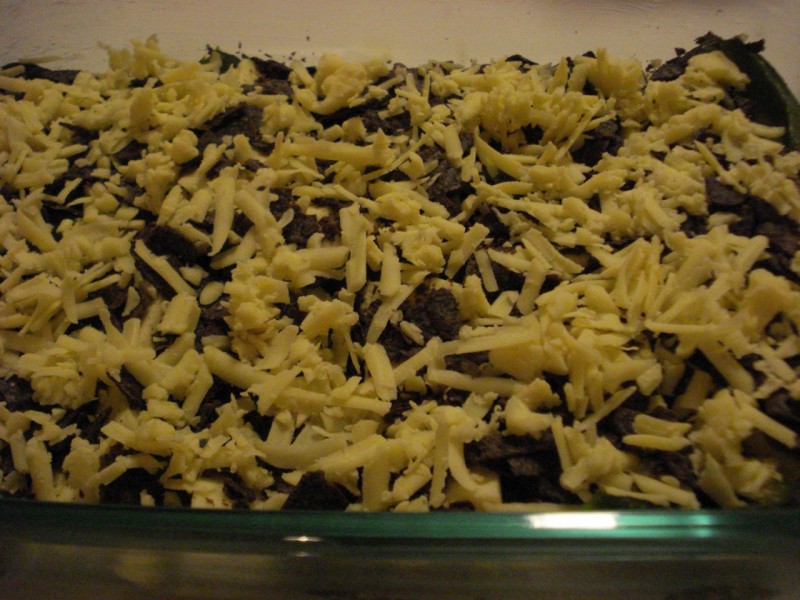
- Sprinkle with crushed tortilla chips and then the cheddar cheese.
- Beat the eggs with milk and salt.
- Add onion mixture to the eggs and carefully pour over the chiles.
- Bake, uncovered for 35 minutes at 350 (or until casserole is lightly browned).
- Remove from oven and let cool for 5 – 10 minutes before serving.
_____________________________________________________________________
SIDE NOTES:
~ This modified method of preparing chiles rellenos is easier than the traditional method (where you would stuff and batter/fry each pepper individually), but equally delicious.
~ If you can’t get New Mexican green chilies, substitute 6 large poblanos (as I did this time – see photos) or 12 Italian long hot peppers.
~ If your family doesn’t like spicy, simply substitute mild peppers such as bell. It won’t quite be chiles rellenos anymore, but it will still be yummy!
~ For photo instructions on how to roast peppers, click HERE.
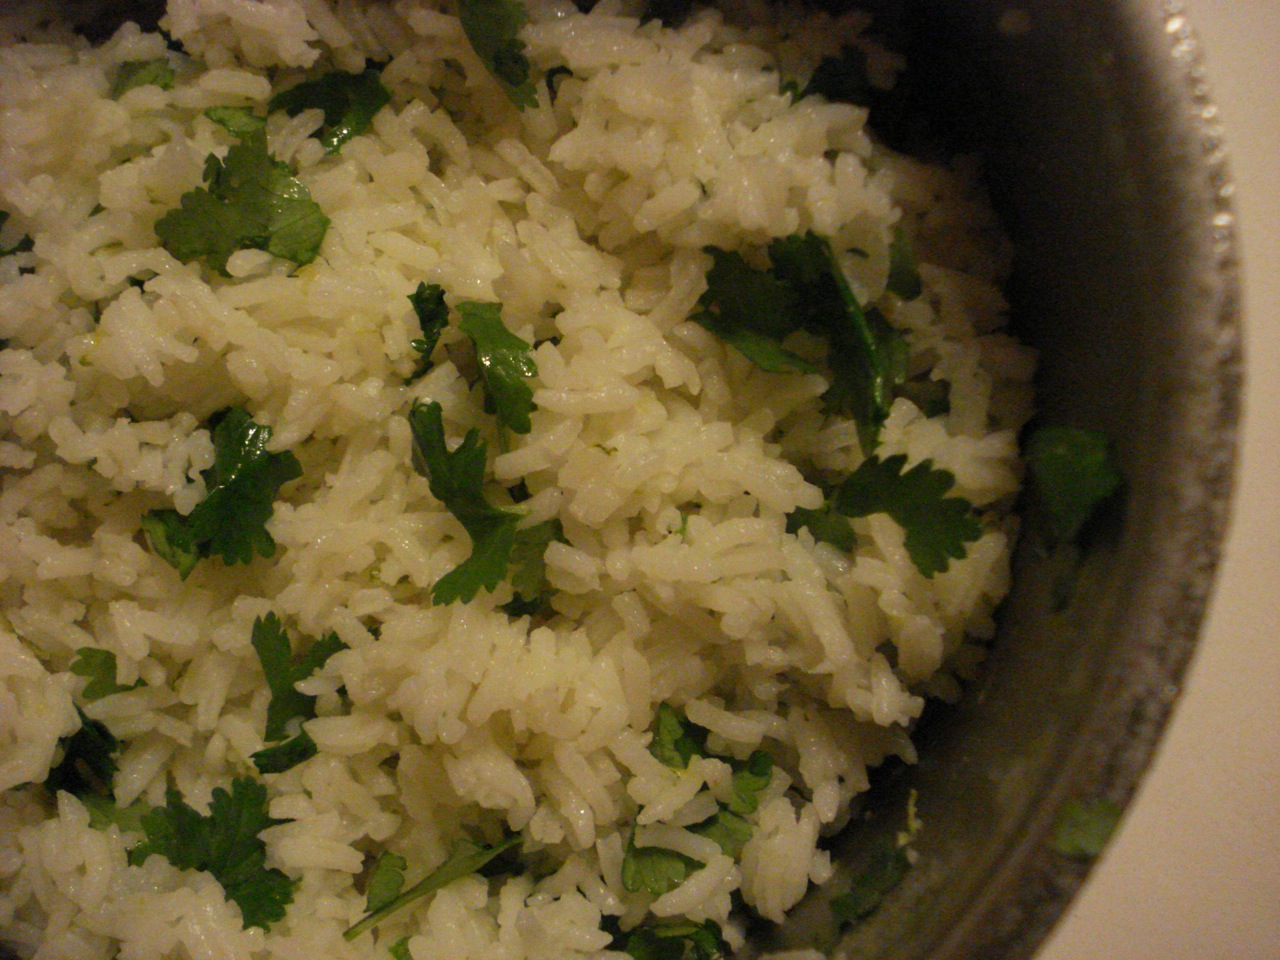
~ Of course, a little salsa, sour cream, and/or guac on the side is a nice compliment to this dish, as is the cilantro-lime-rice I posted last week.
~ You can add ground beef to this casserole as well if you’d like. Simply saute it with seasoning and layer it over the peppers.
~ Adapted from “Chile Pepper”. I have changed the recipe substantially. An important side note: The method in the book (which I followed the first time I made this) suggests roasting the peppers whole, then slitting and deseeding afterward. I must say… What an unnecessary nightmare! I’ve always seeded my bell peppers before roasting, and I will continue roasting my poblanos the same way. The second time I made this, it took a fraction of the time to seed the peppers and there was a lot less huffing and puffing =)
_____________________________________________________________________
1. Layer the roasted/peeled peppers in your baking dish.
_____________________________________________________________________
2. Layer the sliced Monterey Jack cheese.
_____________________________________________________________________
3. Layer the crushed tortilla chips (I used blue chips this time).
_____________________________________________________________________
4. Sprinkle a layer of shredded cheddar over the top.
_____________________________________________________________________
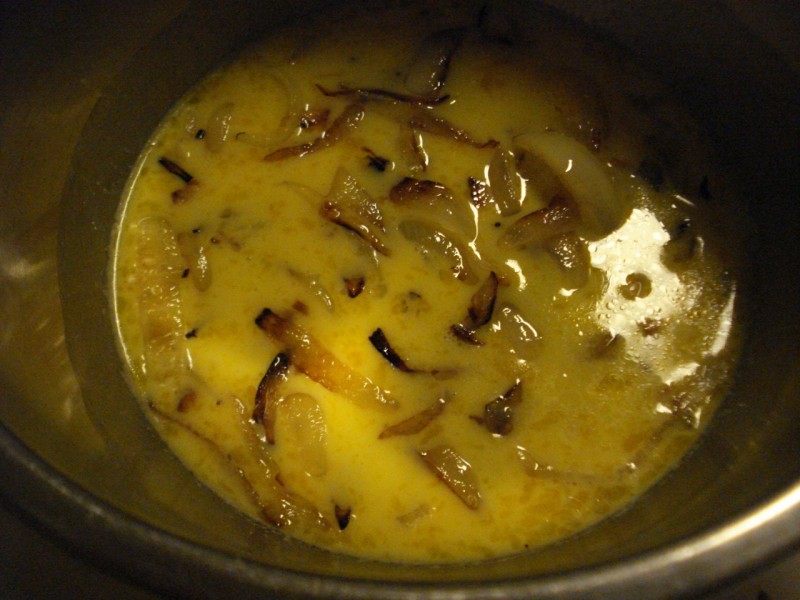
5. Beat the eggs with milk and salt, and stir in the cooked onion/garlic mixture.
_____________________________________________________________________
6. Evenly distribute the egg/onion mixture over the casserole and bake.
_____________________________________________________________________
7. Remove from oven and let rest 5 – 10 minutes before serving.
How to Roast a Pepper
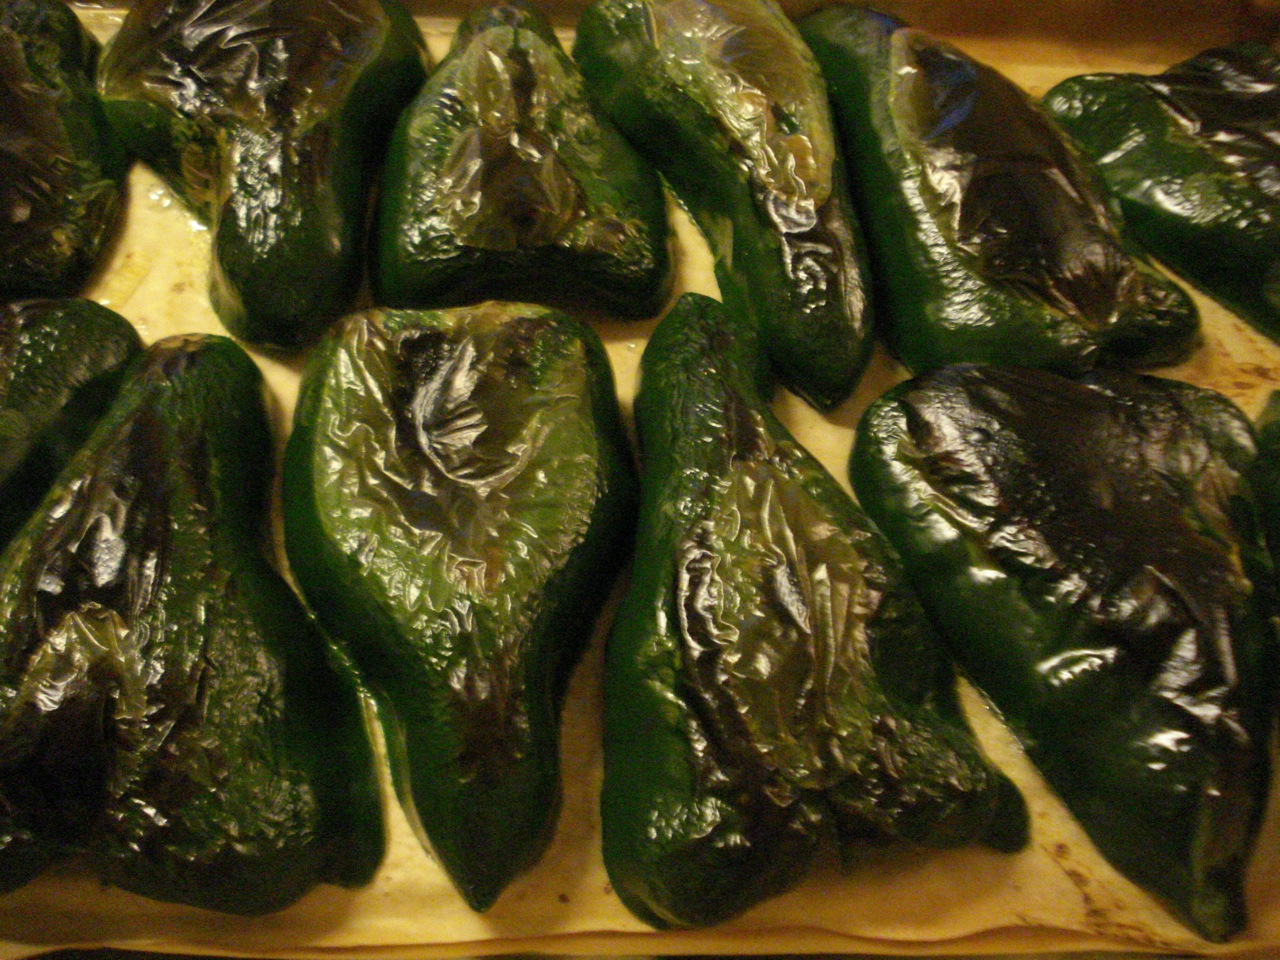
For this demonstration, I’m using poblano peppers for my chiles rellenos casserole, but of course, this method can be used with any type of pepper.
_____________________________________________________________________
1. Preheat your broiler to high.
2. Cut your peppers in half and remove the stems, seeds and pith (white parts).
_____________________________________________________________________
3. Place the pepper halves skin side up on a parchment covered cookie sheet.
_____________________________________________________________________
4. Roast peppers until they’re quite charred — roughly 5 – 10 minutes (be sure the oven rack is close to the top of the oven — directly under the broiler — and check the peppers frequently after the 5 minute mark).
_____________________________________________________________________
5. Remove tray from oven, turn peppers, return tray to oven and roast for about 5 minutes longer.
6. Remove tray from oven and set aside to cool.
_____________________________________________________________________
7. Once peppers are cool enough to handle, simply peel off the skin with your fingers (once cooled, the skin will become baggy and this will be easy to do).
Cilantro Lime Rice

1 cup dry rice
1 & 1/2 cups water
1 TBSP butter
1/2 tsp pure salt
1/4 – 1/2 cup (to taste) chopped cilantro
2 TBSPs fresh lime juice
1 tsp lime zest
- Add rice, water, butter and salt to a small pot, bring to a boil, reduce to a simmer, and cook (according to package directions).
- Mix cilantro, lime juice and lime zest into cooked rice until well combined.
_____________________________________________________________________
SIDE NOTES:
~ If eating dairy free, simply use coconut oil instead of butter.
~ Season with additional salt at the table if needed.
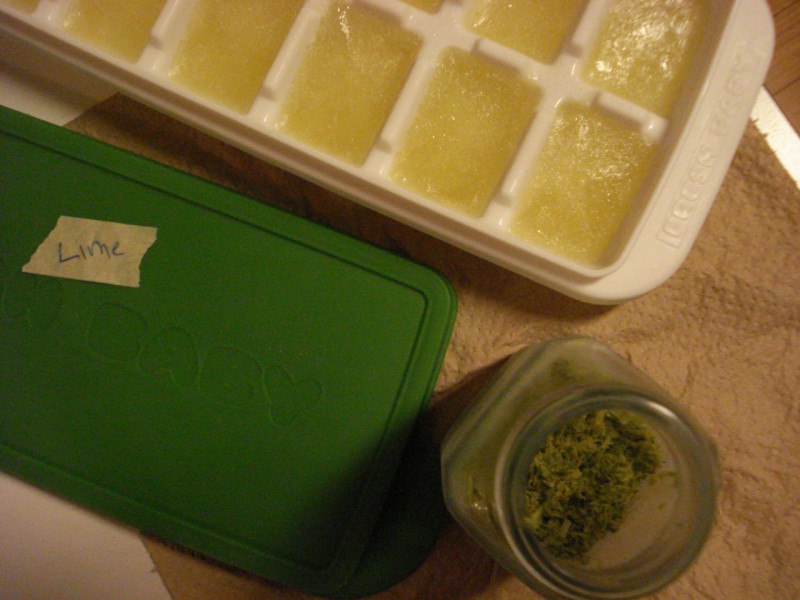
~ This rice is great as a side dish, particularly to anything mexican and/or spicy — and it’s very simple to prepare, especially if you do what I do and keep a few kitchen staples on hand in the freezer: Every now and then, I’ll buy a big bag of organic limes and/or lemons, zest them all — storing the zest in an empty spice jar in the freezer. After zesting, I’ll juice the limes (or lemons) and transfer to my covered ice-cube trays (which hold roughly 1 TBSP per cube). When I need a tablespoon or 2 of lime or lemon juice, I just pop out a few cubes. Likewise, if I need some zest, I just open up the freezer & grab my jar. For more details on these tips and other suggestions for keeping things easier and more organized in the kitchen, see my older post on kitchen tips, tools & gadgets.
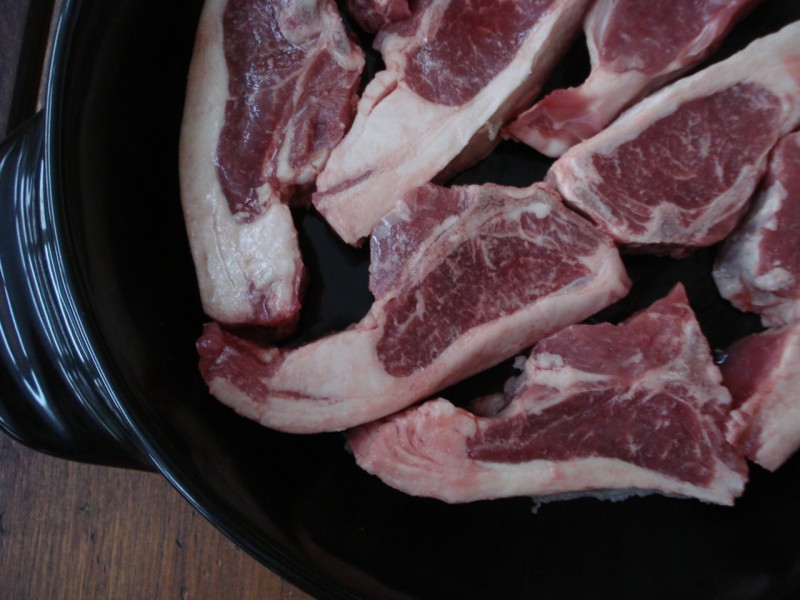
Mustard Rosemary Lamb Chops

2 TBSP coconut oil, melted
2 TBSP Dijon mustard
2 cloves garlic, crushed
4 tsps dried rosemary
1 tsp pure salt
2 tsps black pepper
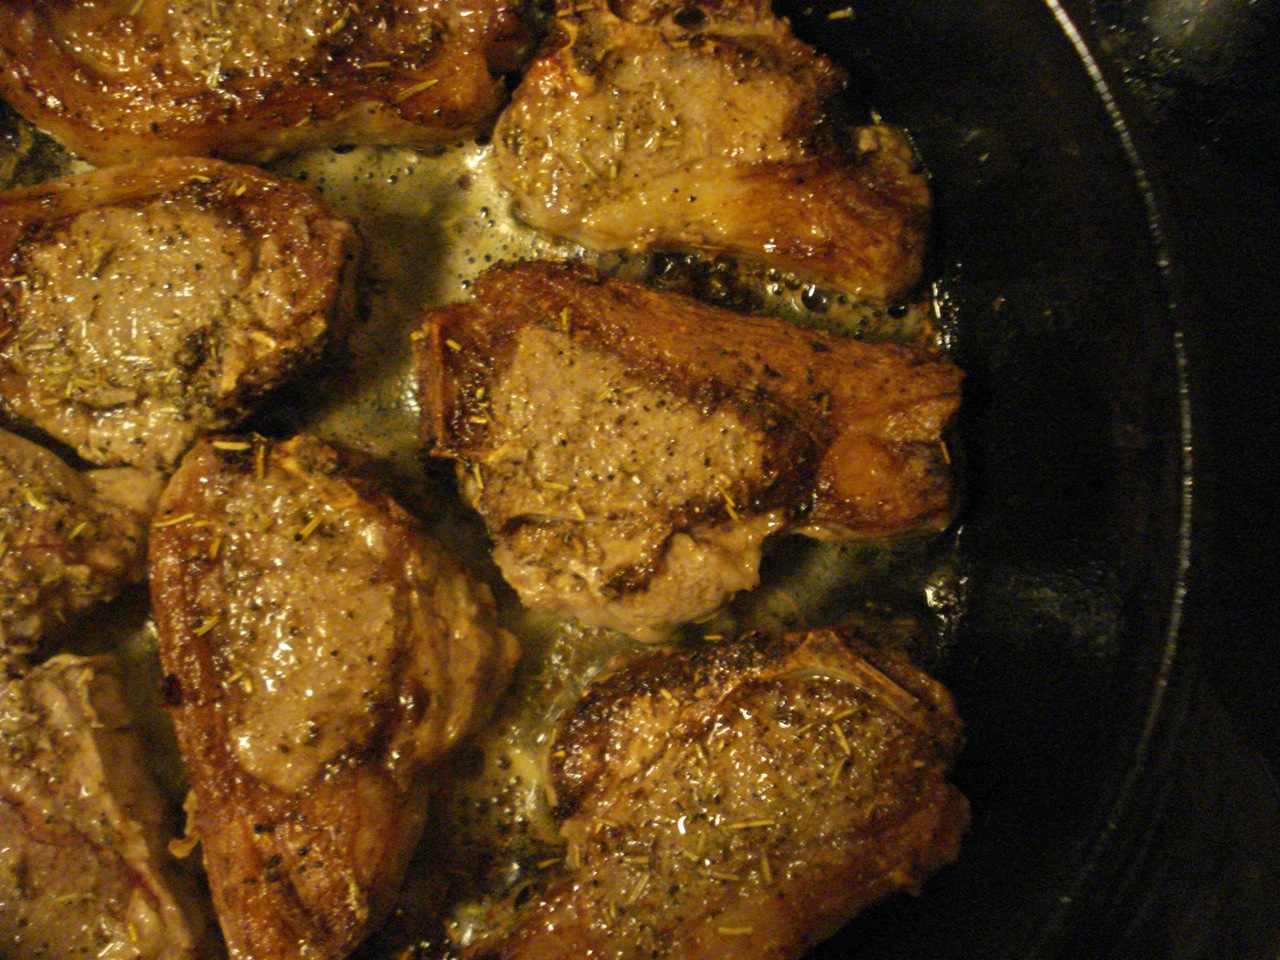
8 lamb loin or rib chops
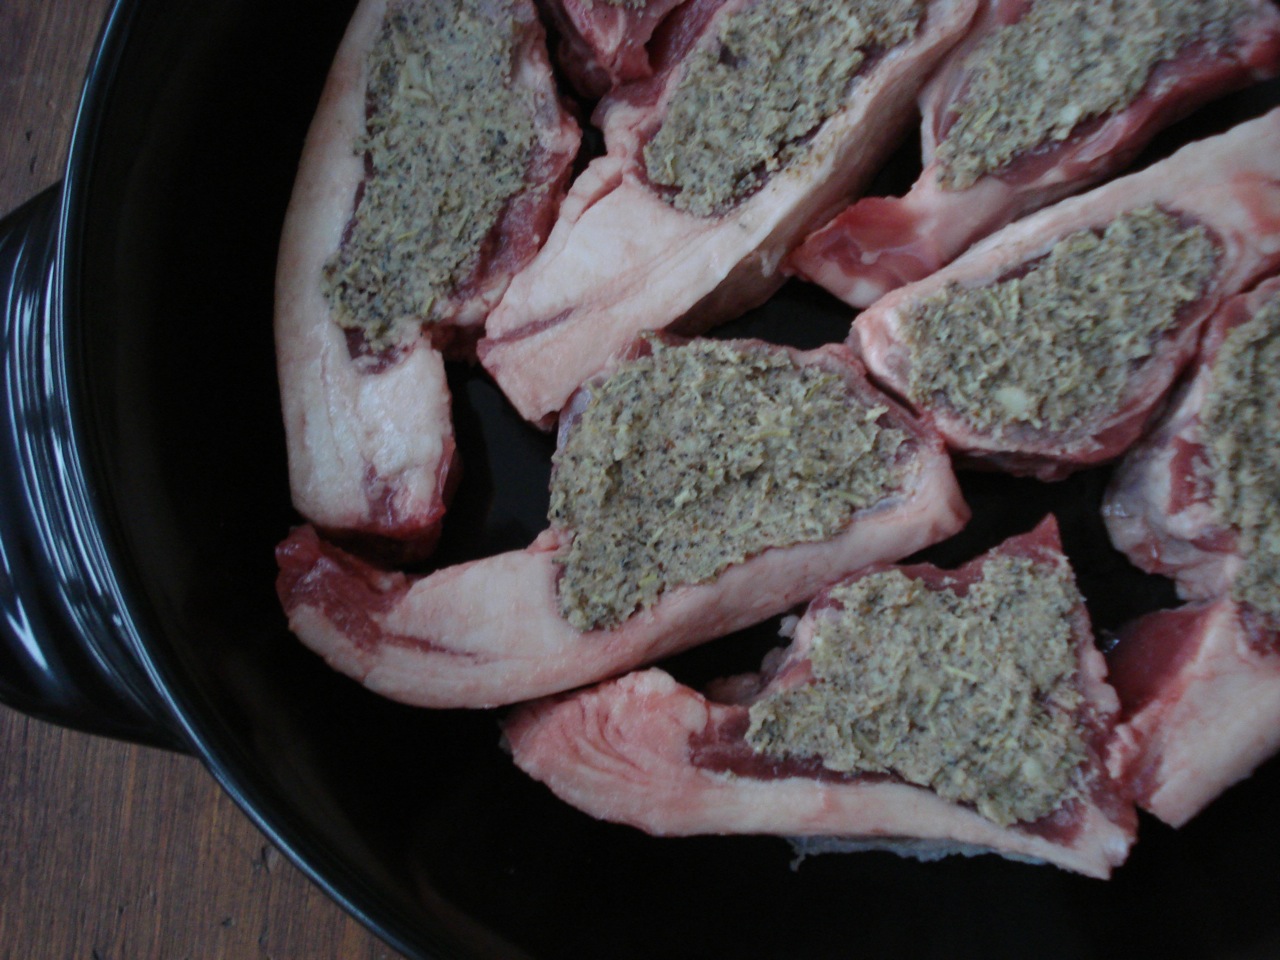
- Blend first six ingredients (AKA mustard-rosemary-garlic-paste) in a small food processor.
- Generously rub paste into chops (both sides) and let sit at room temperature for 1 hour.
- Broil under broiler for 5 mins on each side or pan fry stove top for a similar time period.
_____________________________________________________________________
SIDE NOTES:
~ I tend to do this stove top and after cooking, cover the pan and let sit for an additional five minutes to be sure the chops are cooked through.
~ Mustard, rosemary, garlic paste adapted from The Grassfed Gourmet.
Enjoy!

Mustard Rosemary Garlic Paste
2 TBSP coconut oil, melted
2 TBSP Dijon mustard
4 tsps dried rosemary
2 tsps pure salt
2 tsps black pepper
- Blend in small food processor until thoroughly combined.
_______________________________________________________________________
SIDE NOTES:
~ Adapted from The Grassfed Gourmet. Great on lamb — chops, ribs, or leg.
~ Covers about 8 chops, so scale up or down as needed.
New Offerings / Discounts & Specials
Dear Friends,
For those who have set New Year resolutions relating to better self care, I’m excited to be able to offer my services in new ways moving forward — all of which were inspired by client inquiries / requests for more flexibility. While I’m bursting at the seems with nutrition and wellness information that would benefit all, I consider myself a failure if I’m not within reach of the people who need me. I frequently evaluate and revise my service structure to meet the needs of the community, so please continue to share your ideas and suggestions as to how I may be of service.
Additionally, I encourage you to take advantage of the many discounts-specials currently available (click link or scroll down for details).
To view my availability and instantly schedule an appointment, click HERE.
_____________________________________________________________________
NEW OFFERING: 30 For $30 on Thursdays — $30
For those who prefer an abbreviated session, I am now offering 30 minute consultations on Thursdays at a reduced rate of $30.
How do these sessions differ from traditional consultations? These shorter meetings will be somewhat limited in scope due to the time constraint. The client is responsible for taking notes during the session as there is no post consultation assessment, evaluation, written summary, nor any follow-up email support after or in-between sessions — all of which are included with my traditional consultations. The 30 minutes of our meeting is the total amount of time allotted to the client. My hope is that I will be able to answer questions, provide clarification in regard to confusing nutrition topics, and offer sound advice to those who need guidance but do not wish to have a complete, individualized assessment. These shorter, 30-minute sessions are conducted via phone and Skype only (office visits are reserved for traditional style meetings).
This service is available to all, without the need for a New Client Consultation.
_____________________________________________________________________
NEW OFFERING: Individualized Supplement Assessment — $40
Be informed before purchasing nutritional supplements. Any nutrient or herb can be a stressor to the body if it’s not needed, taken in excess, or of low quality with undesirable additives. Find the exact nutrients and formulas your body is currently in need of, as well as which would cause additional stress to the body. To learn more about Biocommunication, which uses a more sophisticated version of the technology used for lie detector testing — Galvanic Skin Response — click HERE.
This service is available to all, without the need for a New Client Consultation — Office meetings only.
_____________________________________________________________________
NEW OFFERING: Complete Stress Assessment — $90/hr
In addition to the individualized supplement assessment mentioned above, you will also receive a complete body assessment measuring organ, tooth, vertebrae, and meridian stress; a complete food stress assessment; and an emotional needs assessment. Depending on the client, detoxification needs may also be assessed. For more information on Biocommunication stress testing, please click the following link: Biocommunication
This service is only available to individuals who have undergone a New Client Consultation — Office meetings only.
This assessment runs anywhere from 30 to 90 minutes depending on client questions and concerns, but most typically lasts 45 – 60 minutes. In many cases, the session is split into two shorter sessions — one to run the tests, and another after both client and practitioner have had sufficient time to thoroughly review the assessment reports (within 1 – 3 days after the initial meeting).
_____________________________________________________________________
Here are some ways in which to receive the services you’re in need of for less!
1 — View my Free Introductory Webinar and receive a $10 CREDIT
- Sign up to view my FREE, 45-minute, introductory webinar and receive a $10 CREDIT toward a new client consultation! Simply send an email inquiry to diane@realfoodtastesgood.com to view the webinar at a time of your choosing in the comfort of your own home.
2 — Refer a friend and receive a $10 CREDIT
- Each time you refer a friend who undertakes a new client consultation, you’ll receive a $10 credit toward a future consultation or product purchase – your choice!
3 — Reduce your hourly rate by $10 for any and all individualized sessions
- All those who view my seven part webinar series SAVE $10 PER HOUR, forevermore, on individualized consultations!
4 — Reduce your hourly rate by $10 for any and all individualized sessions
- Join my email list at realfoodtastesgood.com to keep informed as to when I’ll be out and about in the local community offering my introductory presentation. All who attend receive a $10 CREDIT toward a new client consultation if they schedule an appointment within 2 weeks of the presentation, but the discount increases to an unlimited savings of $10 PER HOUR — forevermore — if they choose to book directly after the presentation! NEXT PRESENTATION: Tuesday, February 11, 2014 — 6:30 PM — Peter’s Cornucopia — 38 New Hartford Shopping Center — New Hartford, NY 13413
5 — Reduce your hourly rate by 5%, 10%, 15% or 20% by purchasing a package of hours
- Three-hour package = 5% savings
- Six-hour package = 10% savings
- Nine-hour package = 15% savings
- Twelve-hour package = 20% savings
_____________________________________________________________________
As always…. My best to you and yours,
Diane
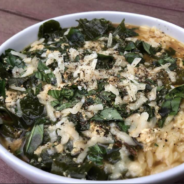
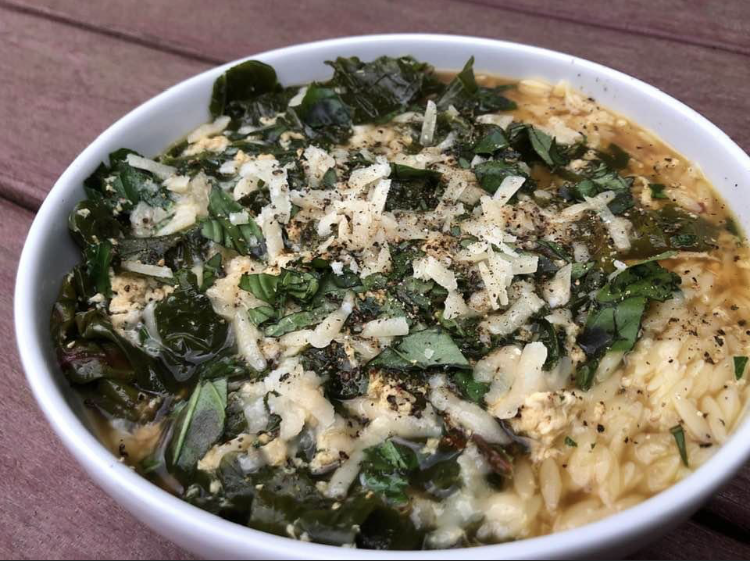
Italian Egg Drop Soup
1 cup (dry) rice, cooked (or 12-16 oz small shaped pasta, cooked)
2 TBSP butter
4 cloves garlic, crushed
8 cups chicken-broth
1/2 tsp crushed red pepper
1/2 tsp pure salt
freshly ground pepper to taste
5 – 6 oz kale, stems removed, roughly chopped, and washed (or spinach)
4 eggs, lightly beaten w/ salt & pepper
Parmesan Reggiano to taste
- Cook rice or pasta according to package directions.
- Melt butter in stock pot and add crushed garlic (saute for about 2 mins).
- Add the broth, crushed red pepper, salt, pepper, greens, and simmer over medium-low heat, covered, until greens are wilted (about 10 mins).
- Bring soup back up to a boil.
- Beat eggs in a separate bowl.
- While soup is at a boil – add the beaten eggs slowly / gradually while stirring with a whisk.
- Add cooked rice (or pasta) to individual bowls and ladle soup over the top.
- Top with freshly grated parmesan cheese.
Serves 4 – 6 depending on portion size.
________________________________________________________________________________
SIDE NOTES:
~ I started making this soup in early September after a conversation I had with friend, Vinnie Amico. We were talking about Italian wedding soup, and he mentioned he also likes making “Italian egg drop soup”. At the time, I had never even heard of it. I don’t know how he makes his, but this is how I have come to make mine. It’s become one of our favorite dinners. Thanks for the great idea Vin =)
~ Be sure the soup is back up to a boil before you add the eggs, or they will simply melt into the soup instead of forming into the “drops” we would expect for “egg drop” soup (this happened to me once – still tasted good, but consistency was off & it didn’t look as good).
~ Some would likely choose a small pasta such as orzo for this type of soup, but we prefer rice.
Enjoy! =)
Below: An older pic / better view of the egg drops! 🙂