1-Minute Ice Cream (w/ demo vid)

For four servings:
4 large bananas, sliced & frozen
1/2 cup milk of choice
- Cut bananas into rounds and place in single layer on a wax (or parchment) paper covered cookie sheet.
- Put cookie sheet in freezer for several hours or overnight.
Vitamix blender method:
- Place frozen bananas in blender, add milk, and blend on high, using the tamper to continually push banana chunks into the blade area.
Within 1 minute, you’ll have creamy ice cream. Blender will be loud as it’s doing it’s thing, but this is normal.
Food processor method:
- Make sure work bowl is fitted with steel S blade.
- Add banana chunks and start processing.
- While the machine is running, slowly drizzle in the milk.
- You’ll need to stop the food processor several times to reposition the banana chunks (they often end up stuck and sitting on top of the blades).
Within 5 to 10 minutes, you should have creamy ice cream.
___________________________________________________________
Make a caribbean version by adding pineapple (frozen or fresh) (or pineapple juice instead of milk), unsweetened shredded coconut (or a few dollops of coconut butter) and/or coconut milk.
Make peanut butter ice cream by adding about 1/4 cup of natural peanut butter (may need to add a little extra milk)
Make strawberry ice cream by adding a handful of fresh or frozen strawberries.
Make chocolate ice cream by adding a handful of high quality chocolate chips/nibs or cocoa powder
Maple pecan ice cream? Peach ice cream? You get the idea – add anything you want. Keep in mind however, whatever you add has to be in addition to the bananas, as the bananas are what makes this ice cream ice cream! The liquid component is essential as well. After that, use your imagination =)
________________________________________________________________________
SIDE NOTES:
~ You will absolutely not believe how creamy and delicious this is. It is jaw dropping considering how easy & healthy it is. Who needs all the corn syrup, liquid sugar, carrageenan, milk fat, partially hydrogenated soybean oil, guar gum….etc. Who even needs an ice cream maker! Once your bananas are frozen, this takes only one measly minute to make in the Vitamix (or a bit longer if using a food processor).
~ If there’s no room for a big cookie tray in your freezer, you can use one of those small trays for the toaster oven, or a large plate. If you run out of room, lay down another piece of wax paper over the top & keep making as many layers as you need.
~ If you’re not using the frozen bananas right away, or want to freeze a whole bunch extra for future use, once frozen, transfer to a freezer bag. Alternately, you can skip the tray part & just dump the banana rounds directly into a ziplock freezer bag if you don’t mind fighting a little (or a lot) to unstick them from each other. They should last a few months in the freezer without getting freezer burn (their color may change, but they should taste fine).
~ Use ripe bananas! If they have any green on them, the ice cream won’t taste good. Even when I’ve used bananas that were all yellow (no green or brown), it didn’t taste quite as good as it had in the past. SPECKLED BANANAS ARE BEST!! Also, they must be thoroughly frozen or the ice cream won’t turn out.
~ If your bananas are small, use less milk. You want to be careful not to use too much liquid or it will end up more like a shake (though worse things could happen in this world). My rule of thumb when pulling banana chunks out of my freezer to make this ice cream – 15 chunks equals 1 large banana. The most I ever make at one time in my large Vitamix container is 4 servings (which would be 60 banana chunks and 1/2 cup of milk).
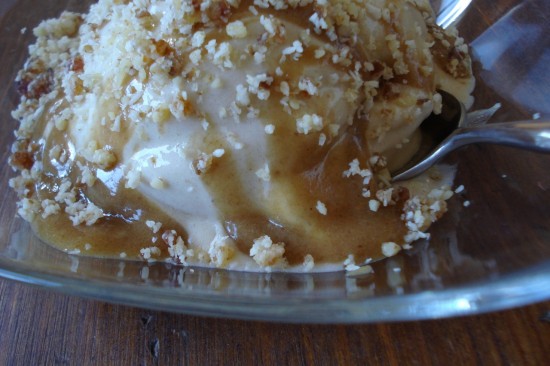
~ This ice cream is best eaten right away, so try not to make more than you’ll want. If you do end up with extra (this is hard to do!), you can freeze it, but let it thaw before you eat. (What you see in the photo is this recipe cut in half – 2 bananas worth. My daughter & I shared it & it was PLENTY.)
~ For the liquid, I’ve used coconut milk, almond milk, raw milk, pineapple juice, and [cold] coffee with great results.
Dairy Free, Gluten Free, Egg Free, Vegan, Nut Free, Sugar Free, Grain Free, Raw
If avoiding milk products, use coconut milk, pineapple juice, or another dairy free option. If eating raw, simply use raw cow milk or other raw, homemade milk (almond, hemp, coconut, etc…).
~ Some topping suggestions…. chopped walnuts, almonds or cashews, shredded coconut, granola, fresh berries, a dollop of natural peanut butter, natural chocolate chips, a sprinkle of nutmeg, cinnamon or ginger, mashed up cookies…! Shown below with CARAMEL-SAUCE and SHORTBREAD-CRUST sprinkled over the top.

~ If you’re considering buying a Vitamix blender, you will not be sorry. This tool is a great investment & this ice cream will be even easier to make. My distributor code is 06-004158. Use it to receive free shipping (& this gives me credit for the referral) (thx!) You do have a 30 day money back guarantee, so it’s easy to test out without obligation. That little cushion is what pushed me over the edge years ago.

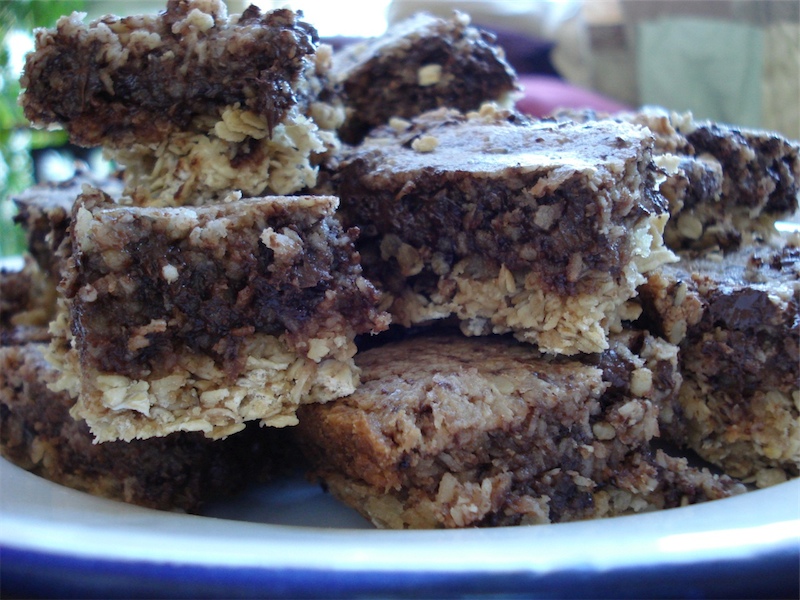
Cocoa Oat Bars

For the Bottom Crust:
4 cups quick cooking rolled oats
1/2 cup maple syrup
pinch of puresalt
1/2 cup hot water
For the Topping:
2 cups chocolate chips (or nibs)
1 cup finely chopped walnuts
1/2 cup maple syrup
2 cups shredded, unsweetened coconut
1 & 1/2 tsps arrowroot, kudzu or cornstarch
- Preheat oven to 350 degrees.
- In a medium bowl, mix the oats, maple syrup, salt & water.
- Using the back of a large spoon, press the mixture firmly & evenly into an oiled 9×13 inch baking dish. Or instead, place parchment paper or plastic wrap on top of the mixture, roll it with a rolling pin, & remove the paper/plastic.
- Bake 8 – 10 mins & set aside.
- While the crust is baking, in the same medium bowl, combine all the topping ingredients.
- Transfer the mixture to a food processor & pulse until sticky.
- Remove dish from oven, place topping over the oat crust & using another sheet of parchment paper, cover the topping and evenly roll out the mixture (or alternately, spread out w/ spoon).
- Remove the paper and bake 20 – 25 mins.
- Let stand to cool & set.
______________________________________________________________________________________
SIDE NOTES:
~ From “The Chicago Diner Cookbook”
~ I find it comes out best if I really press the oat crust firmly into the dish (I use the rolling pin method).
~ There are many different kinds of chocolate chips these days to suit everyones needs. Aside from the regular old choc. chips our parents used, there are now grain sweetened, dairy free, gluten free, carob chips, raw cocao nibs, and more. Here’s a great resource for high quality, organic chocolate suppliers. Personally, I use navitas sweetened nibs.
www.greenpromise.com/chocolatesuppliers
~ If substituting nibs for the chocolate chips, reduce to 1 & 1/2 cups.
Dairy Free, Gluten Free, Egg Free, Nut Free, Sugar Free, Grain Free, Vegan, Raw
If eating gluten free, be sure to use certified gluten free oats and be careful with your choice of chocolate.
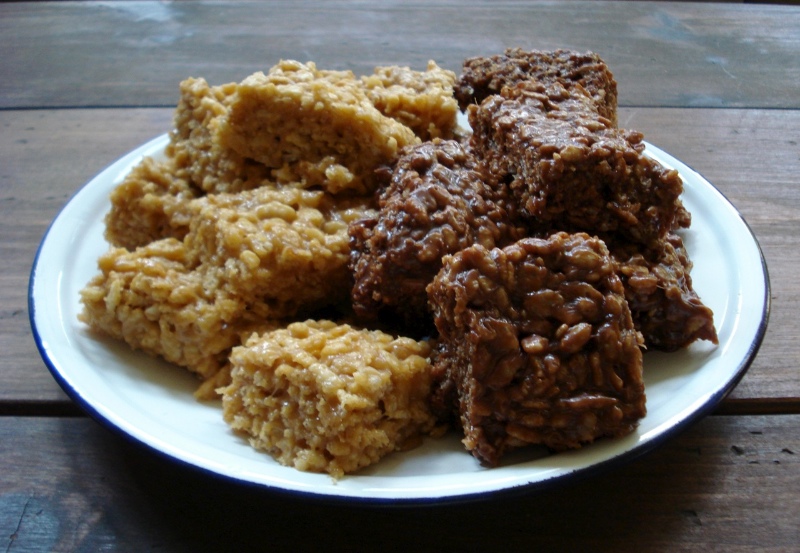
Grown-up Rice Crispy Treats

1 cup brown rice syrup
1/2 cup natural peanut butter (or other nut/seed butter – see notes below)
1/2 cup chocolate chips (optional)
3 cups crispy, brown rice cereal
- In a large saucepan, heat the rice syrup & peanut butter over low heat until creamy.
- Stir in chocolate chips until they melt.
- Remove from heat & stir in cereal until coated.
- Press into a shallow, casserole dish (8×8 pyrex works well).
- Allow to set until firm.
- Cut into squares & serve.
________________________________________________________________________
SIDE NOTES:
~ Adapted from “Cooking the Whole Foods Way”
~ If you’re a chocolate lover, make them as is. If you like peanut butter better than chocolate, omit the chocolate chips & add a few extra dollops of peanut butter. Personally, we like the peanut butter version better.
~ There are many different kinds of chocolate chips these days to suit everyones needs. Aside from the regular old choc. chips our parents used, there are now grain sweetened, dairy free, gluten free, carob chips, raw cocao nibs, and more. Here’s a great resource for high quality, organic chocolate suppliers. Personally, I always use navitas sweetened nibs in place of chocolate chips.
www.greenpromise.com/chocolatesuppliers
Dairy Free, Gluten Free, Egg Free, Nut Free, Sugar Free, Grain Free, Vegan, Raw
Not sure if all brown rice syrups are gluten free, but the one I keep on hand is (Lundberg Organic). If you can’t eat nuts, but are Ok with sunflower seeds, substitute sunbutter for the peanut butter (which would make this a nut-free recipe).
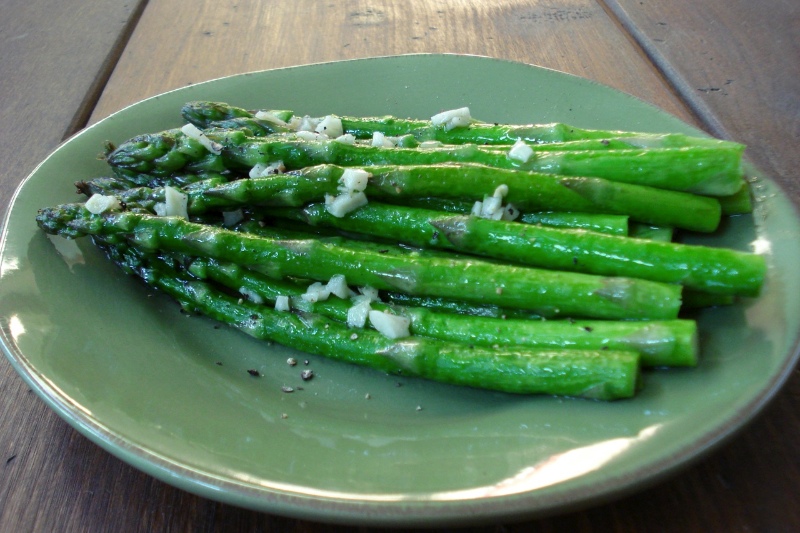
Roasted Asparagus

(dairy free, egg free, gluten free, sugar free)
2 bunches of thick asparagus, tough ends removed
4 TBSP extra virgin olive oil, ghee, or coconut oil
4 garlic cloves, finely chopped
1 tsp sea salt
freshly ground black pepper
lemon wedges for serving (optional)
Preheat oven to 450. Arrange asparagus on a rimmed baking sheet in a single layer (large pyrex works well). Sprinkle with the oil, garlic, salt & pepper & roll them to coat. Roast in the oven until crisp-tender, about 10 minutes. Serve with lemon wedges if using.
SIDE NOTES:
~ Adapted from “Fresh Food Fast.” Pretty standard, easy recipe – but with extraordinary taste.
~ I cut off & discard the lower 1/4 of the asparagus. If you want to get the exact right spot to cut, bend one of them down by the end until it snaps. That’s around where you should cut the others (or you can snap each one individually if this seems fun to you) =)
~ This serves a family of 4 as a side dish w/ a little left over. If you’re cooking for 1 or 2, cut recipe in half.
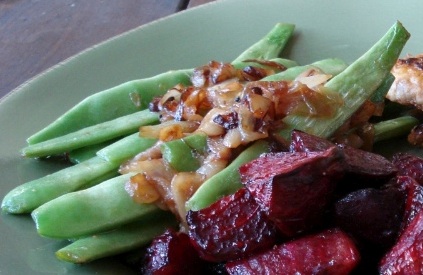
Pole Beans w/ Caramelized Onions

coconut oil, butter, or ghee
1 large onion, sliced thin
4 large garlic cloves cut into chunks
1 pound pole beans, ends trimmed
pure salt & freshly ground pepper to taste
- Caramelize the onions by slowly & gently cooking them in the oil so they become translucent, then brown very slowly (this may take 15 – 20 mins).
- Once the onions look pretty good, add the garlic & saute just a few minutes more.
- Add the beans & continue cooking until tender crisp (5 – 10 mins depending on how you like them).
- Add salt & pepper to taste & serve.
______________________________________________________________________________________
SIDE NOTES:
~ Pole beans are another vegetable introduced to me by my CSA farm. This dish is so savory & crisp-crunchy.
Dairy Free, Gluten Free, Egg Free, Nut Free, Sugar Free, Grain Free, Vegan, RawIf eating dairy free, use coconut oil instead of butter.
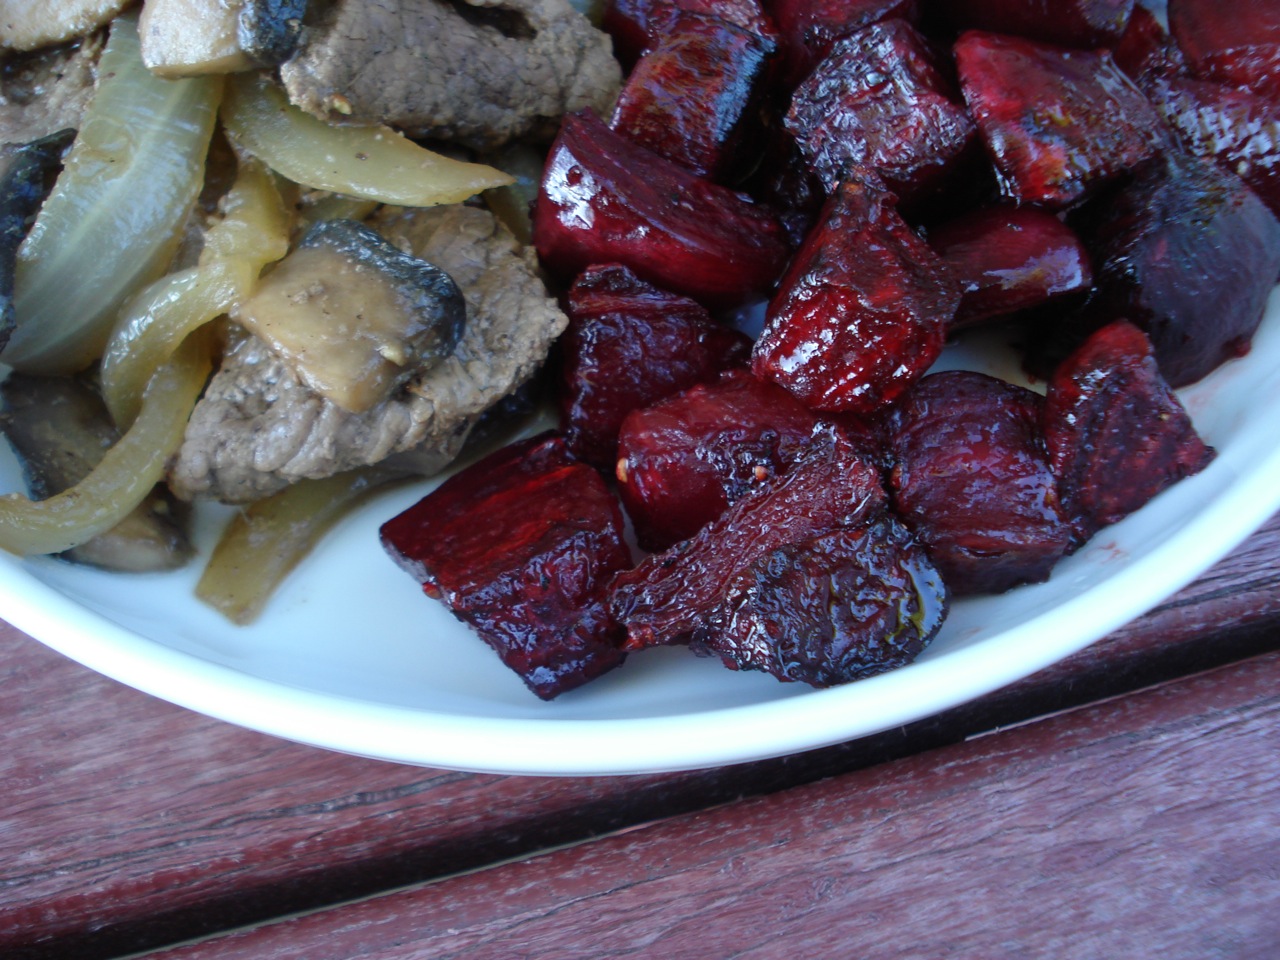
Balsamic Roasted Beets

4 large beets, peeled & cut into chunks
2 TBSP melted butter, ghee, or coconut oil
1/2 tsp pure salt
freshly ground black pepper
balsamic vinegar (optional)
- Preheat oven to 400.
- Wash beets, cut them into chunks & place in large bowl.
- Add oil & toss to combine.
- Add salt & pepper & toss again.
- Spread out on baking sheet (9×13 pyrex works well) & bake for 40 mins (more or less, depending on what looks good to you).
- Drizzle with balsamic vinegar & serve.
______________________________________________________________________________________
SIDE NOTES:
This recipe was passed on to me from my friend Lynn. It’s delicious! (Though only half of us are beet lovers in this house). I sometimes add other spices to this recipe, like rosemary or thyme.
I had never eaten a beet before I joined my local CSA several years ago. Now I look forward to seeing them in my weekly box during harvest season!
Not necessarily table talk, BUT…..If you try beets for the first time, don’t be alarmed if the next day, both liquids & solids coming out the other end have a bright magenta hue, and in fact, if you’d like to check your “bowel transit time” (how long it takes food to travel from mouth to toilet), eating beets is the easiest way to do it.
Dairy Free, Gluten Free, Egg Free, Nut Free, Sugar Free, Grain Free, Vegan, Raw
If eating dairy free use coconut oil instead of butter.
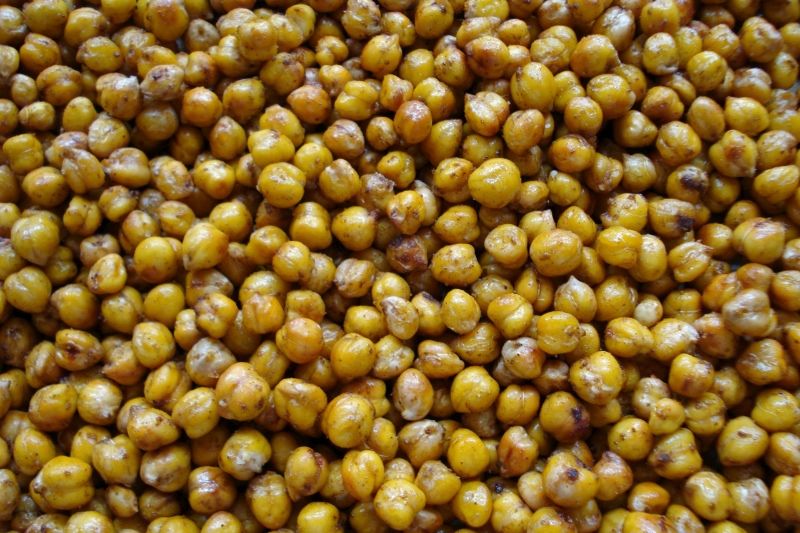
Roasted Moroccan Garbanzos

2 cups DRY garbanzo beans (1 15 oz bag)
6 cups of water (room temp is best)
1 TBSP melted coconut oil or extra virgin olive oil
2 tsps moroccan spice mix
1/2 tsp sea salt
To make the spice mix:
2 tsps ground cumin
1 tsp ground coriander
1/2 tsp each of chili powder, paprika & cinnamon
1/4 tsp ginger
1/8 tsp cayenne
pinch of ground cloves
- Rinse beans in a colander.
- Add the beans to a bowl with the water & soak overnight for approx 12 hours.
- Drain beans and let them sit in the colander for 15 – 30 mins to let out the excess moisture. Preheat oven to 350.
- Transfer chick peas to a large bowl & toss with oil.
- Add spices & salt & toss again.
- Spread on baking pan in a single layer.
- Bake approx 1 hour (checking earlier for desired crunchiness).
______________________________________________________________________________________
SIDE NOTES:
~ You don’t have to make that exact spice mix. You can just add a pinch of whatever spices you feel like. The moroccan spice mix is good on veggies & in soups too, so you can make the full amount & keep the left overs in an extra spice jar. Alternately, you might even be able to buy a pre-made moroccan spice mix if you’d like.
~ Using a glass pyrex dish, these come out crunchier. A parchment covered cookie sheet will make them more chewy. My daughter likes them on the chewy side, so that’s our preferred method. May the force be with you….
Dairy Free, Gluten Free, Egg Free, Nut Free, Sugar Free, Grain Free, Vegan, Raw
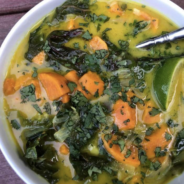
Coconut Sweet Potato Soup w/ Greens
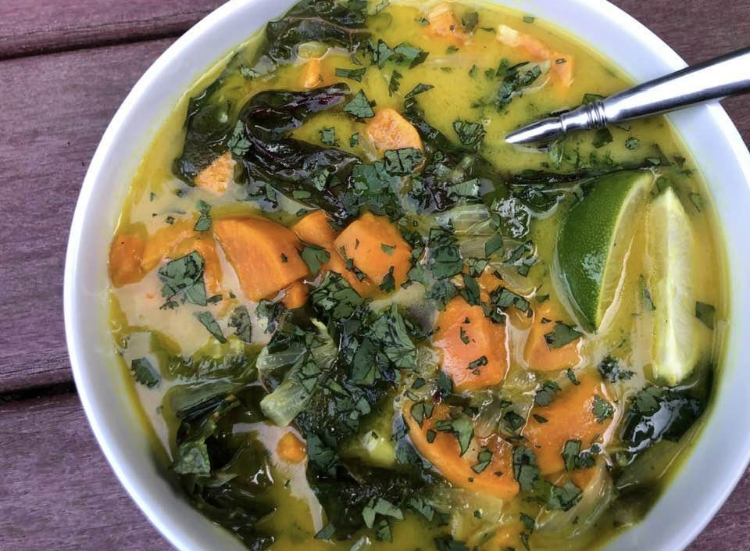
You put de lime in de coconut,, you drink a bowl up……
2 TBSP coconut oil (or oil of preference)
2 cups diced onion (about 2 medium onions)
1 tsp pure salt
4 cups 1-inch sweet potato chunks (about 2 large sweet potatoes, peeled)
4-6 garlic cloves, finely chopped
1 jalapeño pepper with seeds, minced (optional)
1 TBSP minced fresh ginger
1 tsp ground coriander
1/2 tsp turmeric
1 (14 oz) can coconut milk
1 bunch of greens, (chard, kale, or collard), roughly chopped
1 lime, cut into wedges (optional)
1/2 cup chopped cilantro, for garnish (optional)
- In a large saucepan over medium heat, warm the oil.
- Add the onion and a pinch of salt, and sauté until softened, 3 – 4 mins.
- Add the sweet potato, garlic, jalapeno, ginger, coriander & turmeric, & saute for 2 mins.
- Add 2 cups of water, the coconut milk, salt, raise the heat and bring to boil.
- Reduce heat & simmer, covered for 15 mins.
- Add the greens & simmer, uncovered, until tender, about 10 mins.
- Ladle soup into bowls, squeeze lime over all & sprinkle w/ cilantro.
SIDE NOTES:
~ Adapted from “Fresh Food Fast”
~ The greens…..I usually cut out the stem, as they can be tough to chew.
Dairy Free, Gluten Free, Egg Free, Nut Free, Sugar Free, Grain Free, Vegan, Raw
If eating gluten free, be sure to check labels on any canned goods – such as coconut milk).
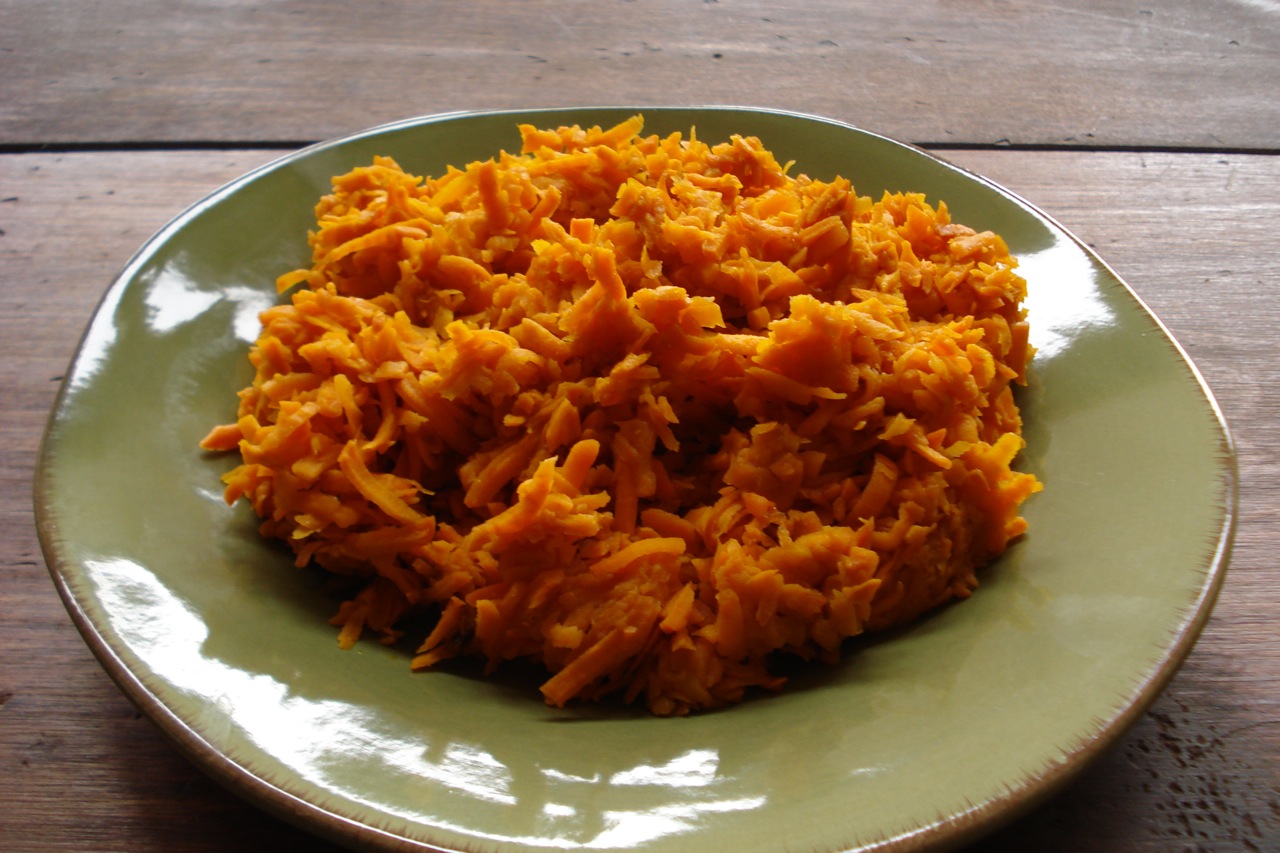
Sweet Potato Homefries

coconut oil, butter or ghee
sweet potatoes, peeled
cinnamon (optional)
- Shred sweet potato and saute in oil for about 10 mins or until cooked to your liking.
________________________________________________________________________
SIDE NOTES:
~ I just love when simplicity is this good 🙂
~ We enjoy this for breakfast along side eggs (instead of toast). It’s great plain (especially cooked in coconut oil), but when I’m in a cinnamon-y mood, I sprinkle some over the top & dig in. Of course, it can be a side dish for lunch or dinner as well. Feel free to fry up some onions and/or peppers along with it.
Dairy Free, Gluten Free, Egg Free, Vegan, Nut Free, Sugar Free, Grain Free Raw
~ If you have a food processor with a shredding blade, it will come in very handy for this recipe. Otherwise, use a cheese grater. I sometimes shred double what I need, and place half of the raw, shredded potato in the freezer for next time. This is good to do especially if you have too many potatoes lying around that will go bad if you don’t use them up. To thaw, I transfer the frozen sweet potato to the refrigerator before bed, and it’s ready to cook in the morning.

Tempeh Fingers w/ Sate Sauce


2 tsps coconut oil
2 cloves garlic, minced
2 tsps curry powder
1 cup unsweetened coconut milk
1/4 cup natural peanut butter
2 TBSP natural sugar (or 6 drops liquid stevia)
1 TBSP tamari/soy sauce
2 packages soy tempeh (16 oz total)
coconut oil for frying
- In a small saucepan, heat 2 tsps oil over medium heat.
- Add the garlic & cook about a minute.
- Add the curry powder & cook, stirring until combined.
- Stir in the coconut milk, peanut butter, sweetener & soy sauce.
- Cook uncovered stirring occasionally, until thickened, about 10 mins.
- Fry tempeh in oil.
______________________________________________________________________________________
SIDE NOTES:
~ Adapted from “1000 Vegetarian Recipes”
~ Although the recipe calls for small, bite sized squares, these days, I like cutting tempeh into strips (or patties). They’re much easier to turn over in the pan this way. And by the way, the best trick to getting tempeh out of its packaging is to cut right down the middle, through the plastic, & gently push out each half from the ends.
~ The recipe calls for deep frying the tempeh. I just coat the bottom of the pan w/ oil & flip. I add more oil for the second side if needed.
~ After cooking the tempeh, I use the same pan to saute some carrots, broccoli & garlic. Throw in whatever veggies you want, keeping in mind that some veggies take longer than others to cook (like carrots), so start them first, then add the softer veggies. I stir fry for only a few minutes, then remove pan from heat & let sit for just a few mins covered (to steam the veggies a bit). Alternately, you can opt for the healthier route & simply steam the veggies from the get-go, skipping the frying altogether.
~ The sauce can also be used for a Thai type salad. It’s great drizzled over lettuce, cukes & shredded carrot.
~ Of course, you can use any peanut sauce recipe for this dish if you already have a favorite you want to stick with.
Dairy Free, Gluten Free, Egg Free, Nut Free, Sugar Free, Grain Free, Vegan, RawIf eating gluten free, use a gluten free tamari, and “soy” tempeh (not “three grain”, “flax”, or “veggie”). You can turn this into a nut-free sauce if need be by using sun butter (you can purchase this or make your own). If avoiding sugar, substitute stevia.