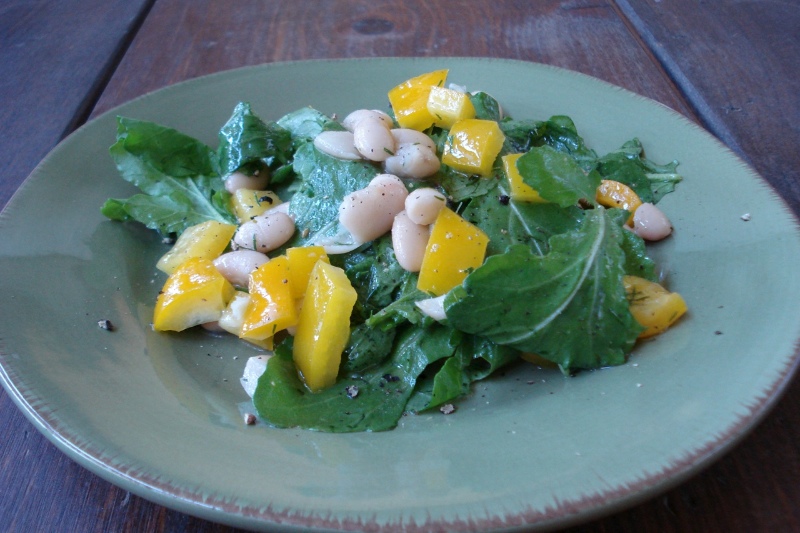
White Bean & Arugula Salad

For the Dressing:
1/3 cup extra-virgin olive oil
3 TBSP lemon juice
1 TBSP minced fresh dill
1 small garlic clove, finely chopped
coarse sea salt & freshly ground pepper to taste
For the Salad:
3 bunches arugula, trimmed & roughly chopped (6 – 7 cups)
1 15 oz can white beans, drained (cannellini or great northern)
1 yellow bell pepper, seeded & diced
shaved parmesan cheese for garnish (optional)
- In a large bowl, whisk together the oil, lemon juice, dill, garlic, salt & pepper.
- Add the arugula, beans & yellow pepper & toss to combine.
- Garnish w/ cheese if using.
______________________________________________________________________________________
SIDE NOTES:
~ From “Fresh Food Fast”
~ Very easy to throw together & delicious. I get sick of the same old salad all the time. I cut the recipe in half & devoured the whole thing myself for lunch.
~ Arugula is a peppery type of lettuce, it’s got a kick to it. I don’t bother chopping it up, I just remove the stems.
~ Over the past year, I’ve gotten used to using dried beans & soaking/cooking myself. However, I don’t stick to it religiously, as I often want to just throw something together on the fly. If using canned, I recommend a high quality product such as Eden.
Dairy Free, Gluten Free, Egg Free, Nut Free, Sugar Free, Grain Free, Vegan, RawIf you’re eating dairy free, omit the cheese.
Stove-top Popcorn


1/3 cup organic popcorn kernels
2 TBSP extra virgin olive oil, ghee, or coconut oil
sea salt to taste
- Over medium heat, add the oil & only 3 or 4 kernels to a medium sized pot & cover (my 3 & 3/4 quart is just the right size for this amount of popcorn).
- Stay close by.
- When you hear those few kernels pop, it’s time to add the rest of the kernels.
- Keeping the pot covered, shake it back & forth often.
- Once the popping slows down (after about 4 or 5 mins), turn off the heat.
- Once it’s fully done popping (maybe 30 seconds later), remove from heat & add salt.
This is one, super big – pig out – adult serving!
______________________________________________________________________________________
SIDE NOTES:
~ I know…. not much of a recipe, but I thought I’d post it in case anyone is interested in making home-made popcorn but isn’t quite sure of the best method. For us, this is it! It’s been accompanying our weekly family movie night for a long time. You can do a larger batch using 1 cup of popcorn and 1/3 cup of oil – of course using a larger pot (8 or 9 quart pot will work).
~ There’s no need to add any butter over the top since the oil used for popping gives a rich flavor & enables the salt to stick to the popcorn. Of course, if you simply love greasy popcorn, and some people do, melt your butter & enjoy! (but DO use real butter)
~ Using coconut oil gives the popcorn a slightly sweet taste. Using ghee (clarified butter) gives it an ultra buttery flavor – like movie theater popcorn (without the undesirables). Olive oil is my personal favorite.
~ We think homemade popcorn is so much tastier (& of course healthier) than the microwave kind.
~ In our experience, Eden Organic popcorn kernels seem to pop the best. We used to use the bulk organic kernels. When we tried Eden, we found that practically every kernel popped (as opposed to having a large amount of unpopped kernels at the bottom of the pot). We also find that trying to do a giant batch leaves more unpopped kernels than smaller batches.
~ Corn is a very GMOed & heavily sprayed crop, so organic is best.
Dairy Free, Gluten Free, Egg Free, Nut Free, Sugar Free, Grain Free, Vegan, Raw
If eating dairy free, use olive oil or coconut oil instead of ghee/butter.
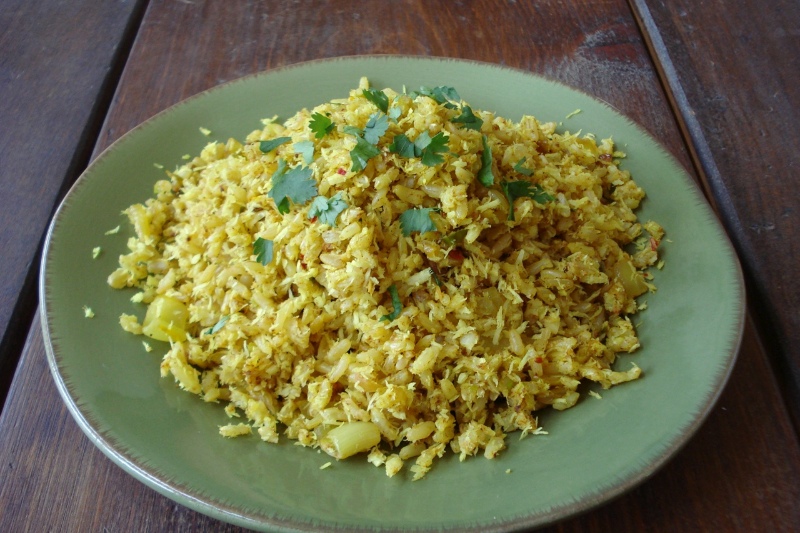
Indonesian Coconut Rice

2 TBSP coconut oil, butter or ghee
1 onion, minced
3 garlic cloves, minced
4 scallions minced
1 TBSP grated fresh ginger
1 tsp ground turmeric
1 tsp ground cinnamon
1/2 (or 1/4) tsp crushed red pepper flakes
1 tsp dry mustard
1/4 tsp ground cloves
1 TBSP natural sugar (or 6 drops liquid stevia)
4 cups cooked long-grain brown rice
1 cup shredded coconut (unsweetened)
pure salt & freshly ground pepper to taste
- Cook the rice according to package directions.
- Heat the oil in a large skillet over medium heat, add the onion & garlic & cook until softened, about 5 mins.
- Add the scallions, ginger, turmeric, cinnamon, red pepper flakes, mustard, cloves, sweetener, & cook, stirring constantly for 2 mins.
- Add the rice & stir to mix evenly.
- Gently stir in the coconut.
- Season to taste with salt & pepper & heat until hot (if you’re using rice you just cooked, it will already be hot).
- Cover & set aside for 5 mins before serving.
______________________________________________________________________________________
SIDE NOTES:
~ Adapted from “Vegan Fire & Spice”
~ This is really easy to make, just be sure to start your rice about an hour before you want to eat. If you have a food processor with a chopping blade, you can throw in the onion, garlic & scallions if you don’t feel like chopping by hand.
~ It might seem silly to measure out the rice after it’s cooked to ensure adding just the right amount, but keep in mind that if you add too much rice, all the other flavors will become diluted. I sometimes dump instead of measuring, but it’s just something to keep in mind if it seems you’ve made a lot more than you need.
~ I used 1/4 tsp red pepper flakes & added some cilantro over the top.
Dairy Free, Gluten Free, Egg Free, Nut Free, Sugar Free, Grain Free, Vegan, RawIf eating sugar free, use stevia or lakanto instead of sugar.
~ The kids didn’t like this the first night I made it. It was strange though that the very next day, when Al & I were eating the leftovers, they tasted it again, loved it & both devoured giant bowls of it. I know different flavor combinations sometimes take time to get used to, but it was weird for them to go from one extreme to the next in less than 24 hours.
Spaghetti w/ Olives & Artichoke


12 oz whole grain spaghetti
1/2 cup extra virgin olive oil
2 garlic cloves finely chopped
2 TBSP capers, rinsed & drained
12 kalamata olives, pitted & chopped
1 & 1/2 TBSP lemon juice
1/2 cup chopped parsley
artichoke hearts (plain – not marinated)
freshly ground black pepper
- Prep parsley, garlic & olives.
- Cook pasta in salted water until al dente.
- In the mean time, gently heat the oil in a small saucepan.
- Add the garlic & cook for 1 min.
- Add the capers, olives & lemon juice, cook 1 minute longer & set aside.
- When the pasta is cooked, drain & return it to the same, warm pot.
- Add the olive oil mixture, parsley, black pepper & toss well to coat.
______________________________________________________________________________________
SIDE NOTES:
~ Adapted from “Easy Vegetarian”
~ If you have one, use your small food processor to chop the garlic. Once you add the garlic to the oil, then you can use the processor to chop the parsley.
~ You can get kalamatas pitted, but be careful not to break a tooth, as every so often one slips through the cracks w/ pit intact. For this recipe, you’re chopping them by hand which is a good way to check for pits anyway. Our favorite brand of olives is “Mediterranean Organics.” Another good one, especially if you’re avoiding yeast is “Delallo” organic jumbo kalamatas in brine.
~ Artichoke hearts are my addition & go extremely well with this dish. Cut into quarters & toss ’em in.
~ Double the recipe to feed a family of 4 generously. Tinkyada brown rice spaghetti comes in 12 oz bags so its easy. We find the pasta needs a little rinsing for this one, but rice pasta is starchier than wheat so do what works for you depending on what kind you use.
Dairy Free, Gluten Free, Egg Free, Nut Free, Sugar Free, Grain Free, Vegan, RawIf eating gluten and/or sugar free, use an appropriate pasta (brown rice pasta is our personal preference), and double check labels of any packaged products such as olives, capers, and artichoke hearts.
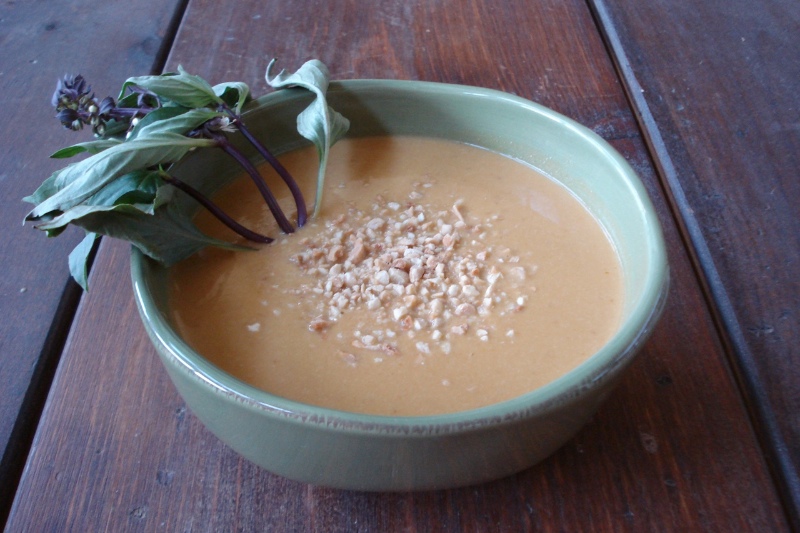
Spicy Pumpkin Soup

1 TBSP coconut oil
1 small onion, chopped
1 TBSP chopped fresh ginger
(up to) 3 hot dried Thai chiles – split lengthwise, or 1/2 tsp crushed red pepper flakes
2 tsp minced fresh lemongrass – white part only, or zest of 1 lemon
3 cups veggie or chicken broth
3 TBSP tamari/soy sauce
1 (16 oz) can pumpkin puree
1 (14 oz) can unsweetened coconut milk
1/3 cup creamy, natural, peanut butter
1 TBSP maple sugar, (or sugar of choice**)
1/2 tsp pure salt
2 TBSP lime juice
1/4 cup chopped fresh Thai basil or cilantro
2 TBSP crushed roasted peanuts
- Heat the oil in saucepan over medium heat.
- Add the onion, ginger, & chiles & cook until softened, about 3 mins.
- Stir in the lemongrass, broth & soy sauce & bring to a boil
- Reduce heat & simmer for 10 mins.
- Strain the broth into another pot, discard the solids & place the pot on the stove over low heat.
- Whisk in the pumpkin, coconut milk, peanut butter, sugar & salt.
- Cook stirring, until smooth & hot, about 10 mins. Do not boil.
- Stir in the lime juice, taste, & adjust the seasonings if need be.
- Serve hot, garnished with basil (or cilantro) & peanuts.
______________________________________________________________________________________
SIDE NOTES:
~ From “Vegan Fire & Spice”
~ Yields 4 bowls. You might be sorry if you don’t double the recipe. (We were the first time we made it!)
~ If you’re not sure how many dried chilies to use, start with 1/2 of one the first time you make it, then keep increasing each time to find the level of heat you like best. Luckily for us, we’ve got a great, local Asian market, so can get dried Thai chiles, lemongrass & Thai basil. If you can’t, the substitutions should work just fine. (FYI – Lemongrass can be purchased in its natural state – a long, thin, green stalk, or pre-minced in a container in the refrigerator or freezer section. Thai basil has pretty purple stems, green leaves & sometimes little white flowers. Also, dried Thai chiles come in 2 sizes – use the small size, which are only about 2 inches long & skinny. You should be able to buy them in a bulk bag & keep them on hand in the pantry.)
~ The author states that the flavor of the soup improves when reheated several hours after it’s made. We wouldn’t know, as it disappears very soon after it’s made!
Dairy Free, Gluten Free, Egg Free, Nut Free, Sugar Free, Grain Free, Vegan, Raw
If eating gluten free, be sure to choose a gluten free tamari. If avoiding sugar, substitute about 6 drops of liquid stevia. If avoiding nuts, you can try using sunbutter in place of the peanut butter and omit the peanuts (or substitute sunflower seeds).
Creamy Red Lentil Soup


2 TBSP coconut oil
1 large onion, chopped (about 2 cups)
3 medium carrots, chopped
4 cups water
14 ounces coconut milk
1 cup red lentils
3 cloves garlic, chopped
1 bay leaf
2 tsps pure salt
1/4 tsp ground ginger
1 TBSP curry powder
1/2 cup chopped cilantro
- Heat coconut oil in a large saucepan over medium heat.
- Add onions and carrots & cook, stirring frequently, until vegetables start to brown, about 10 mins.
- Add water, coconut milk, lentils, garlic, bay leaf, salt, ginger & curry powder.
- Cover & bring to a boil.
- Reduce heat, & simmer, partially covered for 35 to 40 mins or until lentils are tender, stirring occasionally.
- Remove bay leaf & discard.
- Add cilantro.
Optional:
- Puree with a stick blender** (or puree in batches in a regular blender).
SIDE NOTES:
~ Very easy & tasty soup from “Coconut Lover’s Cookbook”
** We’ve found that we like the soup even better if we don’t puree it. (The only one I puree it for is my daughter who doesn’t like the feel of onions in her mouth.)
Dairy Free, Gluten Free, Egg Free, Nut Free, Sugar Free, Grain Free, Vegan, Raw
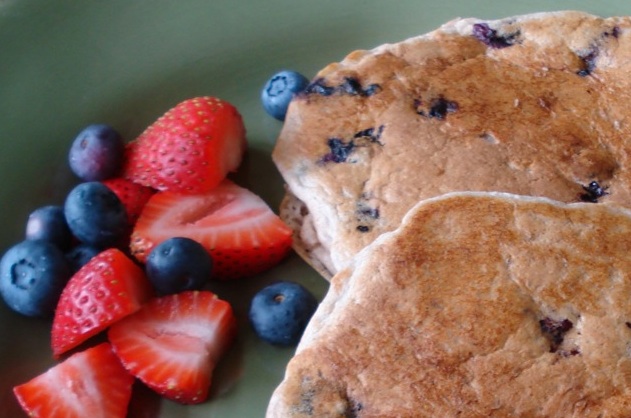
Blueberry Oat Pancakes

2 cups oat flour or ground oats (see notes)
2 TBSPs aluminum-free baking powder
1/4 tsp pure salt
1/4 tsp ground cardamom
1/2 tsp cinnamon
2 cups milk of choice
2 TBSPs melted butter, ghee, or coconut oil
about 3/4 cup fresh or frozen blueberries
- In a large bowl, add the dry ingredients & whisk to combine well.
- Mix in the milk, then the melted butter (or oil), then the blueberries.
- If the mixture is a little loose at first, you can let it sit for a few mins to thicken. If the batter gets too thick at any point, you can add a splash more milk.
- Cook pancakes on either a lightly oiled, or dry skillet – depending on what type of cookware you use.
Makes about 16 pancakes.
________________________________________________________________________
SIDE NOTES:
~ Adapted from “Vive le Vegan”. The original recipe calls for apples instead of berries. They’re both tasty. Just depends on what you’re in the mood for. When making the apple version, I use 1 small apple (or half large), & after thinly slicing, I cut them into pieces roughly the same size banana rounds would be.
~ When I end up with a few extra pancakes, I freeze them (by wrapping in parchment paper & placing in freezer bag). Keep them wrapped in the parchment paper (so they don’t dry out) when heating them up in the oven. Comes in very handy on those hectic mornings when I just can’t deal with anything more than opening up the oven door. For sure, the kids never complain when I pull out left over pancakes on a school day morning =)
~ To make ground oats, simply put quick oats into the food processor and process for a minute or so. The consistency will be similar to a coarse flour. You need to use slightly more than 2 cups of quick oats to make 2 cups of ground oats (measure after it’s ground). If you have a Vitamix, you can greatly improve the nutritional value of these pancakes by using whole oat groats. Simply add 1 & 1/2 cups of groats to the dry carafe container & process for 1 minute (should yield approx 2 cups flour). You can’t get fresher, whole grain flour than that! If you’re in the market for a vitamix, feel free to use my distributor code for free shipping (& I get credit for the referral – Thx!) – 06-004158. Alternately, you can simply purchase oat flour.
~ Ground cardamom is a spice (should be able to find in the spice aisle of your regular grocery store)
~ Our favorite topping for these pancakes are sliced bananas, but If you use syrup, Grade B pure maple syrup is the best. It will have nutrients that have been cooked out of Grade A. Alternately, if you’re a big coconut fan, try topping with Artisana’s Coconut Butter. It’s expensive, but absolutely to die for (if you like coconut), and it’s a raw, whole food as opposed to a condensed sweetener.
Dairy Free, Gluten Free, Nut Free, Sugar Free, Egg Free, Vegan Raw, Grain Free
If eating gluten free, be sure to use certified, gluten free oats. If eating dairy free, use coconut milk or other non-dairy option and coconut oil instead of butter. If avoiding sugar, top with sliced banana or coconut butter instead of syrup.

One Minute Applesauce
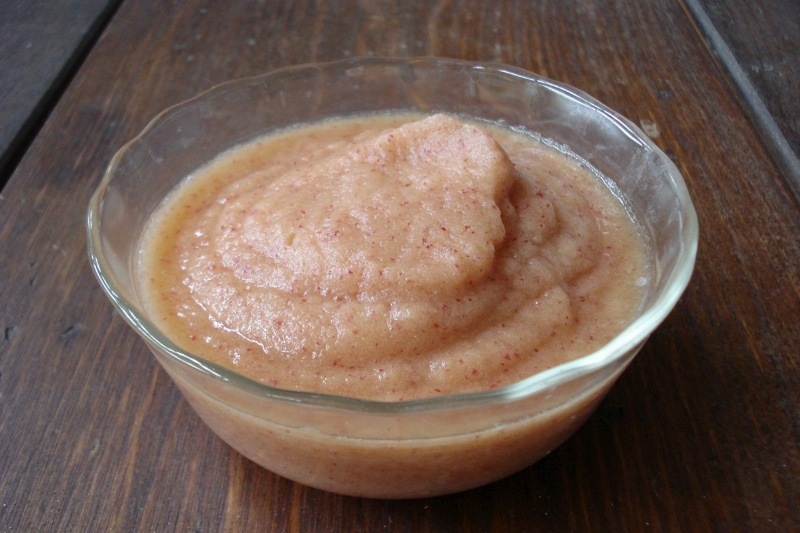

4 apples, peeled & roughly chopped
pinch of cinnamon (optional)
- Chop apples (removing seeds & core).
- Place in food processor w/ cinnamon & blend until smooth.
- If using a Vitamix, no need to peel the apples. (see demonstration video below)
Serves 4.
________________________________________________________________________
SIDE NOTES:
~ Ridiculously quick, easy & amazingly tasty. My kids go NUTS for this. I make it several times a week as part of our breakfast.
~ Use crisp, firm apples, not the softer, mealier types. Our favorite apples to use are BRAEBURN, PINK LADY, GALA, JONAGOLD or FUJI. We think the consistency is a bit too watery if you use red delicious, sunrise, or other soft varieties.
~ The cinnamon, in addition to adding great flavor, helps to kick start your digestion for the day.
~ As mentioned, if using a Vitamix, no need to peel the apples – it pulverizes skin & all. Just use the tamper to push the apples into the blade area. Takes no more than a minute. If using a food processor, you’ll need to peel & it won’t be quite as quick, but you’ll get the same end result. If you’re in the market for a vitamix, feel free to use my distributor code to get free shipping 06-004158 which entitles you to free shipping and I get credit for the referral – Thx 🙂
~ We find it’s plenty sweet enough as is, but if you’d like it sweeter, try adding a little bit of medjool date. This is what I started doing when I first started making this type of applesauce. I soon found out that depending on the particular apples I was using, it often ended up too sweet. I kept decreasing the amount of date I used until I wasn’t using any. Then it seemed perfect & I wondered why I assumed I would need to add a sweetener to something that was already inherently sweet. Probably a misconception buried deep in my brain due to the way old fashioned, cooked apple sauce is made – w/ lots of sugar!
~ The nice thing about raw applesauce, (besides the amazing taste), is that you need less apples! If you cook it, the apples melt down to nothing & you end up needing many apples for just one small serving. With this method, one large apple is perfect for one serving (yields somewhere between 3/4 to 1 cup of applesauce). If your apples are small, plan on using 2 per person.
~ If you intend to make this often, get yourself one of those apple slicers (that round thing with handles that cores & yields 8 slices with one push). I got a cheap one first (4 or 5 bucks) but it didn’t work so well. I recommend a better one like oxo brand ($10) which slices with more ease & is comfortable for my hands. I still need to cut each slice in half or thirds as I put into my blender, but oxo still saves me time.
Dairy Free, Gluten Free, Egg Free, Nut Free, Sugar Free, Grain Free, Vegan, Raw
If you’re concerned with keeping your food raw, be sure to use cold apples from the fridge and don’t over blend (the blades of the Vitamix will eventually heat up the applesauce if you let it run too long).
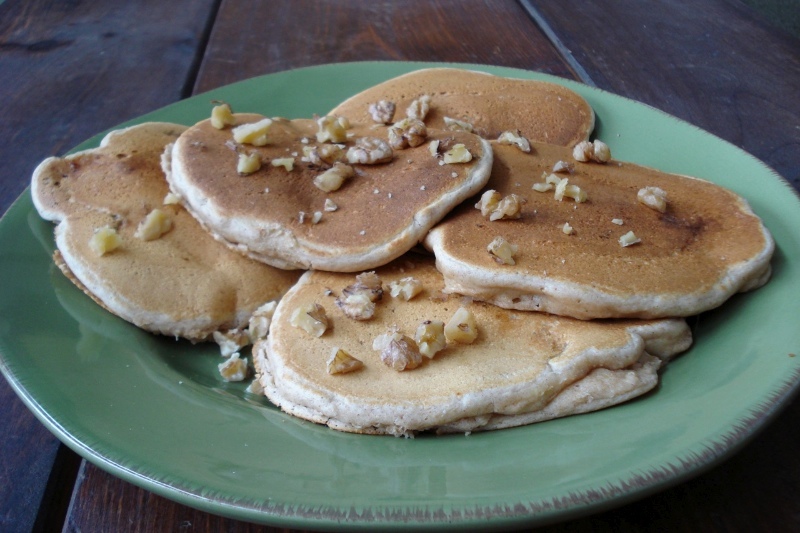
Banana Bliss Pancakes

1 cup whole-wheat pastry flour
1 TBSP aluminum-free baking powder
1/4 tsp cinnamon
1/8 tsp nutmeg
1/8 tsp pure salt
1 cup + 1 TBSP milk of choice
1 TBSP melted butter, ghee, or coconut oil
1 medium-large ripe banana, sliced into rounds
chopped walnuts (optional)
- In a large bowl, add the dry ingredients and whisk to combine well.
- In a small bowl, combine the milk and melted butter (or oil), & stir through.
- Add the wet mixture to the dry & stir just until well combined, adding the banana slices as it comes together.
- Cook pancakes on either a lightly oiled, or dry skillet – depending on what type of pan you use.
________________________________________________________________________
SIDE NOTES:
~ Adapted from “Vive le Vegan”
~ Make sure your banana is ripe enough (speckled).
~ If you can get Grade B pure maple syrup, this will have nutrients that have been cooked out of the Grade A. Better still – As an alternative to maple syrup, try topping with Artisana’s Coconut Butter. It’s expensive, but absolutely to die for (if you like coconut of course), and it’s a raw, whole food as opposed to a condensed sweetener. Of course, a topping of sliced fruit, or pureed fruit works well too.
~ Double this recipe to serve a family of 4.
Dairy Free, Nut Free, Egg Free, Sugar Free, Vegan Gluten Free, Grain Free, Raw
If eating dairy free, use coconut milk or other non-dairy option and coconut oil instead of butter. Omit the walnuts if avoiding nuts (can substitute berries). If eating sugar free, make sure you’re using “unsweetened” milk (vanilla flavored milks contain sugar), and top with berries or sliced banana instead of syrup.
Almond Milk Smoothie
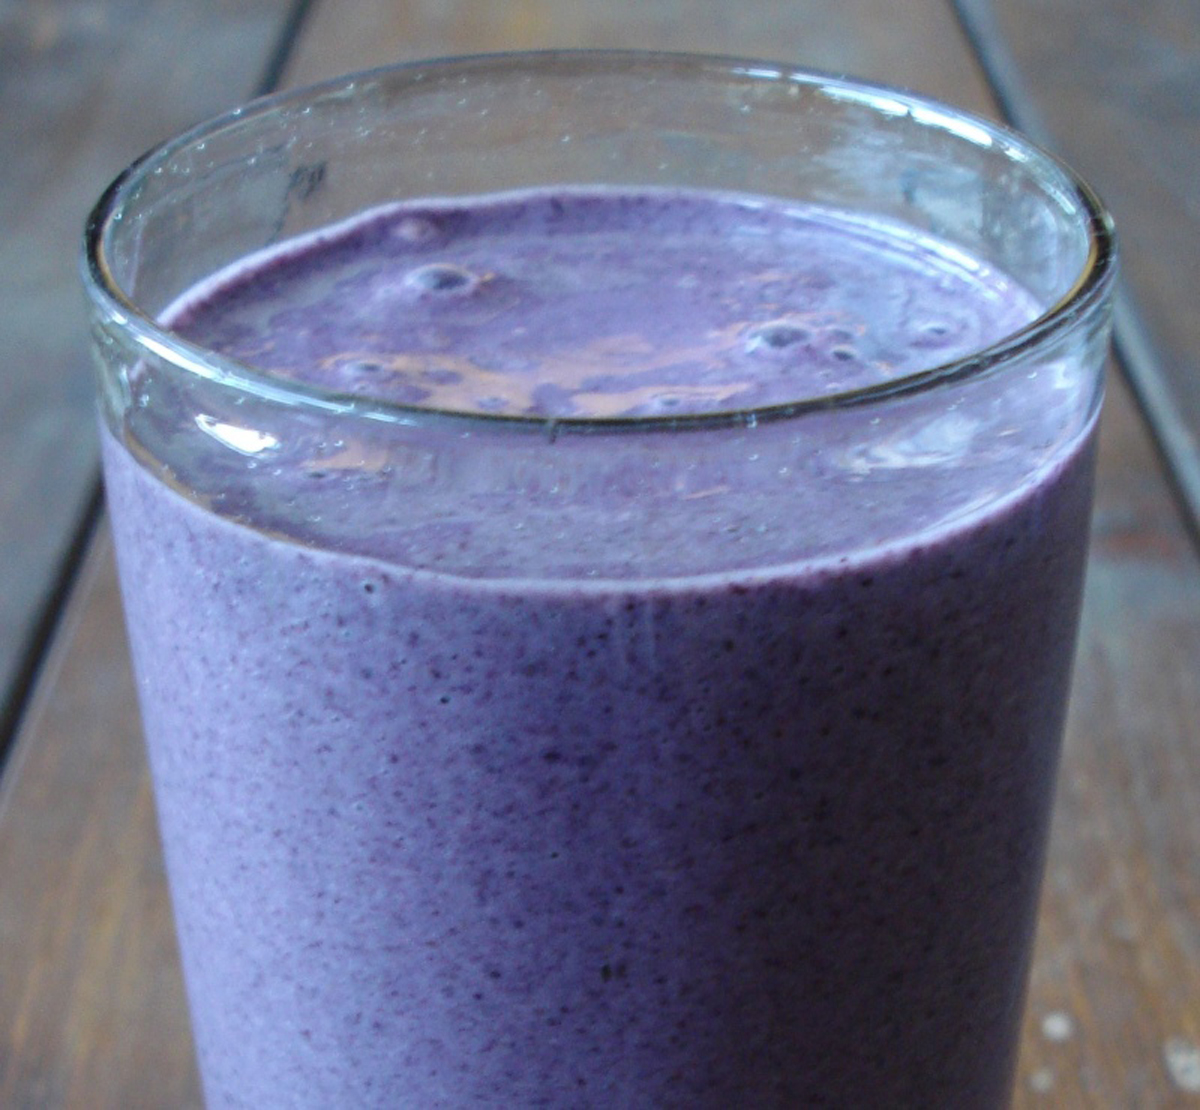

To make a smoothie, you can really toss in whatever sounds good to you in whatever amounts you want, but here’s one version we like in case you’d like a starting point:
10 oz almond milk
1 banana
1 heaping cup of another fruit
1 TBSP seed mixture, ground (see notes)
- Blend in blender.
Yields approx 20 oz – 1 adult serving.
________________________________________________________________________
SIDE NOTES:
~ If you’d like to make your own almond milk, click HERE for recipe.
~ For the “other” fruit, I alternate between blueberries, strawberries, raspberries, peaches and pineapple. Toss in any fruit you’re in the mood for!
~ SEED MIXTURE……Get a large mason type jar & fill it up halfway with flax seeds. Then fill it up the rest of the way with equal parts of sesame, sunflower & pumpkin seeds. Mix it up. The average blender will not be able to grind up the smaller seeds, so you’ll need to buy a coffee grinder (designated solely to seeds). Each morning, only grind up the amount needed for your smoothie. The problem with grinding a whole bunch of it in advance is that once ground, it will go rancid quickly. Cuisinart sells a coffee grinder with removable parts that are dishwasher safe. Alternately, if you’re making this smoothie in a Vitamix, no need to grind up the seeds before adding. Just dump them in with everything else & the vitamix will grind them to perfection. If you’re in the market for a vitamix, feel free to use my distributor code to receive free shipping 06-004158 (and I receive credit for the referral – Thx!).

~ I use frozen organic fruits (berries/peaches/pineapple…). However, I don’t like my smoothie ice cold, so as soon as I wake up, I put the amount of fruit I’ll be using in a bowl & let it sit out @ room temp for 30 – 60 mins. Alternately, you can put your portion of frozen fruit in a container in the fridge the night before, this way, if you need to eat as soon as you get up, it’s defrosted & ready for use. Of course, you can also just use the fruit right out of the freezer. The things to consider though, even if you don’t mind a very cold smoothie in the morning is that… 1 – rock hard fruit is hard on your blender, 2 – ice cold things are hard on your digestive system & 3 – letting the fruit defrost a bit will bring it *back to life*
~ Tupperware makes cups with lids that I used when the kids were young. You only have to spill a full glass of blueberry smoothie on the carpet once to have these cups overnighted to your door! And when the kids were younger, I use slightly different amounts – 12 oz almond milk, 2 small bananas, heaping 1/2 cup frozen fruit, 2 TBSP seeds. This is enough for 2 kids. Basically, I came up with these ratios because it fits perfectly in two 12 ounce tupperware cups. Experiment & do what works for you!
Dairy Free, Gluten Free, Egg Free, Nut Free, Sugar Free, Vegan, Grain Free, Raw Keep in mind, if eating raw, you’ll need to use your own, home-made, almond milk made specifically from raw, unpasteurized almonds (which are not easy to come by these days unless you’re very intentional with your purchases).