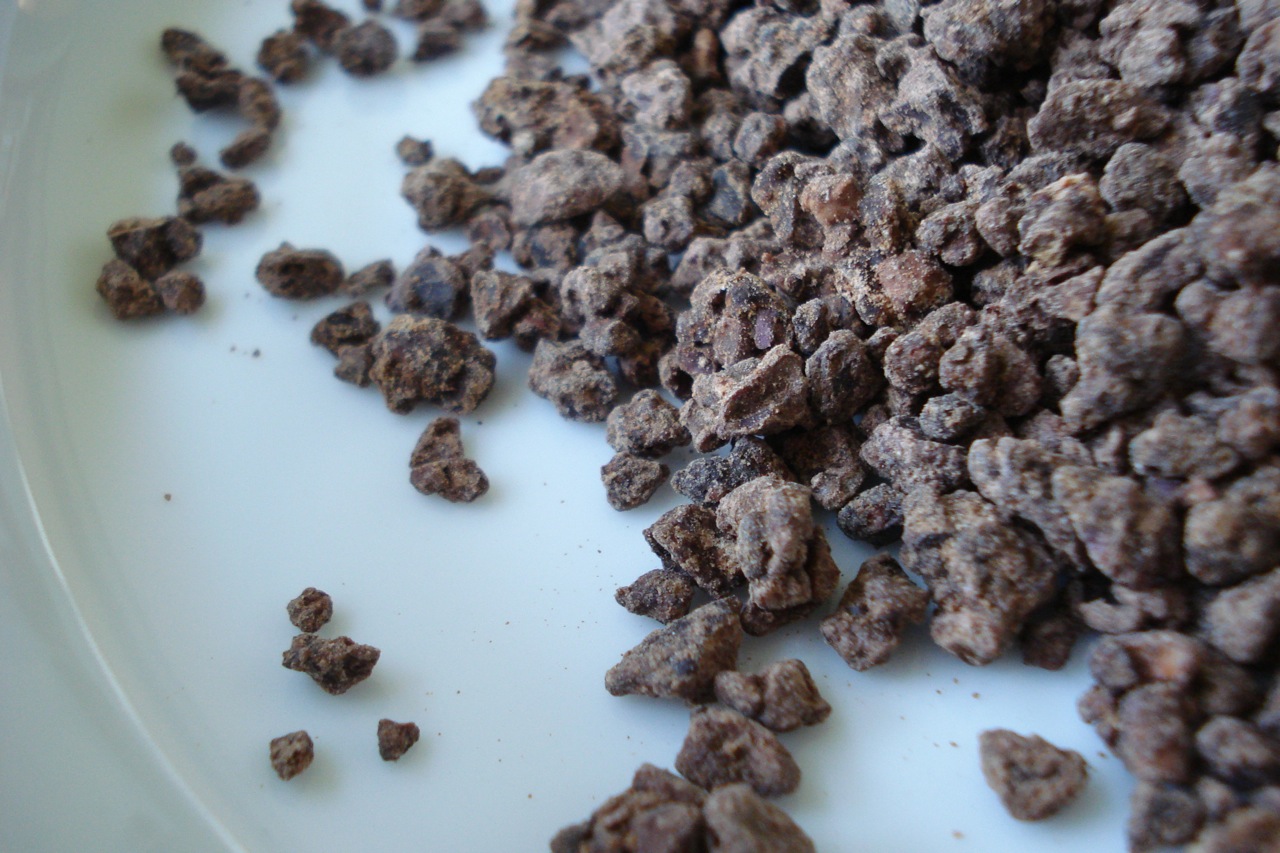
Tempeh Sausage Crumbles
2 packages soy tempeh (total of 16 oz)
2 TBSP fennel seeds
2 tsps dried basil
2 tsps dried oregano
1 tsp red pepper flakes
1 tsp dried sage (or 3/4 tsp ground sage)
4 garlic cloves, minced or crushed
1/4 cup soy sauce
2 TBSPs extra virgin olive oil
3 TBSPs lemon juice (juice of 1 lemon)
- In a large saute pan, crumble the tempeh (using your hands) and add enough water to almost cover it (about 3/4 cup).
- Over medium heat, cover pan & steam the tempeh until the water is absorbed, about 10 minutes.
- Drain any remaining water (if necessary), or cook it off with the pan uncovered.
- Add the rest of the ingredients and cook over medium heat, stirring occasionally, until lightly browned – about 10 minutes.
Serves 4.
________________________________________________________________________
SIDE NOTES:
~ This recipe is pure genius, adapted from Post Punk Kitchen.
Dairy Free, Gluten Free, Egg Free, Nut Free, Sugar Free, Vegan, Grain Free Raw
If eating gluten free, be sure to use soy tempeh (not “three grain” or “vegetable”, etc), and gluten free soy sauce (tamari).
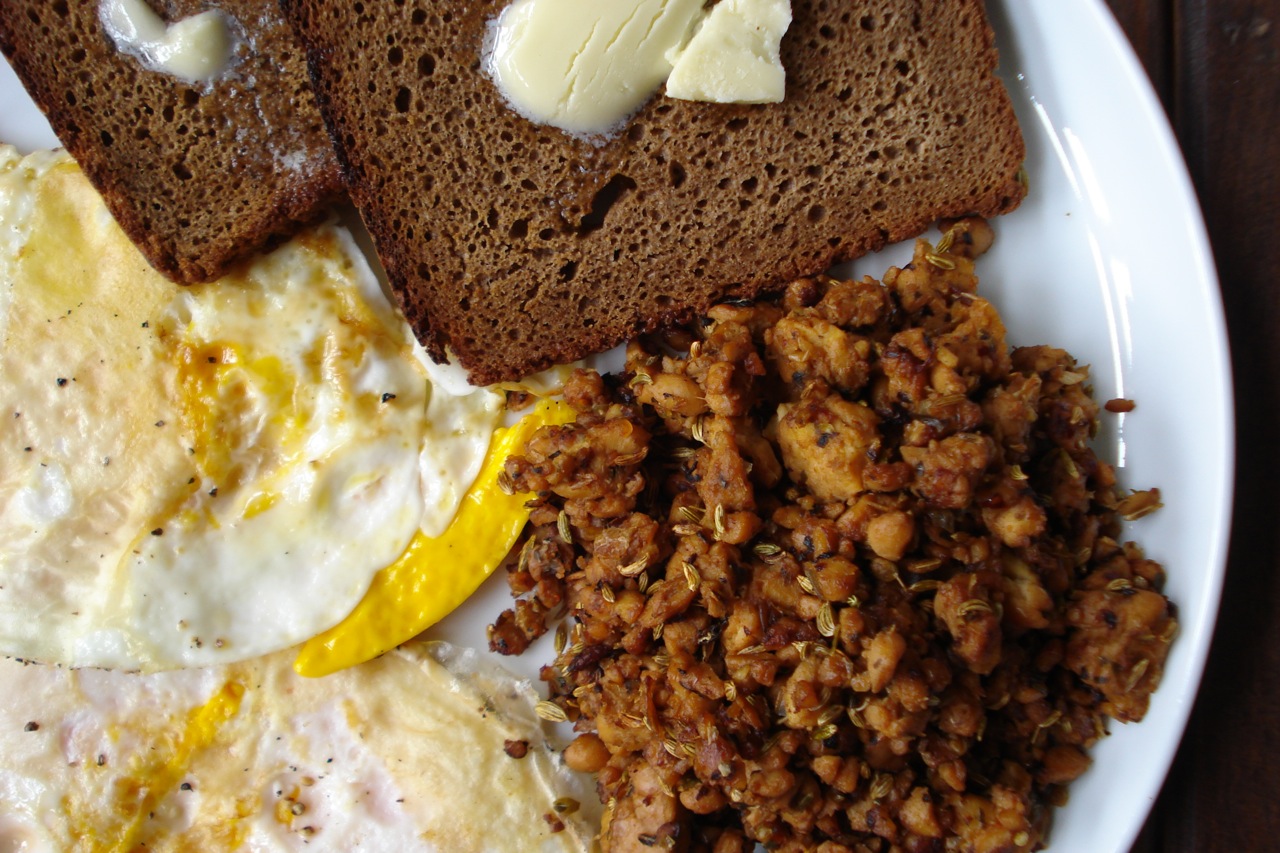
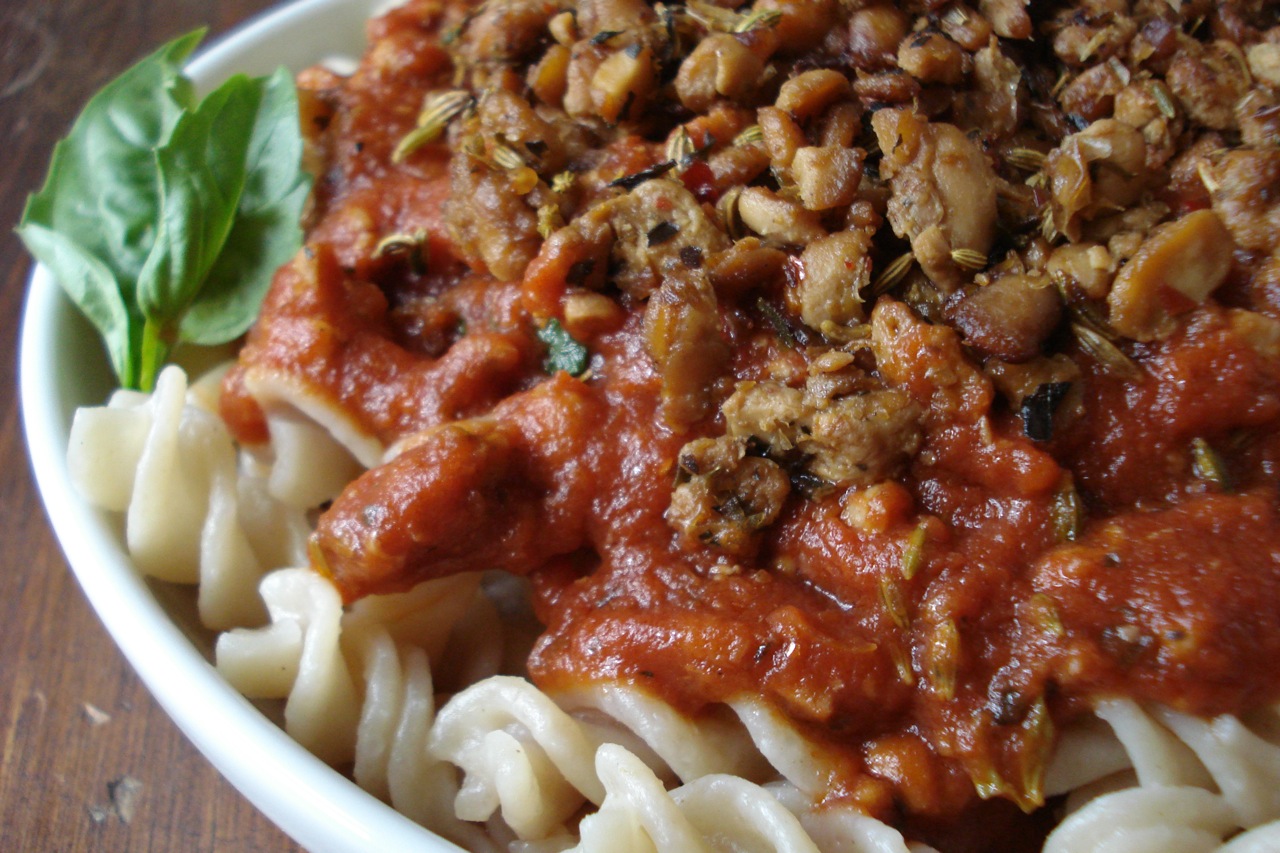
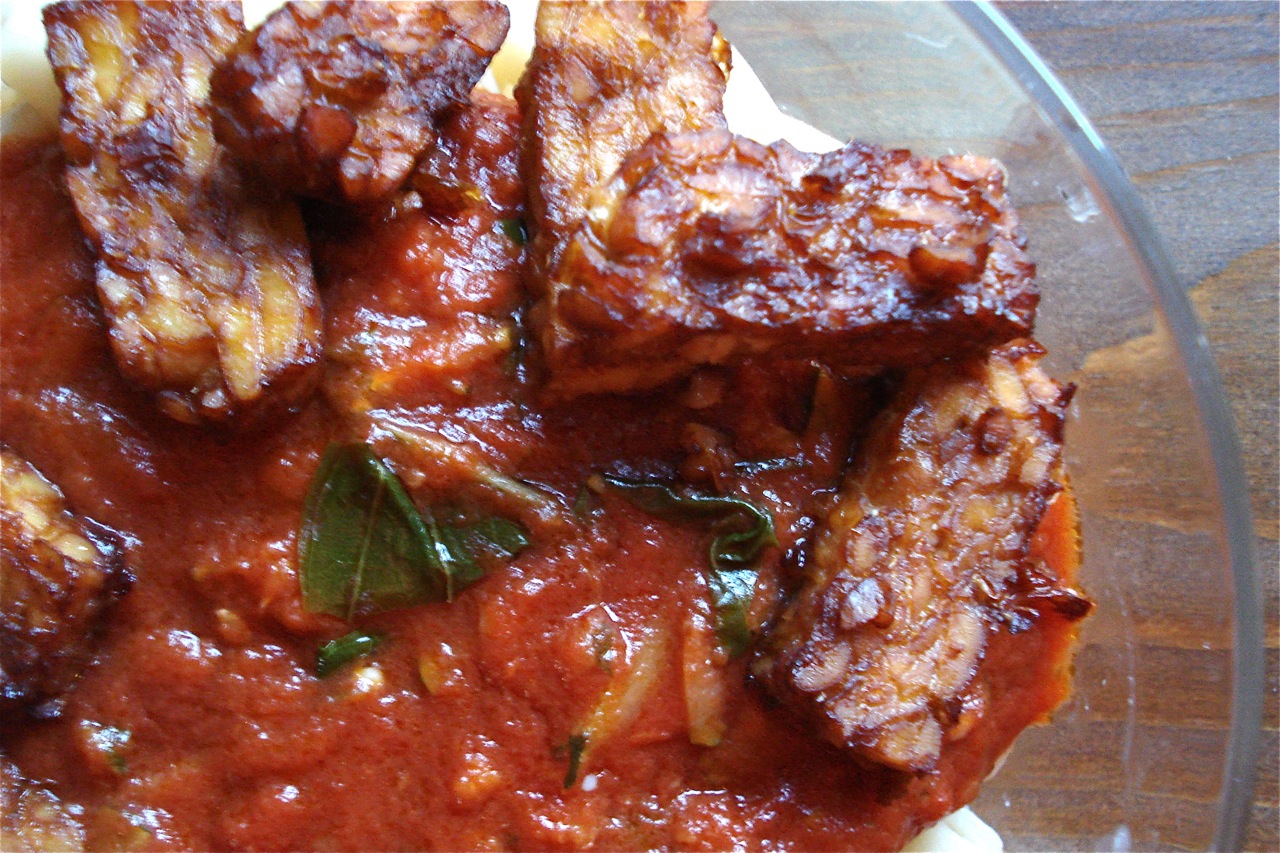
~ Besides having this for breakfast – along side eggs, we’ve also had it tossed with marinara sauce & pasta, with sautéed onions & red bell peppers (“sausage & peppers”), as a pizza topping, and with sautéed greens. So satisfying & so good.
Shown above with 10-MINUTE-MARINARA-SAUCE.
________________________________________________________________________
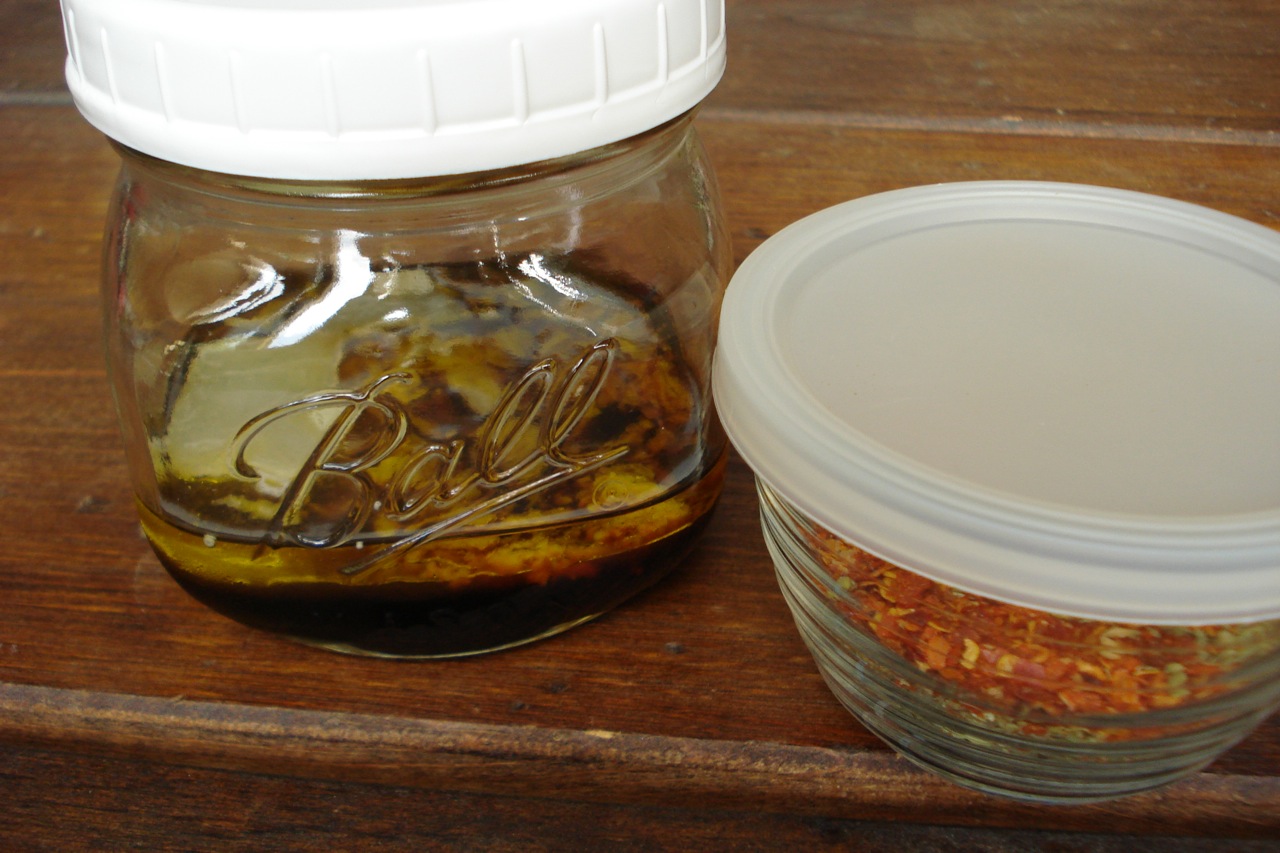
~ To make things easier, if you know you’ll be in a hurry later on, do some prep work ahead of time. For example, in this case, you can combine all of the liquid ingredients (and crushed garlic) in one container, and the dried spices in another. This way, when the time comes, all you have to do is open & dump =)
10-Minute Marinara Sauce
2 TBSP butter or ghee
4 garlic cloves, minced or crushed
28 oz package crushed or strained tomatoes
1 cup water
1/2 tsp pure salt
freshly ground black pepper to taste
fresh basil or parsley, chopped (as much as you’d like)
1 – 2 TBSP extra virgin olive oil
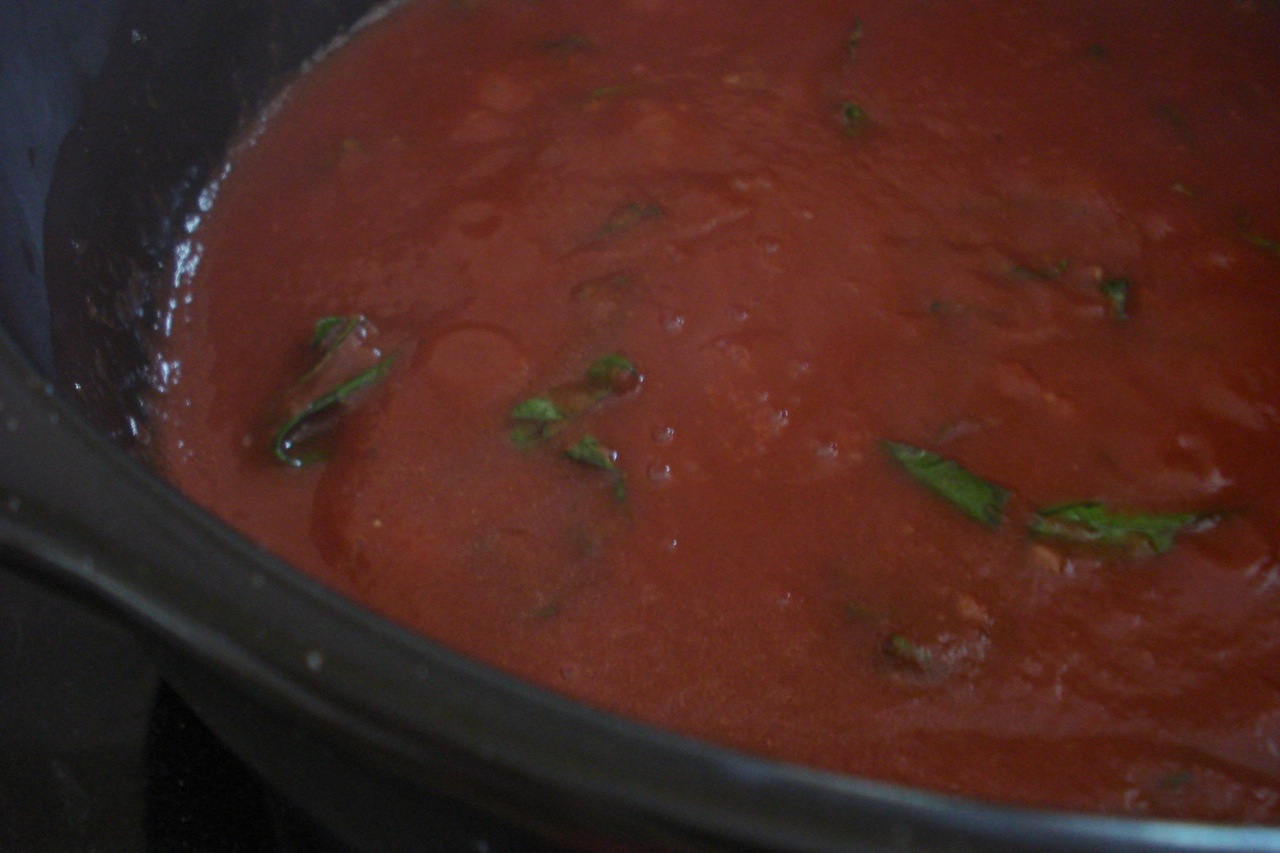
- Warm butter or ghee over medium heat and saute garlic for 1 – 2 mins.
- Add tomatoes, salt and pepper.
- Add the water to the empty tomato container, swish it around (to collect the remaining remnants of tomato), and add it to the pot.
- Simmer for approx 10 mins.
- Stir in chopped basil, drizzle in the olive oil and serve.
Serves 4.
______________________________________________________________________________________
SIDE NOTES:
~ Very basic, very fast! This simple sauce can be used over sauteed vegetables, for a homemade pizza, over pasta, or for something like eggplant/chicken/meatball parmesan.
~ I’d recommend a minimum of 2 TBSP fresh basil (but I use a whole lot more).
Dairy Free, Gluten Free, Egg Free, Nut Free, Sugar Free, Grain Free, Vegan, Raw
If eating gluten and/or sugar free, double check the label on your tomatoes. The only ingredient that should be listed is “tomatoes”!
~ Unfortunately, due to their acidic nature, tomatoes end up leaching undesirables such as BPA right out of the can lining. There are a few companies working on a new, safer type of can to package their tomatoes, but until then, I’ve been using Pomi brand which are packed in non-toxic tetra boxes. I must admit, I have fallen in love with their fresh flavor and may never look back. Click HERE for more information on what BPA is and why it’s best avoided.
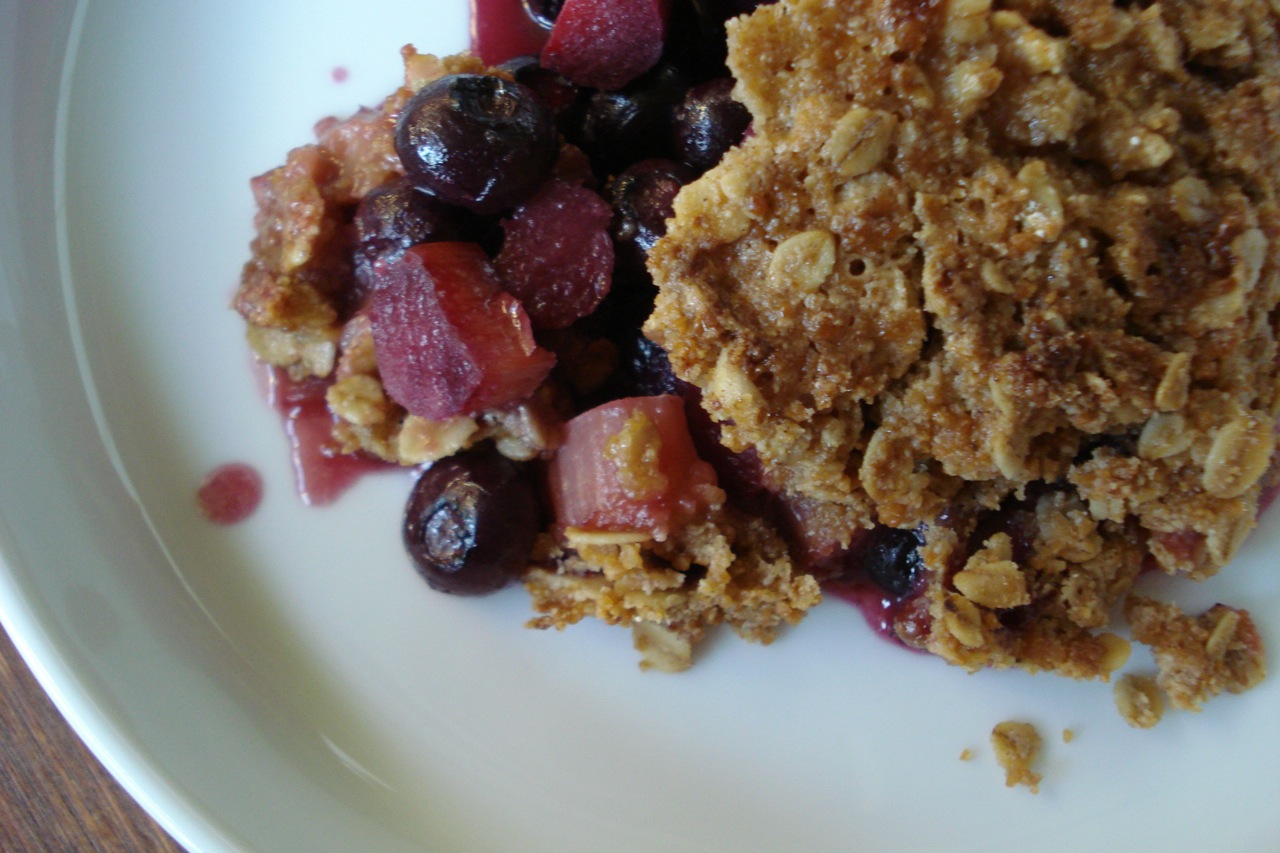
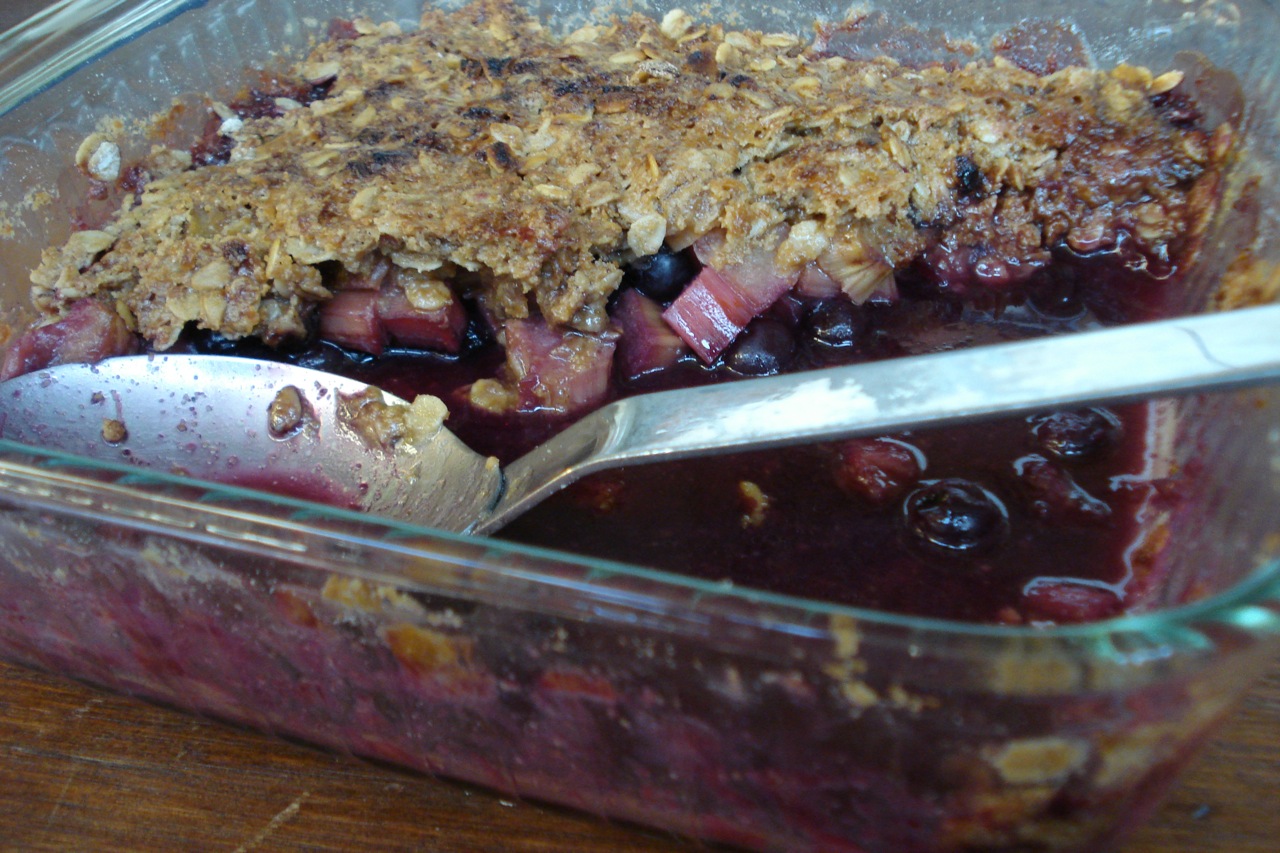
Rhubarb Blueberry Crumble
This is such an easy to make, killer dessert.
I think my first word to Nancy Grove on Monday (our CSA farmer) was YAY. Harvest time has begun! I received our first batch of fresh, crisp vegetables. Rhubarb is only around for a short time in June, so get it while you can!
While picking up my veggies, there was a dish of homemade rhubarb crumble out to share (courtesy of Ed Grove). There wasn’t much left (sign of a good pie), as I was a late comer, but I did get a few spoonfuls & wow, it was good. As I walked away, I knew exactly what I had to do with the rhubarb sticking out of my produce bag. I don’t know how Ed made his, but I came up with a version that really hit the spot after that little tease =)
Tis the season…..!
______________________________________________________________________________________
For the filling:
3 cups rhubarb, chopped (about 6 stalks)
1 cup blueberries (fresh or frozen)
1 TBSP water
1/2 cup natural sugar
1/4 tsp cinnamon
1/4 tsp nutmeg
For the topping:
3/4 cup oat flour (or any flour you prefer)
1/2 cup natural sugar
1/4 tsp pure salt
1/4 tsp cinnamon
1/2 cup rolled oats
7 TBSP butter, diced into small pieces (optional)
___________________________________________________________________________
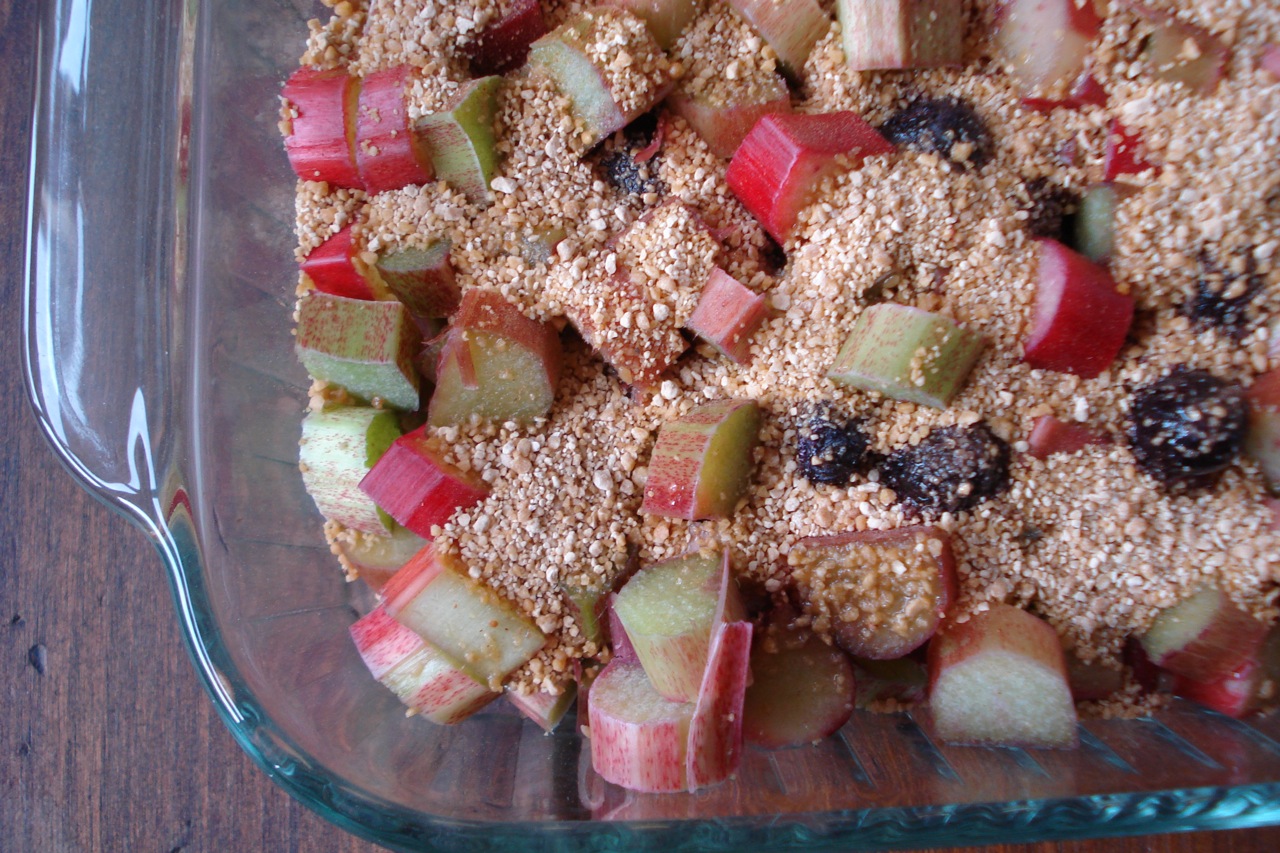
- Add rhubarb and blueberries to a square 8 x 8 baking dish (or 9 inch pie plate) and sprinkle with water.
- Mix together sugar, cinnamon & nutmeg, then spoon over the top of the fruit.
Will look like this:
________________________________________________________________________
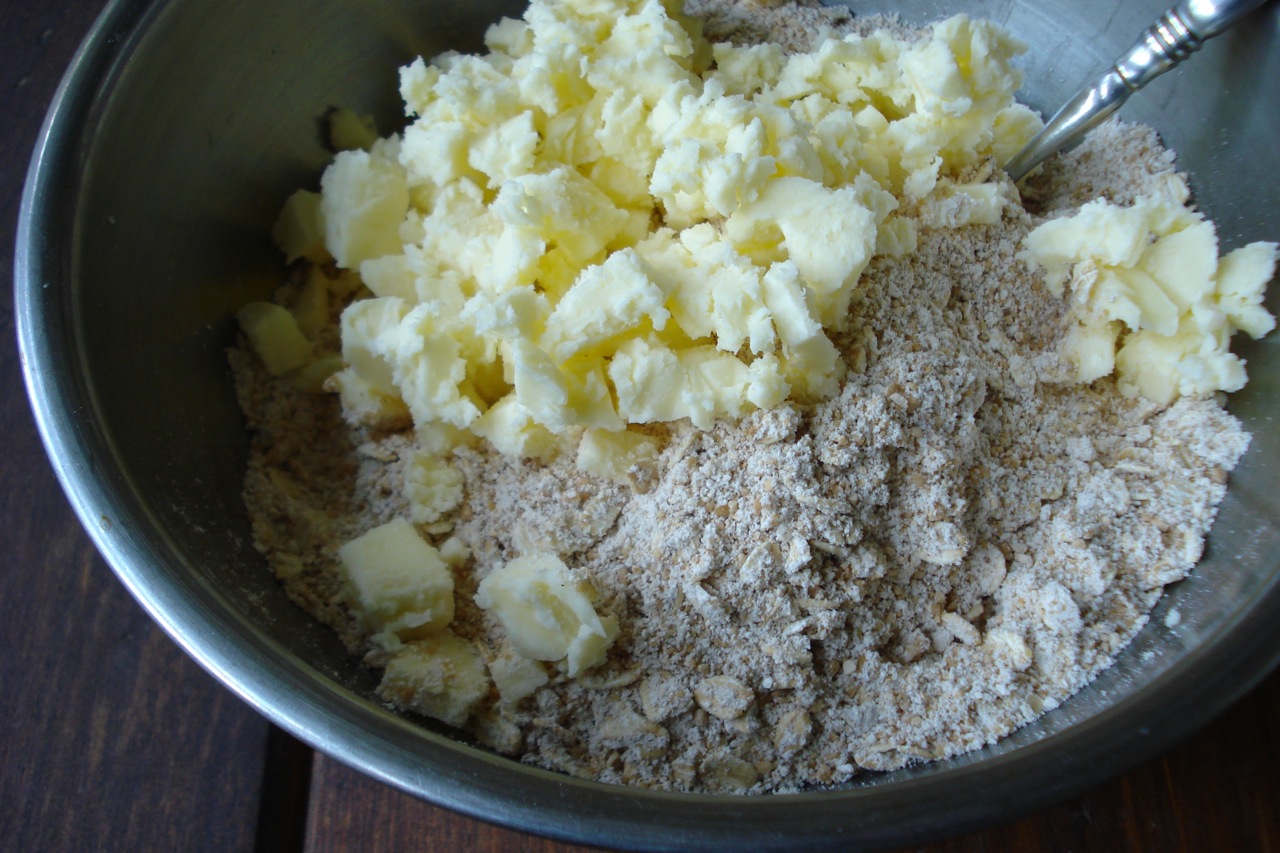
- In the same bowl you just used to mix the sugar & spices, combine the flour, sugar, salt, & cinnamon (a whisk works well to help remove lumps from the flour, but a spoon is ok too).
- Mix in oats.
- Add butter.
____________________________________________________________________________
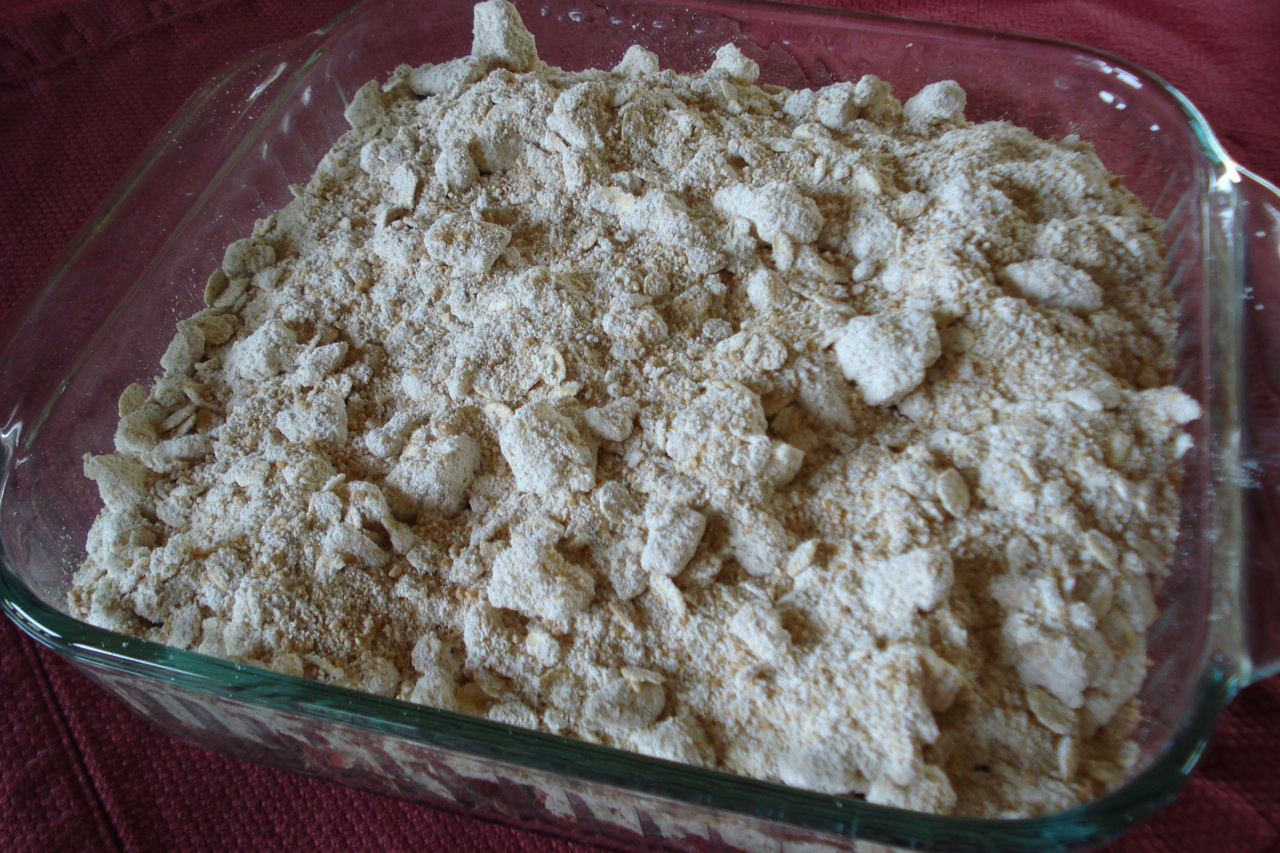
- Combine butter with flour mixture and sprinkle on top of the filling.
The butter will make the topping look lumpy:
___________________________________________________________________________
- Bake at 350 for about 40 minutes, or until rhubarb is tender & crumble is golden brown. You’ll see the filling bubbling over the topping a bit around the edges.
- After the 40 mins is up, you may need to put the dish under the broiler for 3 – 5 mins if it’s not already browned on top (I did).
______________________________________________________________________________________
SIDE NOTES:
~ I couldn’t find any recipes in my books or online that looked right for me, so I took bits & pieces of each, made substitutions to fit my own needs, and ended up doing pretty well. (My son was licking the plate, which I consider a marker of success.) =)
~ First off, for those new to rhubarb, it looks somewhat like celery, except it’s mostly red (some green too). It’s one of the first crops to pop up in the spring, and is technically considered a fruit, even though it looks more like a vegetable. It’s very flavorful and very tart. That’s why this type of crisp calls for a decent amount of sugar – to balance out the tartness (but not so much that it completely overpowers the flavor). It all depends on your taste buds, but for us, the 1 cup of sugar in this recipe is plenty good enough. If anything, I might try cutting it back a bit next time, but in general, it’s a safe bet to start at 1 cup (1/2 for filling & 1/2 for topping) & see how you like it. Husband thinks this amount is just right & implored me not to change a thing.
~ You can use 4 cups of rhubarb and omit the blueberries if you’d like. Or – you can add 1 cup of sliced strawberries or 1 large, peeled/sliced green apple, instead of, or in addition to the blueberries. Play with it, using fruits that sound good to you.
~ I used maple sugar for both the filling & the topping. Was outstanding. Oat flour, besides being whole grain, is a perfect match for this type of dish, since rolled oats are included in the topping. It can either be purchased, or easily made at home.
~ If you’d like, you can divide the crumble topping and use half on the bottom as a crust (pressed into the baking dish before you add the rhubarb).
~ Feel free to double this recipe and bake as described above in a 9 x 13 pyrex.
Enjoy! =)
Dairy Free, Gluten Free, Egg Free, Nut Free, Sugar Free, Grain Free, Vegan, Raw
If eating gluten free, be sure to use certified gluten free oats and oat flour (will need to make the oat flour yourself in a food processor or simply use a different type of gluten free flour).
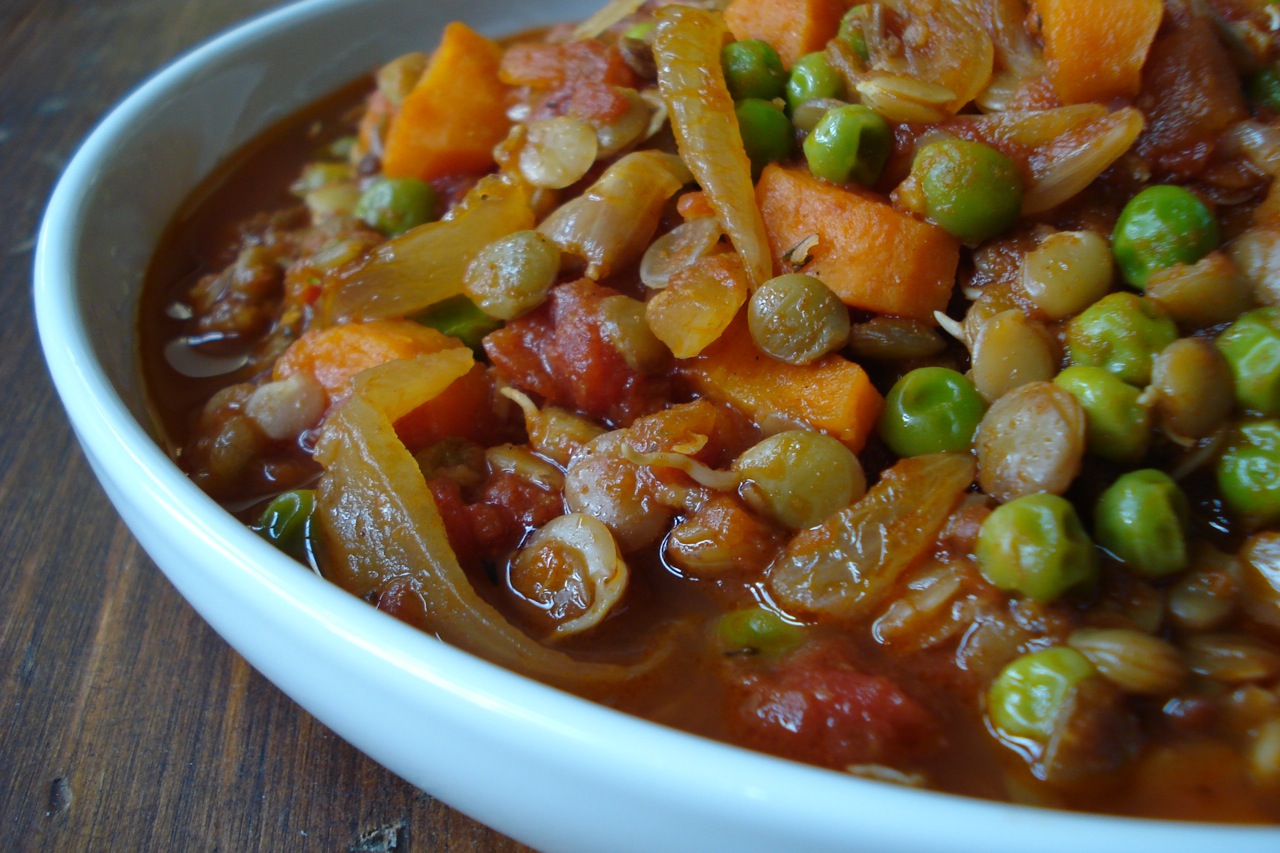
Spicy Tomato Lentil Stew
1 cup brown or green lentils
1/4 cup coconut oil
1 large onion, chopped
2 carrots, peeled & chopped
4 cloves garlic, crushed or minced
2 TBSP fresh ginger, grated or finely chopped
28 oz package chopped tomatoes
1 cup broth (veggie or chicken)
1 cup fresh or frozen peas
Spice Blend:
2 tsps ground cumin
2 tsps paprika
1 tsp ground fenugreek (optional)
1/2 tsp pure salt
1/2 tsp dried thyme
1/4 tsp ground cardamom
1/4 tsp ground coriander
1/8 tsp ground cloves
1/8 tsp ground cinnamon
1/8 tsp cayenne pepper
- Boil lentils for about 45 minutes or until tender.
- In large saute pan over medium heat, warm the oil and saute onion & carrot for 10 mins.
- Add garlic, ginger, and spices, and saute approx 3 mins.
- Add the tomatoes and cook for 5 minutes more.
- Add the broth and bring to a simmer.
- Add lentils and peas, and simmer an additional 15 mins.
Serves 4.
______________________________________________________________________________________
SIDE NOTES:
~ Adapted from “Veganomicon”. Super delicious. Bursting with flavor. Great served with basmati rice, naan, corn bread, or any other type of bread or rice you like. This was a big hit for us – kids included.
~ When in season, you can use 10 fresh plum tomatoes (chopped w/ their juice) and 1/2 cup tomato paste instead of the packaged tomatoes.
~ For the spices, you can alter the mix any way you see fit, depending on what you have on hand and what you like. I didn’t have fenugreek, so omitted it. I’m not sure that I’ve ever tasted it, but I’m kind of curious now & will look for it to try next time. I believe it’s a spice used in Ethiopian and Indian cuisine.
~ For the lentils… You have a few choices. 1 – As mentioned above – Boil them for about 45 mins or until tender (up to an hour). OR – 2 – Soak lentils for 4 hours (up to 12 hours is ok), drain, then boil in fresh water for approx 30 minutes. The soak time will soften them somewhat, so a shorter cook time works unless you like them on the mushy side. Soaking the beans will make them more digestible. If beans tend to make you gassy, this should help with that. Taking that one step further (if you’d like) adding a small piece of Kombu (seaweed) as the lentils cook will reduce the possibility of gassiness even further. OR – 3 – Use truRoots sprouted lentils and boil for 5 minutes, remove from heat, cover, let sit 2 mins, and drain. This method is of course the quickest, but more costly.
Dairy Free, Gluten Free, Egg Free, Nut Free, Sugar Free, Grain Free, Vegan, Raw
If eating gluten free, be sure to double check labels of any packaged ingredients (tomatoes, broth).
Peanut Butter Cookies
1 cup natural peanut butter (or other nut butter)
1 & 1/2 cups natural sugar
1/2 tsp pure salt
4 eggs
1/2 tsp pure vanilla extract
1/2 cup coconut flour, sifted
1/2 cup peanuts, coarsely chopped (or other nut) (optional)
- Preheat oven to 375 degrees.
- Mix together peanut butter, sugar, salt, eggs and vanilla.
- Stir in coconut flour and chopped nuts (if using). Batter will be wet.
- Drop by the spoonful on a greased (or parchment paper covered) cookie sheet.
- Bake for 10 – 12 mins.
Makes about 3 dozen cookies.
______________________________________________________________________________________
SIDE NOTES:
~ This is my kind of cookie =) In fact, we all agreed this is the best cookie yet.
~ Remember, you can use any nut-butter you’d like – peanut, almond, cashew. Personally, I used PECAN-BUTTER and pecans in place of the peanuts. If using the kind of natural, store-bought, nut butter that has oil on the top, be sure to mix it into the nut-butter. I assume most people do this anyway, but just in case you typically pour the oil out to reduce the fat content, don’t do it this time, as the oil portion of the nut-butter is an important component to these cookies (you may have noticed, there is no other added oil or butter for this recipe).
~ The cookies will spread on their own, so no need to pre-flatten before you bake. Also worth noting, the author from “Cooking w/ Coconut Flour” recommends 14 – 15 mins bake time. When I checked my first batch at 12 minutes, they were already a little toasty on the bottom. This is why I changed the bake time. Of course, some ovens will bake hotter than others, but it’s a good idea to set the timer & start checking at 10 minutes to avoid burnt cookies. I caught mine just in the nick of time!
~ To reduce sugar content, simply cut the sugar in half (use 3/4 cups) and include 1/2 tsp of powdered stevia.
Dairy Free, Gluten Free, Egg Free, Nut Free, Sugar Free, Grain Free, Vegan, Raw
If eating gluten free, be careful choosing your vanilla. If you can’t eat nuts, but can tolerate sunflower seeds, use sunbutter (and either omit the chopped peanuts, or substitute sunflower seeds).
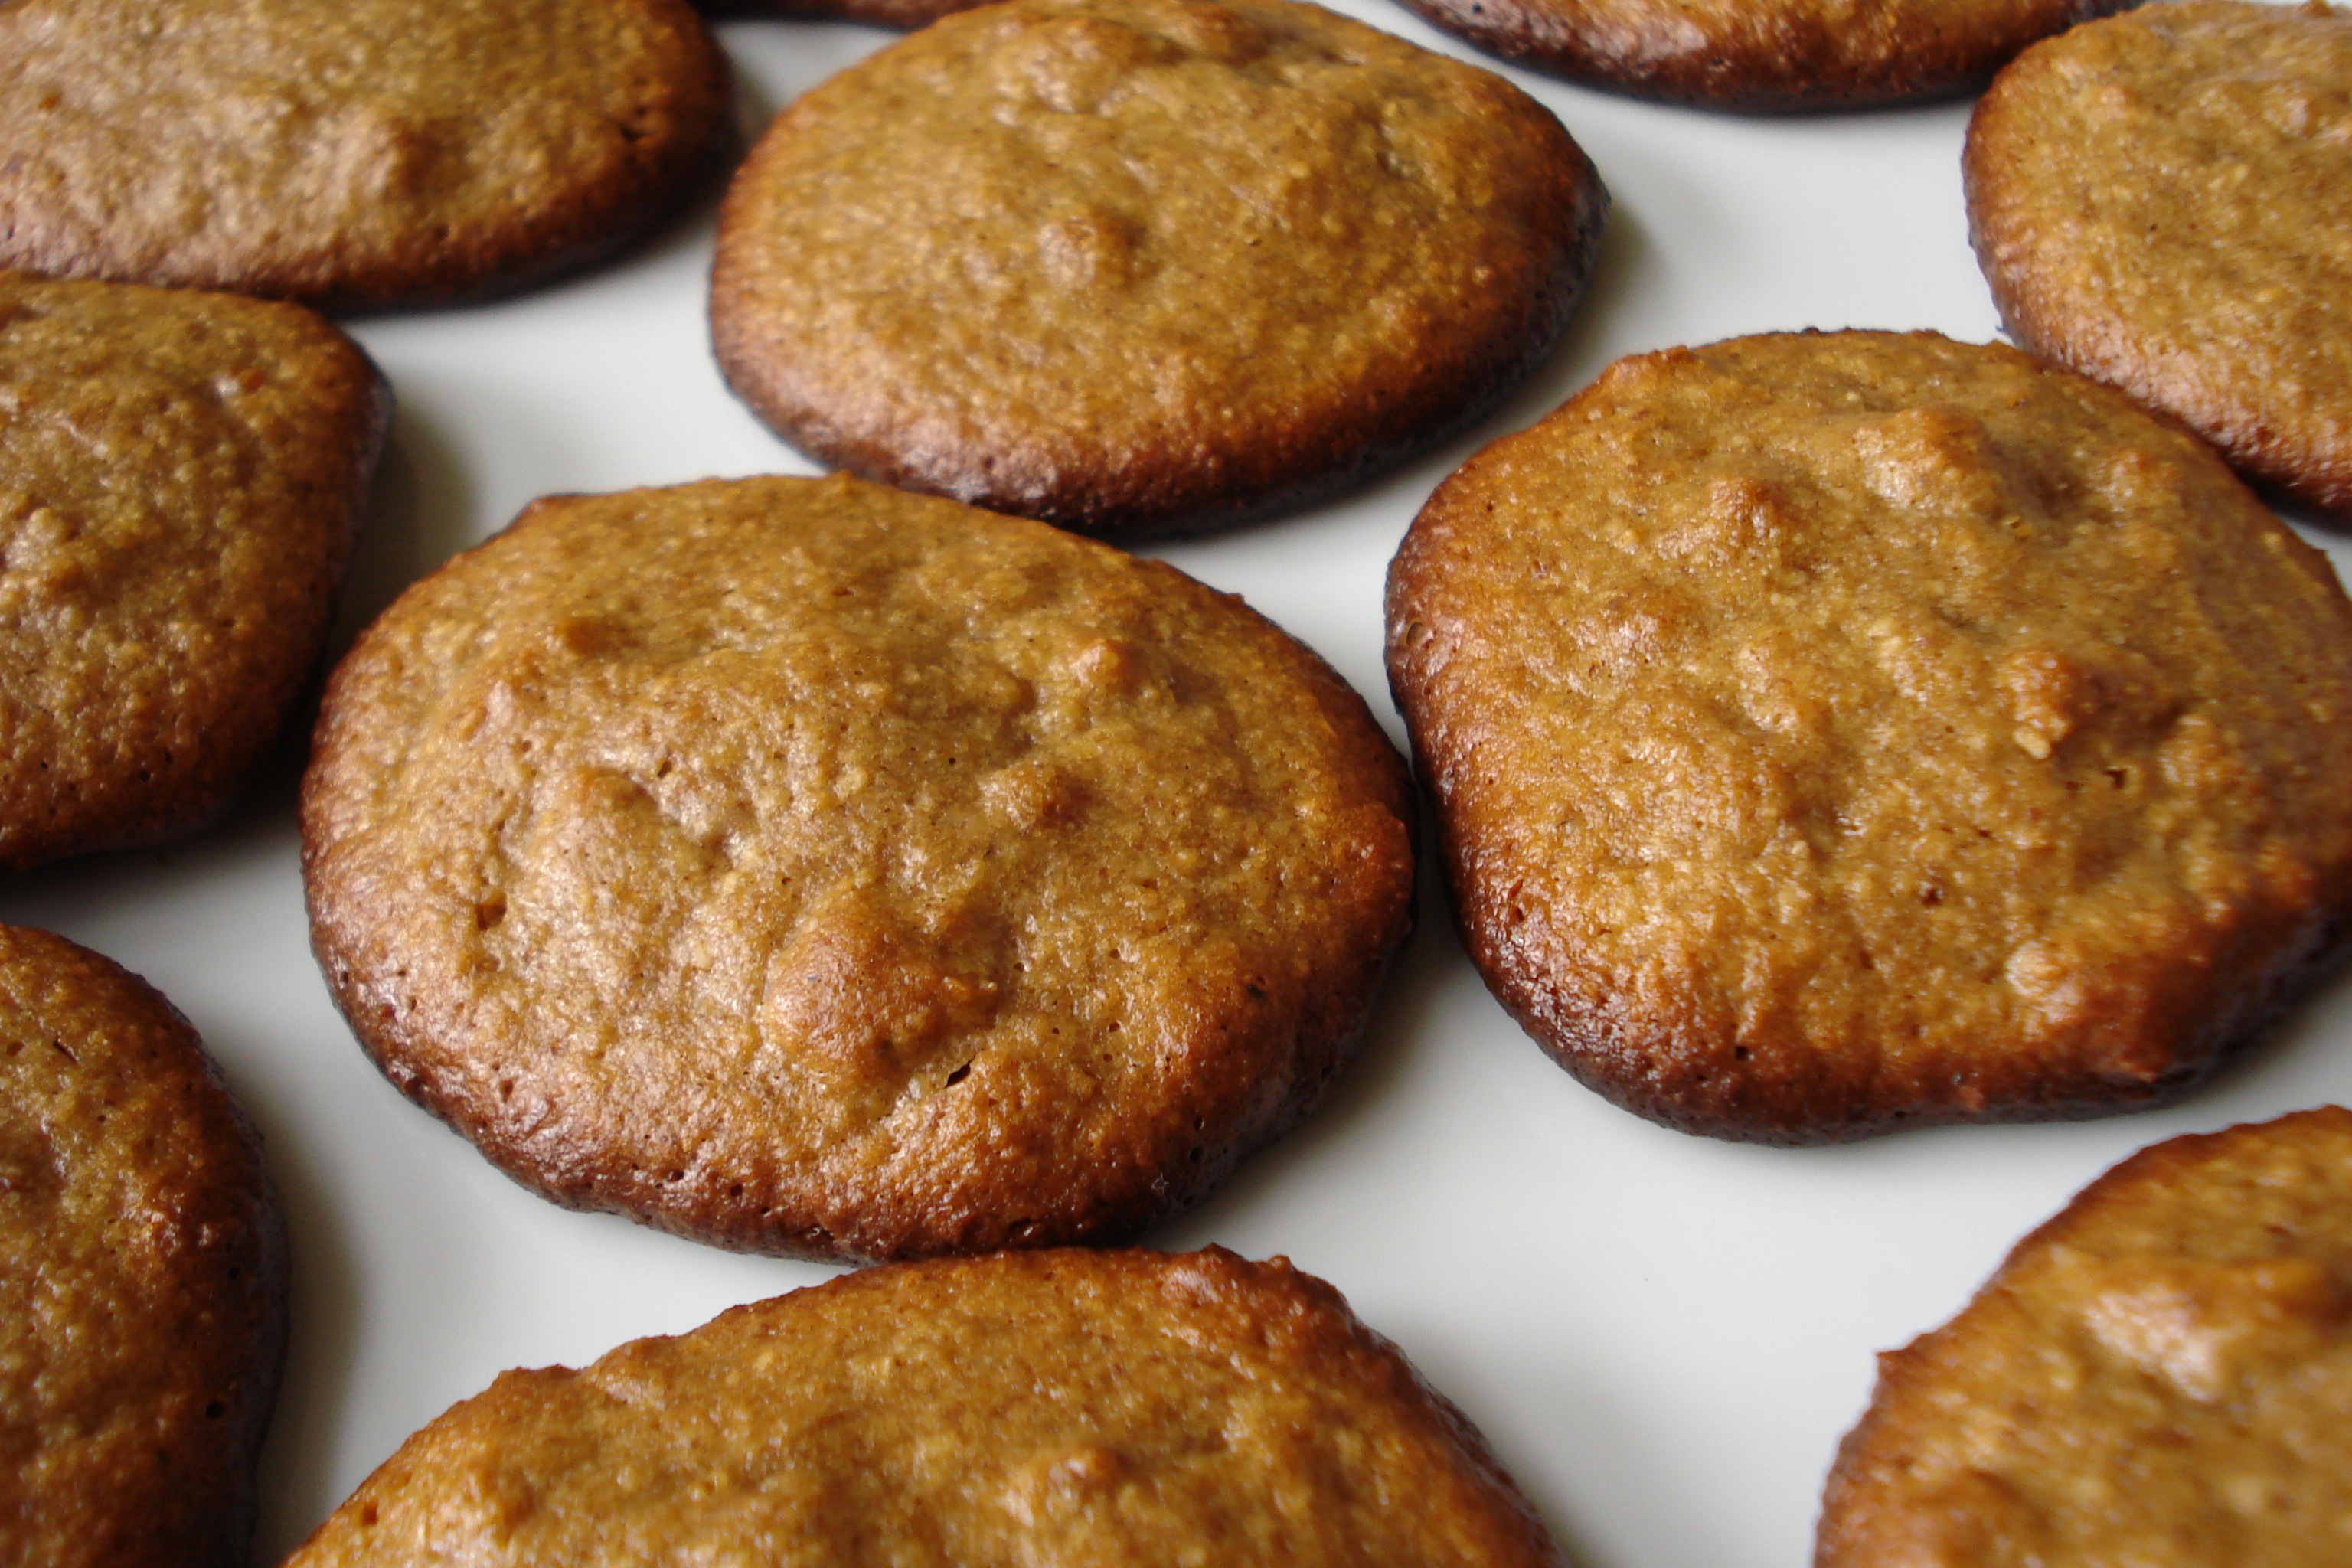
Gingerbread Cookies
6 eggs
1/3 cup butter or coconut oil, melted
1/4 tsp pure salt
1/2 cup molasses
3/4 cup natural sugar
1 tsp ground ginger
1 tsp ground cinnamon
1/4 tsp ground cloves
3/4 cup coconut flour, sifted
- Preheat oven to 400 degrees.
- Blend together eggs, butter, salt, molasses, sugar, and spices.
- Stir in coconut flour and mix thoroughly. Batter will thicken slightly as the flour absorbs moisture.
- Drop batter by spoonfuls onto greased (or parchment paper covered) cookie sheet.
- Bake for 12 – 14 mins.
Makes approx 30 cookies.
______________________________________________________________________________________
SIDE NOTES:
~ These may look similar to last week’s chocolate cookies, but they’re entirely different (although undoubtably, equally as tasty). This time, it’s not chocolate yielding that dark, rich color, but molasses. Very moist & “cake-like” cookies. The kids love them.
~ No need to manually flatten these cookies before baking. The batter will be on the wet side, and they’ll spread quite nicely on their own. I did slightly flatten the first batch, so they ended up spreading too much & running into each other. Aside from not having perfect, circle shaped cookies, they were as good as the next batch, so not to worry if this happens to you.
~ What is molasses? Molasses is the by-product of sugar refining, and contains all the nutrients from the raw sugarcane plant. During the refining process, the sugarcane plants are boiled to a syrup from which the crystals are extracted (these crystals become white, table sugar). The sticky syrup that’s left over is molasses. The crystals are actually boiled 2 more times, and what’s left over after the last and final boiling (the “dregs” of the barrel), is called blackstrap molasses (this type of molasses is the most nutrient dense). In general, molasses is low in sugar and high in nutrients (minerals & B vitamins) – a nutritional powerhouse as far as sweeteners are concerned. For the best of the best, look for unsulphered blackstrap molasses from organic sugar.
~ Adapted from “Cooking with Coconut Flour” – my favorite source for baked goods. Did you ever think you could bake entirely grain free and still put out something worth biting into? Until about 18 months ago, I know I didn’t!
Dairy Free, Gluten Free, Egg Free, Nut Free, Sugar Free, Grain Free, Vegan, Raw
If eating dairy free, use coconut oil instead of butter.
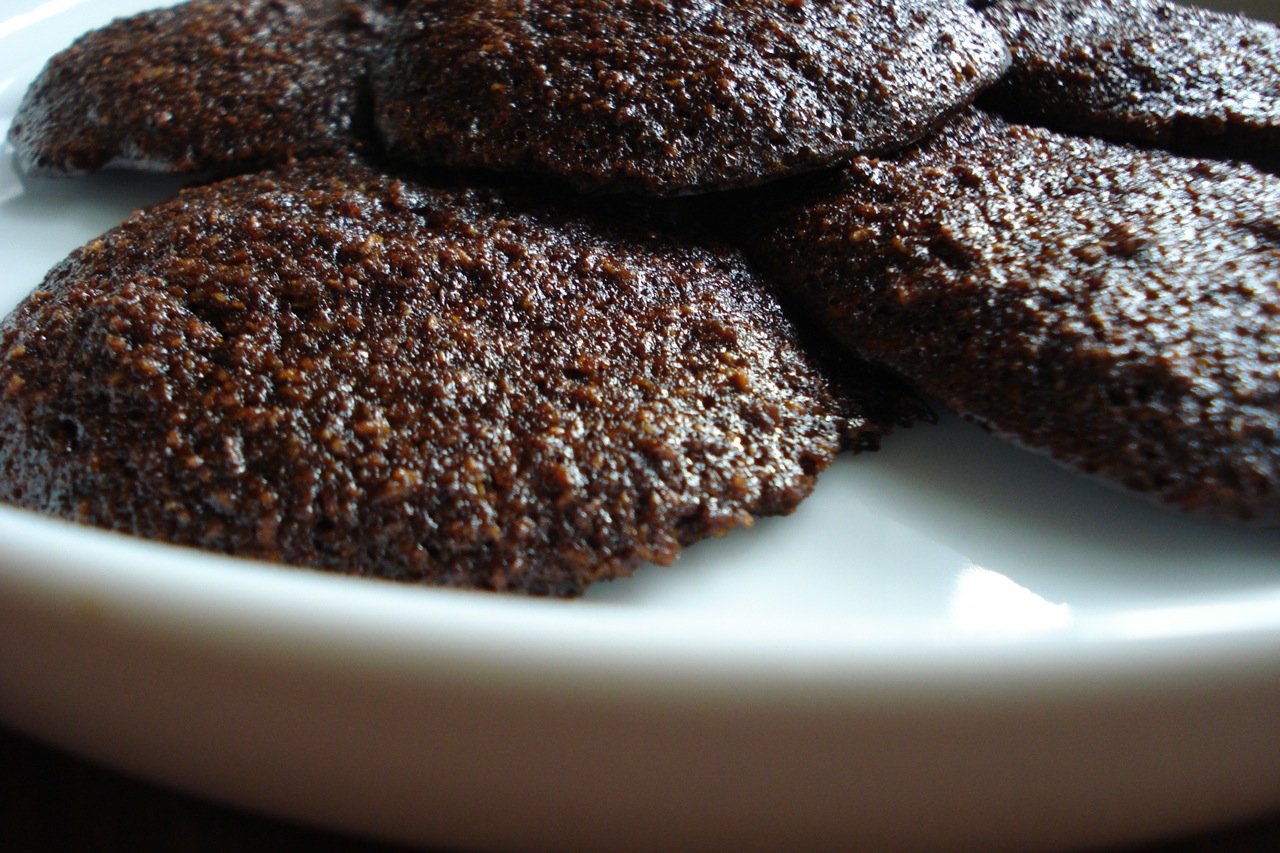
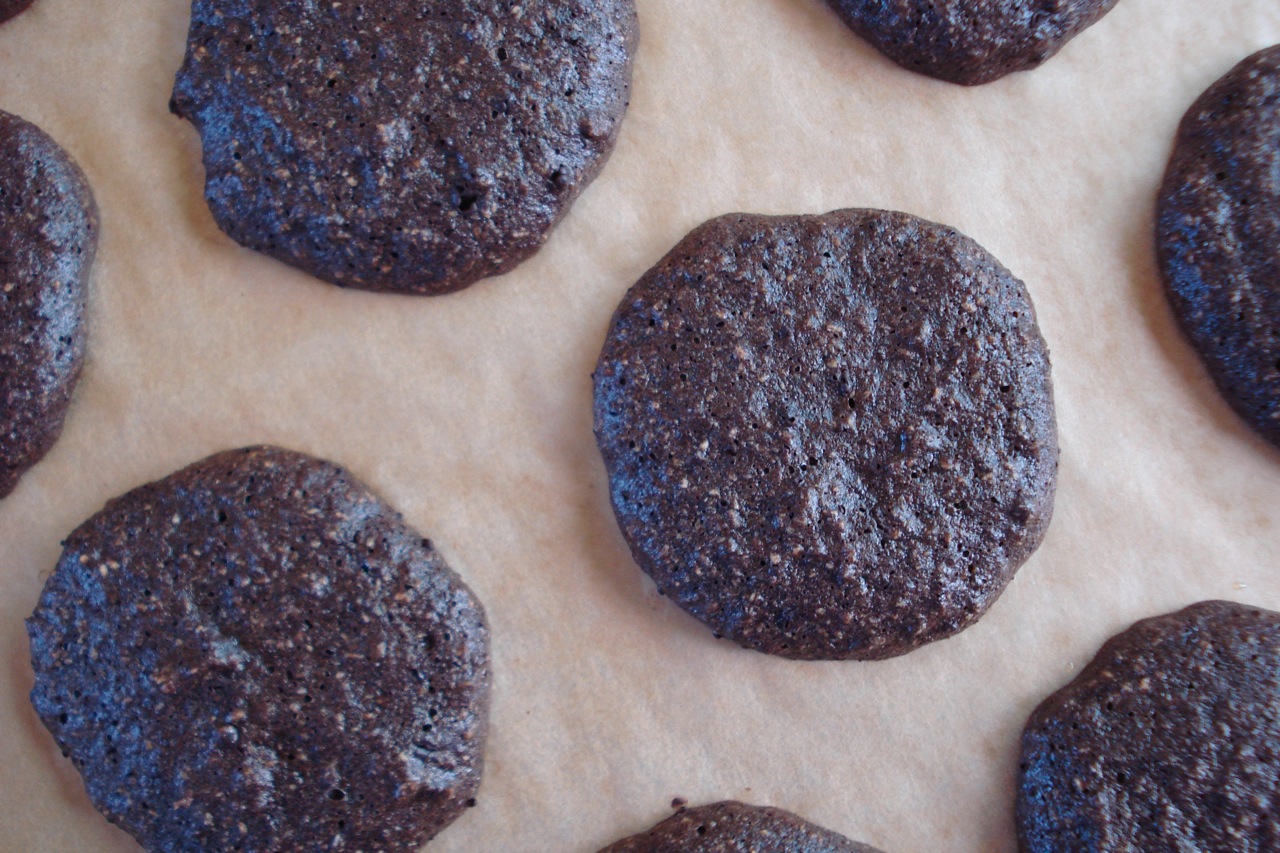
Chocolate Cookies
1/4 cup butter or coconut oil, melted
1/3 cup cocoa (or cacao) powder
3 eggs
1/3 cup natural sugar
1/4 tsp pure salt
1/4 tsp pure vanilla extract
1/4 cup coconut flour, sifted
- Preheat oven to 350.
- Melt butter in a small saucepan.
- Stir in cocoa powder and remove from heat.
- In a separate bowl, combine eggs, sugar, salt and vanilla.
- Stir in cocoa mixture.
- Whisk coconut flour into batter until there are no lumps.
- Let batter rest 3 or 4 minutes to allow it to thicken slightly.
- Drop batter by spoonful on greased (or parchment paper covered) cookie sheet.
- Bake for 14 mins.
Makes about 18 cookies.
______________________________________________________________________________________
SIDE NOTES:
~ Adapted from “Cooking with Coconut Flour”. A very moist & tasty chocolate cookie. Reminiscent of chocolate cake – only bite sized. The kids love them.
Dairy Free, Gluten Free, Egg Free, Nut Free, Sugar Free, Grain Free, Vegan, Raw
If eating dairy free, use coconut oil instead of butter. If eating gluten free, be careful choosing your vanilla and chocolate powder.
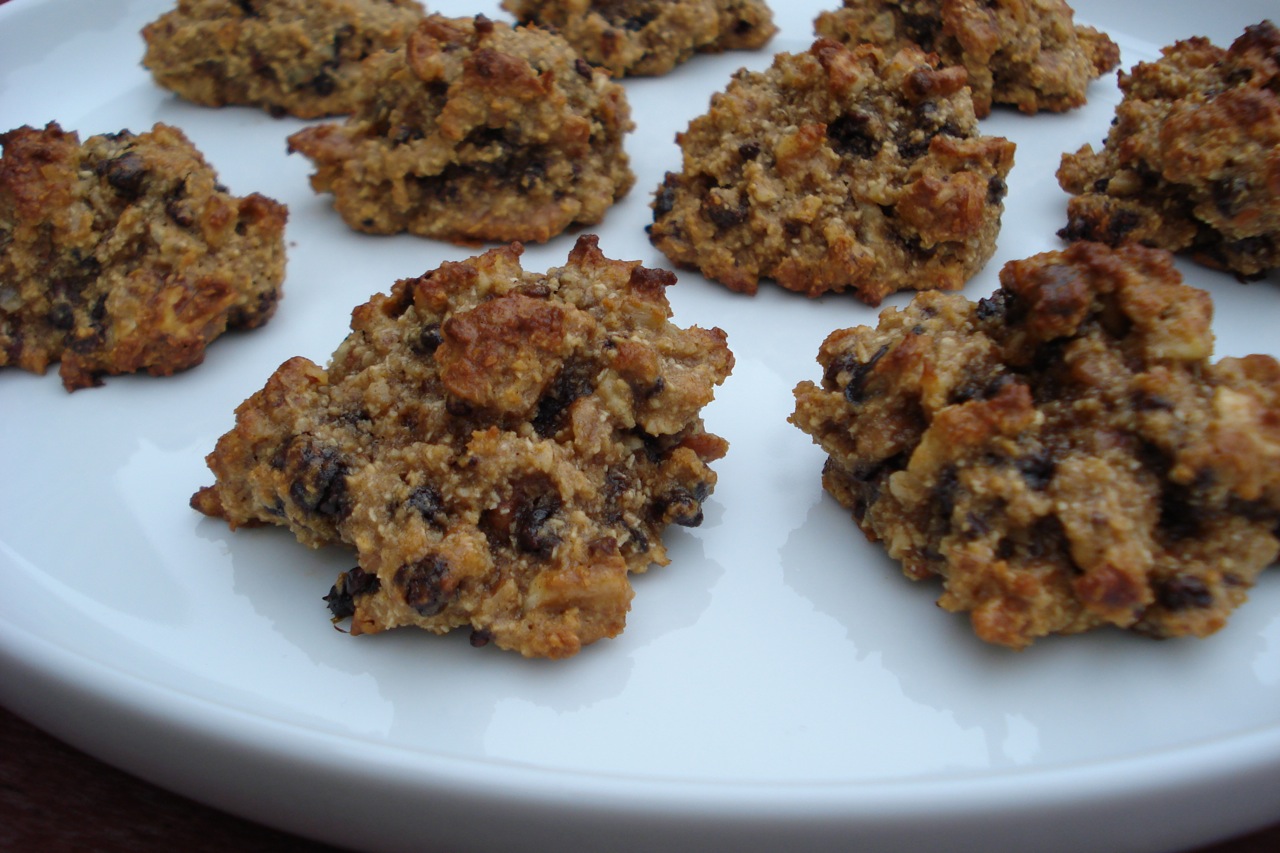
Nut & Chocolate Clusters
1/2 cup natural nut butter (peanut/almond – whatever you typically use)
1 & 1/4 cups natural sugar
4 eggs
1/2 tsp pure vanilla extract
1/2 tsp pure salt
2 cups nuts, chopped
1 cup chocolate chips (or 1/2 cup nibs)
2/3 cup coconut flour, sifted
- Mix together nut-butter, sugar, eggs, vanilla & salt.
- Stir in nuts, chocolate chips and coconut flour.
- Drop by spoonful on greased (or parchment paper covered) cookie sheet.
- Bake at 375 for 13 minutes (or until done to your liking).
- Cool slightly and remove from cookie sheet.
Makes approx 28 clusters.
______________________________________________________________________________________
SIDE NOTES:
~ These chocolate chip nut clusters are fantastic. Although somewhat reminiscent of a chocolate chip cookie, they’re way nuttier (and less coconutty than last week’s cookies). A real keeper. Have become the cookie test kitchen lately (the family is not complaining).
~ If you reduce the nuts by 50%, these become more like cookies & less like clusters.
~ I usually cut cookie recipes in half until I tweak them to our liking. Of course, your taste may be different from ours, so consider doing the same – make the first batch a small one.
~ More cookies to come….!
Dairy Free, Gluten Free, Egg Free, Nut Free, Sugar Free, Grain Free, Vegan, Raw
If eating gluten free, be careful choosing your vanilla and chocolate chips. If you can’t eat nuts, but can tolerate sunflower seeds, use sunbutter and sunflower seeds instead of peanuts (which would make this recipe nut free).
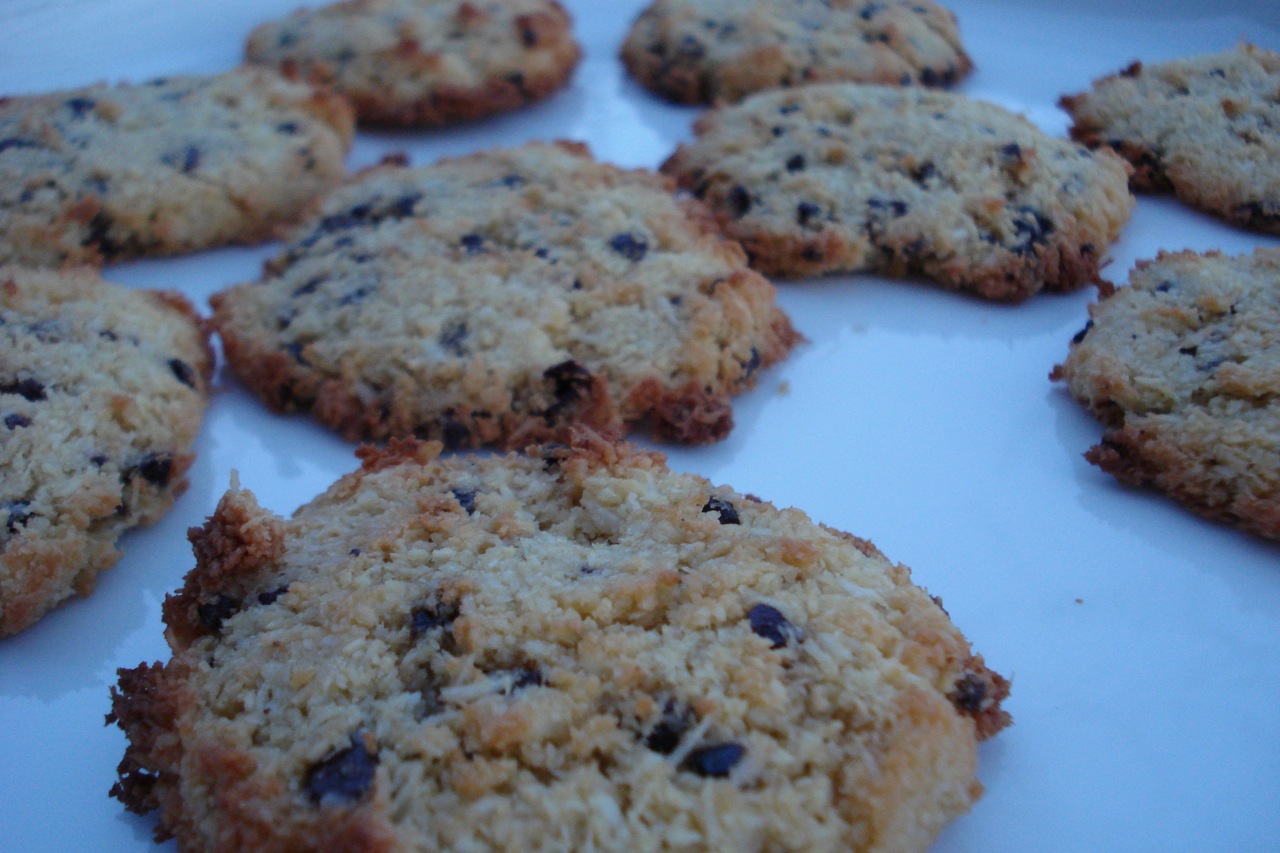
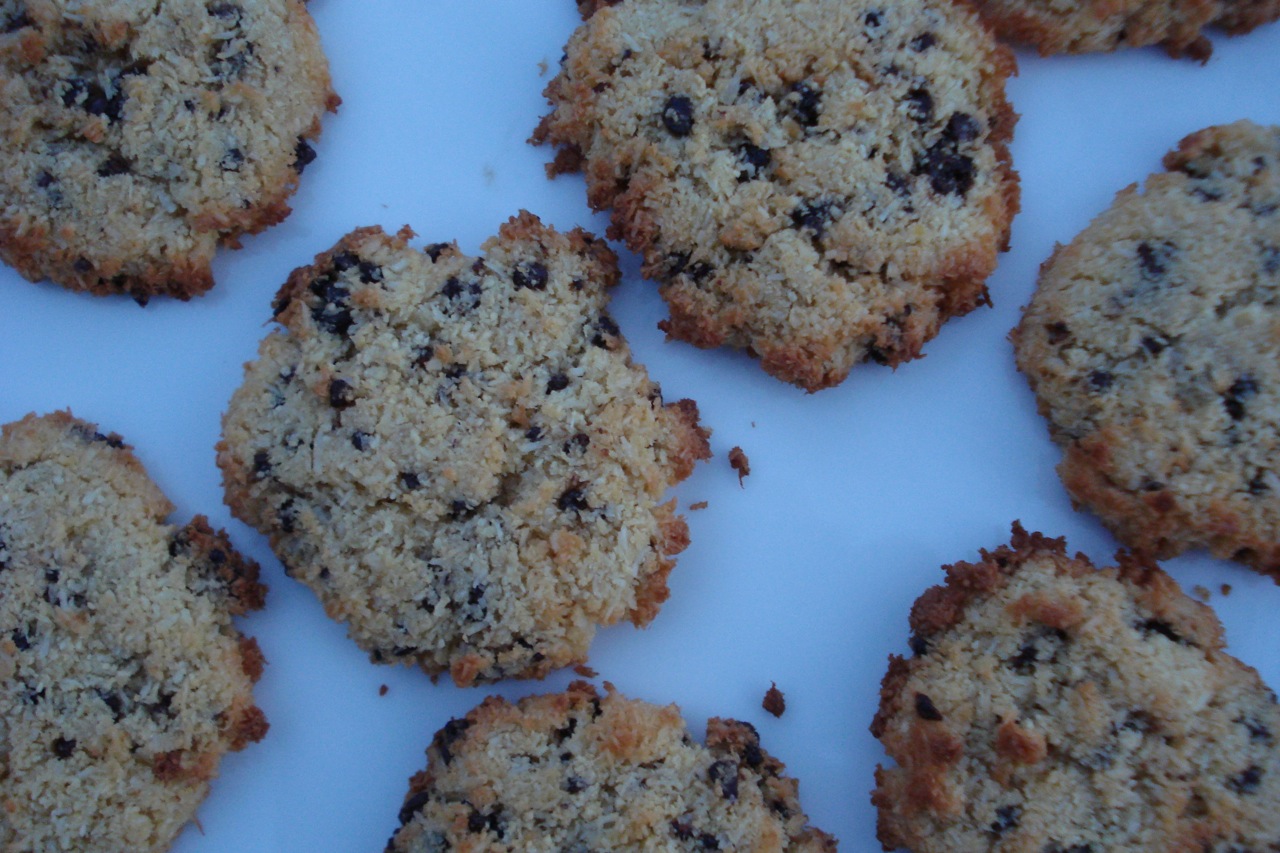
Chocolate Chip Coconut Cookies
What recipe blog would be complete without a rendition of the good old, chocolate chip cookie? With this version, adapted from “Cooking with Coconut Flour”, (cliché as it is) you can have your cookie & eat it too. It’s sort of a cross between a chocolate chip cookie & a macaroon.
______________________________________________________________________________________
1/2 cup butter, melted (or ghee or coconut oil)
1 cup natural sugar
4 eggs
1/2 tsp pure vanilla extract
1/8 tsp pure salt
1 & 1/2 cups shredded coconut (unsweetened)
3/4 cup chocolate chips (or nibs – see notes)
1 cup coconut flour, sifted
- Mix together butter, sugar, eggs, vanilla & salt.
- Stir in remaining 3 ingredients.
- Drop batter in spoon-size mounds, about 1-inch apart, on a greased (or parchment paper covered) cookie sheet.
- Bake at 375 for 14 minutes (more or less – depending on how soft or crispy you like them).
- Let cool for a few minutes, then remove from cookie sheet.
Yields 24 – 36 cookies, depending on how big you make them.
______________________________________________________________________________________
SIDE NOTES:
~ A cookie can become somewhat of a superfood using high quality ingredients such as organic butter from grass-fed cows, eggs from local free range chickens, pure salt, coconut (loaded with fiber), real chocolate, and natural sugar. Let’s face it…The world is not going to stop eating cookies any time soon. So, for those who are interested, this is what I would consider a very good alternative to the white flour variety
~ Maple sugar works well in this recipe. I first tried using date sugar but was not satisfied w/ the results (decent cookie, but texture & color were a bit off). I use date sugar a lot for baking, but for this recipe, using maple sugar made the cookies tastier & more “normal” looking. Coconut sugar is another good option. You can experiment a bit & see what type of sweetener works best for you. If you prefer to use regular sugar, I’d go for brown sugar over white, as it will give you a better cookie).
~ Keep in mind…. If you’re not into coconut, these are not your cookies.
Dairy Free, Gluten Free, Egg Free, Nut Free, Sugar Free, Grain Free, Vegan, Raw
If eating dairy free, use coconut oil instead of butter. If eating gluten free, be careful choosing your vanilla and chocolate chips.
~ What are cacao nibs? Pronounced ka-COW, they’re partially ground cacao beans (the source of all chocolate products). If using them to replace chocolate chips in a recipe, use less than what’s called for. I usually just eyeball it when adding, but probably use about half of what’s called for (since nibs are so small, 3/4 cup would end up being way too much chocolate for these cookies). For me, Navitas Naturals sweetened nibs (dairy & gluten free) always work extremely well to replace chocolate chips (they’re sweetened with organic cane juice). Navitas makes an unsweetened version which are good for certain purposes, but not when replacing chocolate chips. Why do I go out of my way to use them? They’re real, unprocessed chocolate that taste amazing and are loaded with antioxidants, magnesium & iron. Put that in your cookie & eat it =)
Easy Vegetarian “Meatballs”
8 oz tempeh (one package)
2 TBSP extra virgin olive oil
2 TBSP tamari/soy sauce
- Whisk together oil & soy sauce in a medium bowl.
- Slice tempeh into small rectangles & toss with marinade.
- Let sit for 1 hour (or less if you’re in a rush).
- Pre-heat oven to 350.
- Place tempeh on a cookie sheet (I like to line w/ parchment paper) and bake 10 – 15 mins.
______________________________________________________________________________________
SIDE NOTES:
~ This is the same exact recipe as “Easy Marinated/Baked Tempeh”. I hate to be redundant, but thought I’d list it again, with a second title, as someone looking for a veggie meatball could easily miss it.
~ In my early vegetarian days, I used frozen soy “meatballs” with pasta dishes. When I started getting more into cooking, I began making my own vegetarian meatballs using tofu. If you freeze tofu, it becomes the perfect texture to crumble & form into meatballs (mixed with seasonings/cheese/eggs…). At some point, however, I decided making my own vegetarian meatballs was annoying. That’s when I came up with this simple recipe! Add additional seasonings as you see fit.
~ This was actually posted a long time ago on the QUICK-TOMATO-SAUCE page. I just realized it was hidden there & thought I’d give it its own space so people who are looking for an easy way to use tempeh can find it. As mentioned, it’s great tossed with pasta & marinara sauce (ZUCCHINI-MARINARA pictured above), or simply on its own with rice, vegetable, and/or salad. Of course, you can cut the tempeh into larger patties (like THIS) if you’re not mixing it into a pasta dish or casserole.
Dairy Free, Gluten Free, Egg Free, Nut Free, Sugar Free, Grain Free, Vegan, Raw
If eating gluten free, be sure to use a gluten free soy sauce and “soy” tempeh (not “3 grain” “flax” or “veggie”).


