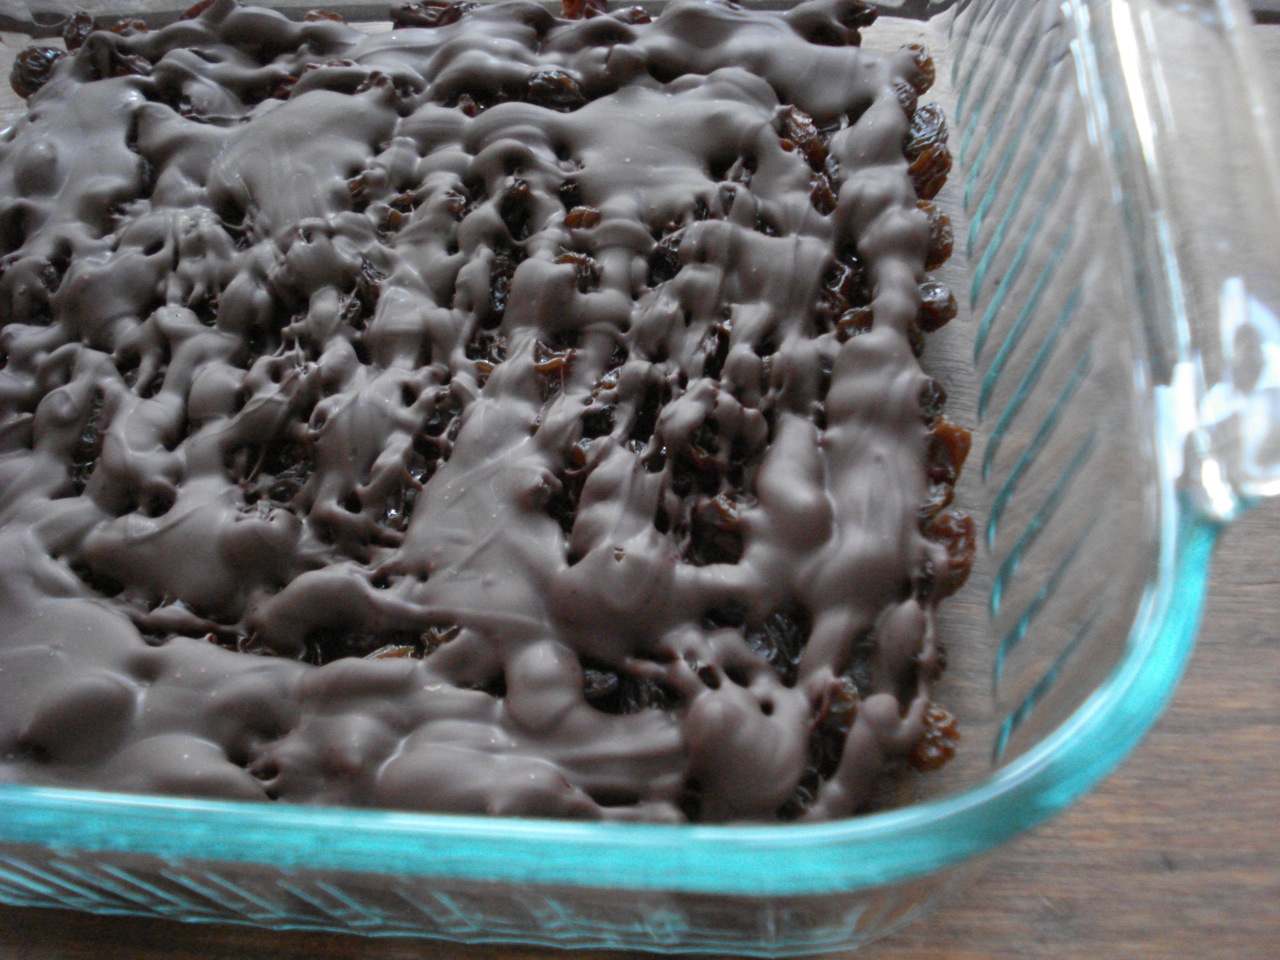
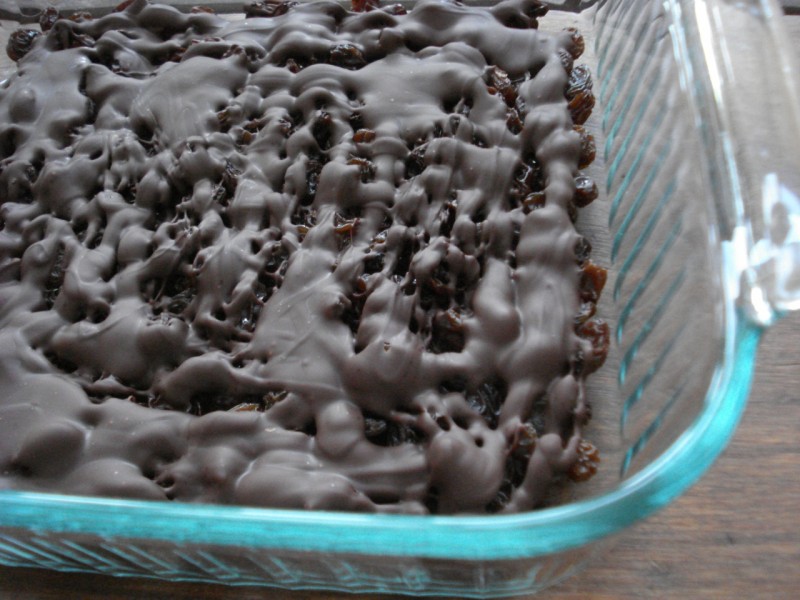
Rum and Raisin Rock
1 cup raisins
2 TBSPs white rum
8 oz dark, semi-sweet chocolate
- Spread raisins out in an 8 x 8 baking dish and sprinkle with rum (toss to mix well, then spread them out again to reach all sides of pan).
- Cover and set aside for 15 minutes to soak.
- Melt chocolate using a double boiler (or substitute – see below) and drizzle over raisins.
- Allow time to set, then simply use the edge of a spoon to roughly chop into bite sized pieces.
_____________________________________________________________________
SIDE NOTES:
~ This is good my friends =)
~ Think raisins with some chocolate (not the other way around).
~ The first time I made this, I used a small bowl to soak the raisins in rum (as the author suggested), but found the rum was not evenly dispersed (even though I tossed as well as I could). There were a few bites that were REALLY rummy, and the rest were delicious, but without even a hint of rum. You will definitely have more control over the rum dispersement if you lay the raisins in a single layer and slowly sprinkle the rum. Give it a toss or two, then spread the raisins in a single layer again and cover until you’re ready to drizzle the melted chocolate.
~ You don’t need an “official” double boiler to do this. I don’t have one myself. I just put a small pot with water in it on the bottom (bring water to boil), and carefully sit a larger pot on top with the chocolate. Of course, you don’t want it to fall over so be sure the pot on top is secure (with a real double boiler, the 2 pots would fit together very snuggly without any chance of tipping).
~ Adapted from “Earthly Delights” (original recipe called for 1 TBSP of rum. I doubled it, because… come on… if we’re doing this, we’re doing this – right!!?? 😉 )
Enjoy!
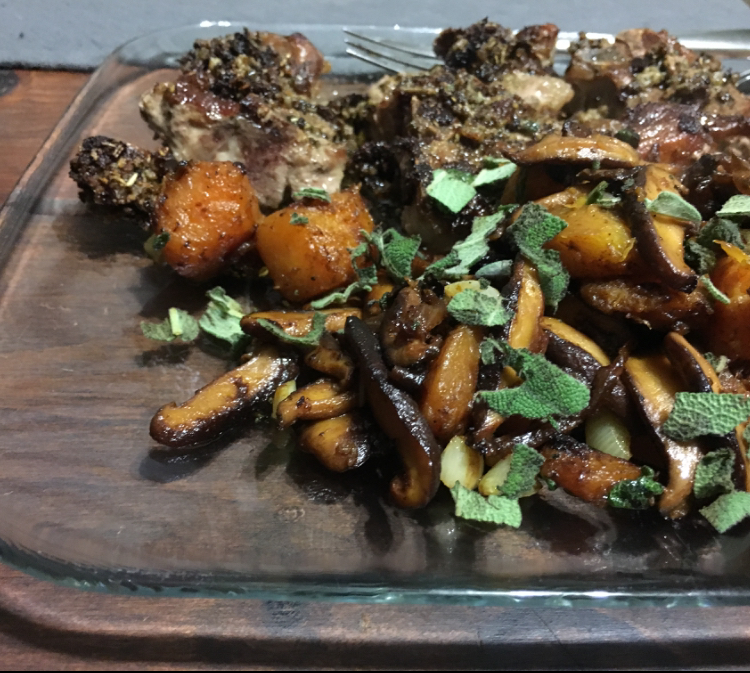
Mushroom, Onion, Garlic, Squash Saute
1 head garlic, chopped (or however much you’d like)
1 large onion, sliced
20 oz cubed butternut squash
7 oz mushrooms, sliced (I use shiitake)
Butter
Salt
Pepper
Fresh sage
- In large skillet, saute chopped garlic in butter until beginning to brown. Remove garlic from skillet with a slotted spoon.
- Add onion and saute until beginning to soften and brown (add additional butter throughout cooking process as needed).
- Add cubed squash and continue sautéing until squash softens and browns.
- Add sliced mushrooms and saute until reduced and cooked through.
- Add salt / pepper to taste, the garlic that was set aside, and half of the fresh sage – toss to coat.
- Garnish with remaining fresh sage.
________________________________________________________________________________________
SIDE NOTES:
- This side dish was born out of pure laziness – because I can get pre-peeled / pre-chopped organic butternut squash, and pre-sliced organic mushrooms. So it’s basically just chopping the garlic, onion & sage (I spend A LOT of time chopping, so whenever I can get a break, I take it – ha).
- Have been making it periodically for the past 6 months and it’s become one of our favorite side dishes. Sooooo good!
- Tonight, made it with mustard / garlic / rosemary lamb chops for a special occasion <3
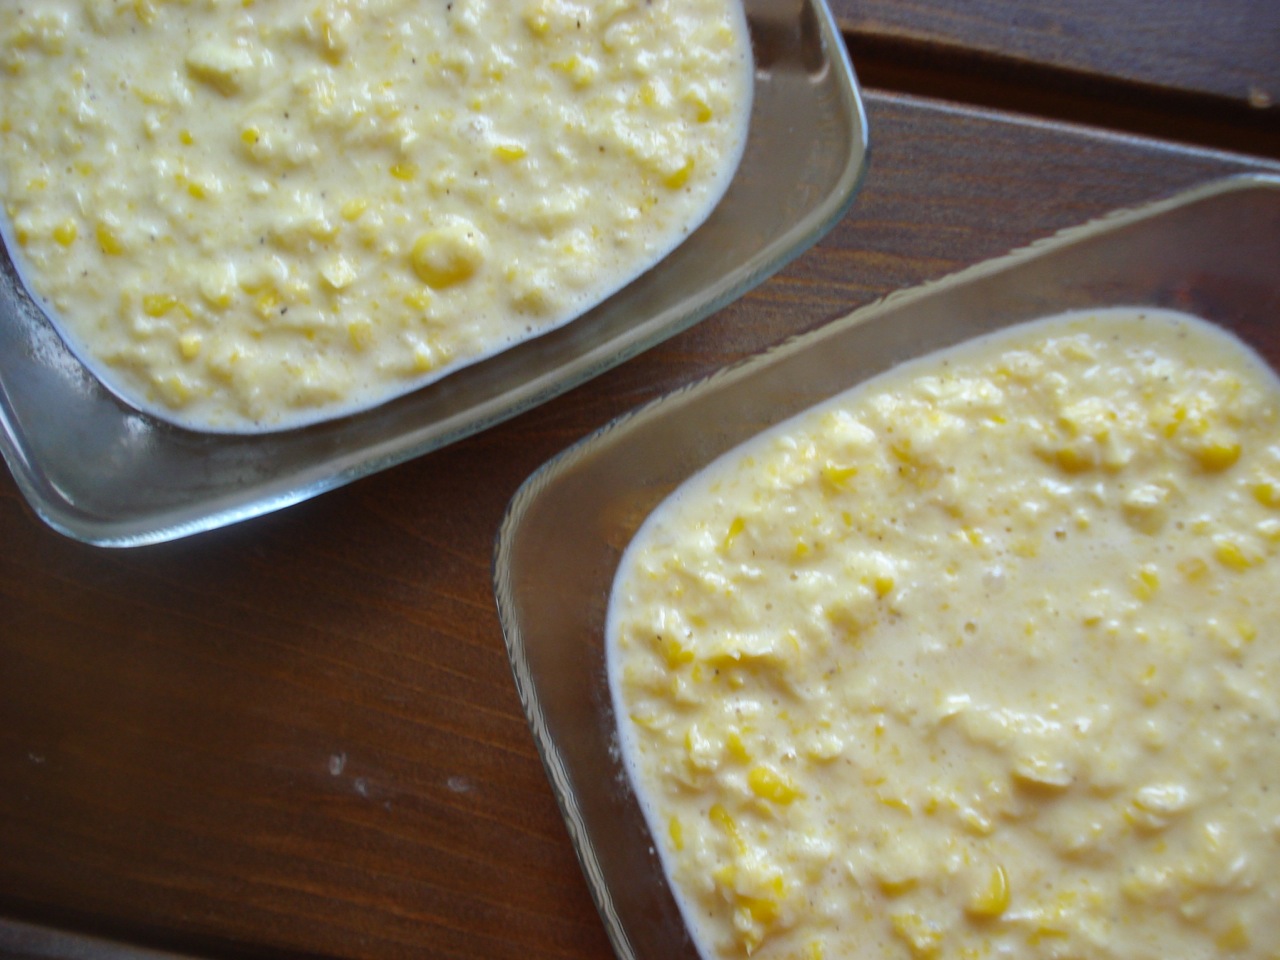
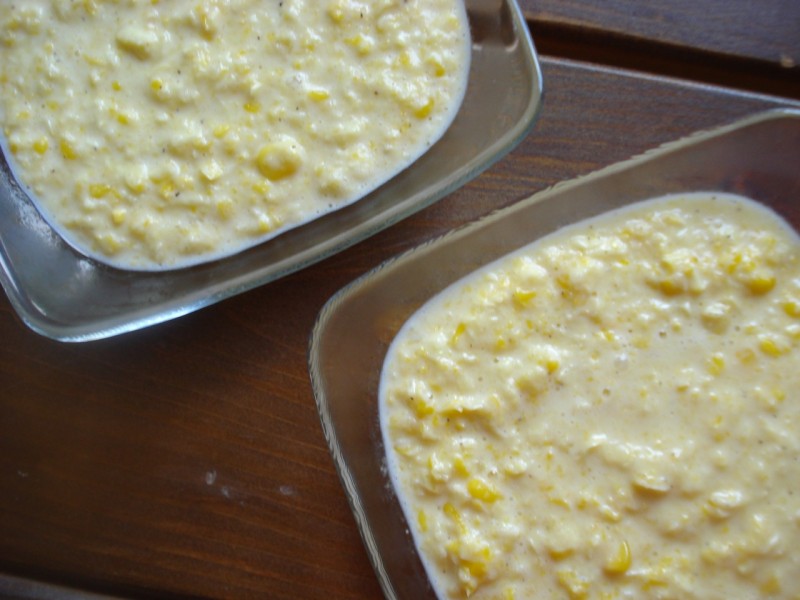
Creamed Corn
20 oz frozen corn kernels, thawed
2 cups whole milk
1 tsp pure salt
2 TBSP natural sugar
rounded 1/4 tsp black pepper
2 TBSP real butter
1/4 cup freshly grated parmesan cheese.
- Bring everything (except cheese) to a boil in a 2 qt saucepan.
- Reduce to a simmer & cook for 10 minutes, stirring occasionally so the bottom doesn’t burn.
- Add cheese.
- Blend with an immersion blender to desired consistency (or transfer to traditional blender and give it a few quick pulses).
_____________________________________________________________________________________________________
Notes:
~ So easy. So yummy. Way better than the ready-made / canned version! 🙂
~ You can replace 1 cup of the milk with heavy cream or half & half if you happen to have some on hand and want it extra creamy (though I typically just stick with whole milk & it’s great).
~ An immersion (stick) blender is a GREAT kitchen tool. I used to hate pureeing soups & stuff like that…. slopping everything back & forth to the blender in batches, making a mess. You can stick an immersion blender right into your pot, and within a few seconds, the job is done. They’re about 30-ish bucks. You don’t want this corn dish pureed – just give it a few quick pulses so it stays chunky.
Enjoy!
Marinated Antipasto Salad
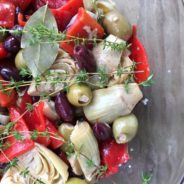
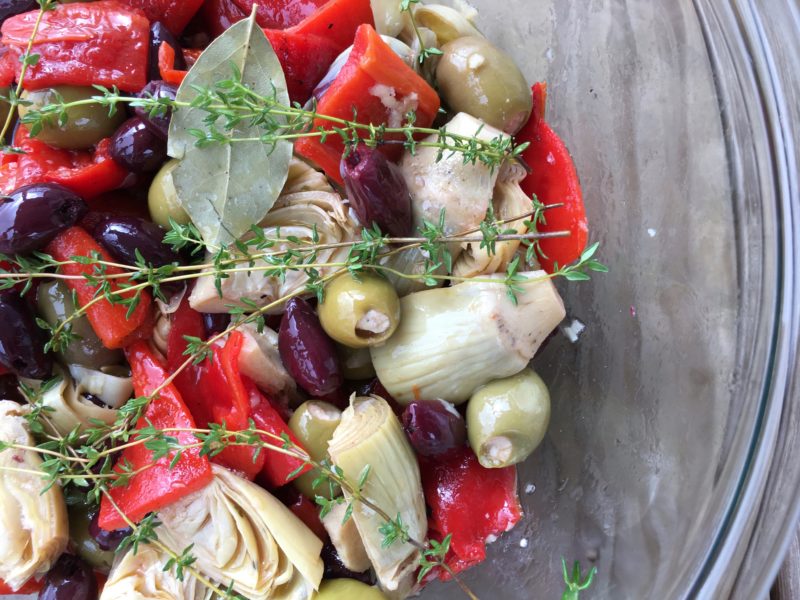
2 lbs assorted antipasto vegetables (kalamata olives, green olives, artichoke hearts, and roasted red peppers – everything drained)
1/2 cup extra virgin olive oil
1/4 cup red wine vinegar
8 cloves garlic, crushed
9 sprigs of fresh thyme or 1 tsp dried thyme
4 bay leaves
- Toss everything together in a large bowl and cover
- You can serve this immediately, but it’s best marinated for at least a few hours or overnight (in the fridge)
- As it marinates, be sure to toss every once in a while
- Before serving, remove the bay leaves (and thyme sprigs if using)
__________________________________________________________________
SIDE NOTES:
~ We like this salad over salami and provolone cheese (I’m able to get organic, uncured salami at my local health-food store). If you’d like to do bread with this, a good, crusty loaf of semolina will do the trick.
~ Antipasto is a regular part of our family celebrations (Christmas, for sure) – served as an appetizer. We used to simply lay everything out dry – in a pretty configuration on a large, oval platter – and each person drizzled as much oil and vinegar over their portion as they wanted…very simple, very good! But several years ago, my mom started marinating the vegetables overnight, and we think it’s pretty amazing (thanks Mom!) 🙂
~ Of course, the ratios don’t have to be exact, but to give you an idea of what it takes to get to 2 lbs — I use one 7-oz jar of kalamata olives, one 12.9-oz jar of green olives (stuffed with feta cheese!), one 14.5-oz jar of artichokes, and one 16.2-oz jar of roasted red peppers.
Enjoy! 🙂
Ricotta Honey Cheesecake


12 oz whole milk ricotta
16 oz mascarpone cream cheese @ room temp
3/4 cup natural sugar
1/4 cup honey
1 TBSP lemon or orange zest
4 large eggs
- Place two 9 x 11 Pyrex dishes filled with water on the bottom rack.
- Preheat the oven to 350 degrees.
- Grease a 9-inch springform pan with butter or coconut oil and set aside.
- Blend the ricotta in a food processor (with S blade) until smooth.
- Add the cream cheese and sugar and blend well, stopping the machine occasionally to scrape down the sides.
- Blend in the honey and zest.
- Add the eggs and pulse until just blended.
- Pour the cheese mixture into the pan, reduce the oven temp to 325, and place pan on middle rack in oven (leave the water filled Pyrex dishes in the oven underneath it as the cake bakes).
- Bake for 1 hour, then without opening the oven door, turn the heat off but leave the cake in the oven for 15 minutes longer.
- Remove cake from oven and let cool for at least 1 hour before releasing cake from pan and refrigerating.
- Refrigerate for a minimum of 8 hours before serving.
- Garnish with your choice of fresh fruit if desired.
_____________________________________________________________________
SIDE NOTES:
~ This is not your average American-style cheesecake. It’s more of a traditional Italian cheesecake with a lighter texture and more delicate flavors. It’s super easy to prepare and personally, I like it better than my other cheesecake recipe.
~ When you’re picking up the cream cheese, you’ll likely need to pick up 2 containers (as the 8 oz size is most common). You can find mascarpone (Italian cream cheese) at the grocery store near the fresh mozzarella, and other hunk style cheeses (usually by the deli section).
~ I recommend using an organic lemon or orange for the zest. From what I understand, chemicals soak into the rind of citrus fruits and you can’t really wash them off. For those new to zesting… well, first – you’ll need a zester 🙂 [$10]. Use the tool to shave off the outer layer of citrus fruit skin. Only shave the brightly colored (yellow/orange) portion. Once you start to see white, move to a different section of the skin.
~ The water filled Pyrex dishes will prevent the cake from cracking! 🙂
~ FYI — I line the bottom of the spring-form pan with parchment paper, but this is optional.
~ It’s delicious with fresh raspberries, but just as good plain with a cup of tea or coffee.
Enjoy! =)

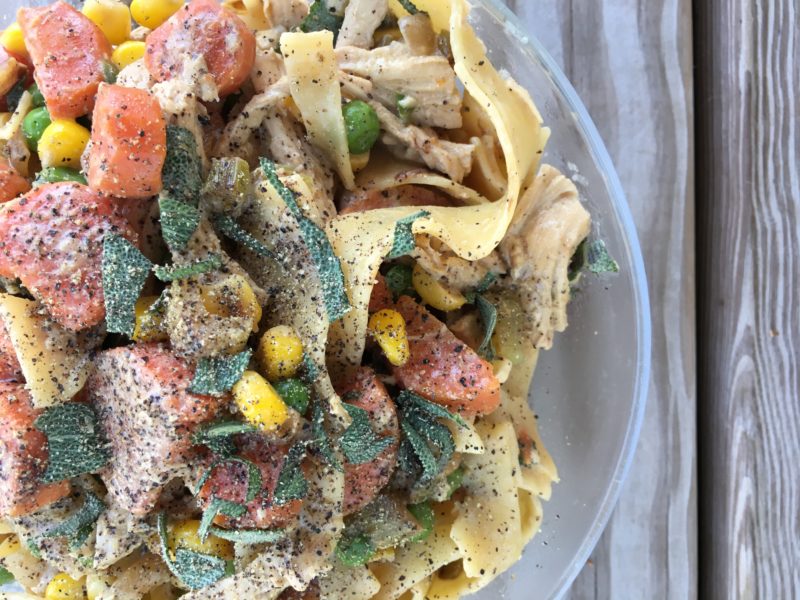
Chicken Pot Pie [minus the pie] Casserole
![Chicken Pot Pie [minus the pie] Casserole](https://realfoodtastesgood.com/wp-content/uploads/2018/09/IMG_9320-e1537226108145-184x184.jpg)
2 TBSP real butter
1 large onion, chopped
4 carrots, chopped
4 celery stalks, chopped
1 jalapeno, chopped (optional)
Whole head of garlic, peeled & crushed [insert rock-n-roll hand sign here]
1 cup broth
1 cup whole milk or half & half or cream
Salt & freshly ground pepper to taste
Heaping 1/2 cup frozen corn
Heaping 1/2 cup frozen peas
2 boneless / skinless chicken breasts, cooked & shredded
8 to 10 ounces wide, egg noodles, cooked according to package directions
LOTS of fresh sage (optional)
- Heat butter in a large saute pan (I used a 5 qt pan) over medium heat, and saute onion until soft and starting to brown
- Add carrots and celery and saute another 5-10 minutes until vegetables are softened & slightly browned
- Add jalapeno and saute 2-5 minutes longer
- Crush garlic into pan and saute for just a minute or 2 longer (stir it a lot at this point because crushed garlic can burn fast if you don’t)
- Add broth, half & half, sprinkle with salt and pepper to taste, and bring to a boil
- Once boiling, reduce heat to a simmer and cook for 5 minutes
- Add corn, peas, pre-cooked/shredded chicken, and cooked noodles
- Stir in lots of chopped, fresh sage if using (can save some for garnish) and adjust salt/pepper to taste (I kind of smothered mine with pepper!)
_________________________________________________________________________
SIDE NOTES:
~ I don’t know about you guys, but to me, anything with those big, wide noodles is comfort food <3 I almost referred to this [in my mind] as a one-pot meal, but when I got up to do the dishes, I was reminded it wasn’t LOL. I do tend to love these casserole type meals where everything is mixed together. But this one does not have the added bonus of 1-pot clean up. Anyway…..
~ I’ve been throwing a jalapeno into EVERYTHING because we have a lot of them in the garden and we like the heat – but it’s in no way integral to the meal. [Though… if you like spicy – it DID add a nice, little kick!]
~ In recent years, any time I see a recipe that calls for 1 or 2 cloves of garlic, I think to myself… Ha ha ha, that’s funny [including my own – I wasn’t always so bold!]. But feel free to tone it down if you’re not a garlic freak like me!
~ If you’d like to try making old-fashioned bone broth, here’s a link to that recipe BONE BROTH. And actually, organic bone broth is now available at grocery stores – which I happily take advantage of when I don’t have any homemade on hand (I like to make BIG batches and freeze). Of course, you can use any type of broth you like, including vegetable broth.
~ If you think of it, let the corn & peas sit out at room temp for an hour or so (take out of freezer before beginning to prep everything else). But if you forget – you can toss them in frozen and just let the casserole simmer a couple extra minutes.
~ You can omit the noodles entirely, or use a gluten-free variety. I’d bet it would also taste great substituting rice. Similarly, you can omit the meat (maybe fry up some tempeh to throw in?) and use veggie broth if that’s how you roll. Make it vegan by omitting the milk. Use your imagination and tailor it to your own preferences!
~ The fresh sage is soooooooooo good in this dish – really pushes the flavor over-the-top, but again, not integral to the meal.
Enjoy! 🙂
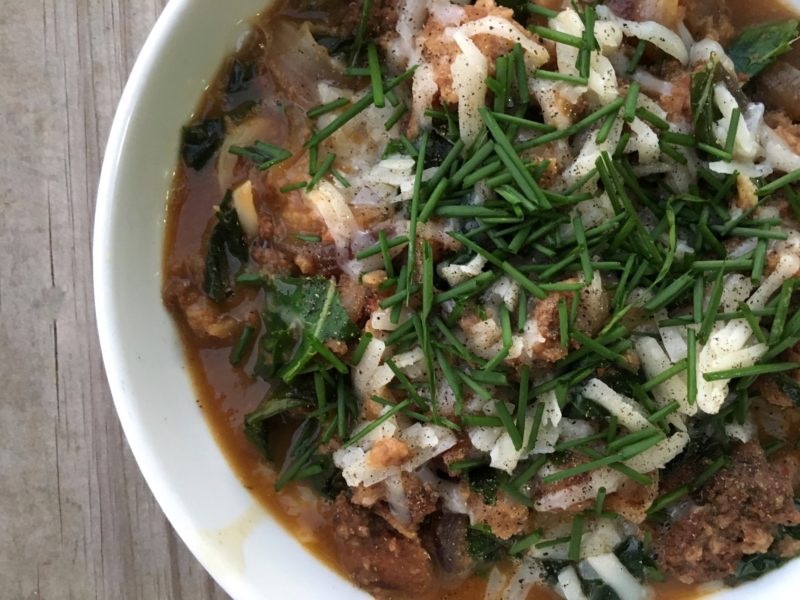
Garlic & Bread Soup w/ Chorizo & Kale

2 TBSP coconut oil (or butter)
2 large onions, thinly sliced
1 jalapeno, chopped (optional)
12 cloves garlic, thinly sliced
1 lb chorizo sausage, crumbled
1 bunch kale (about 12 large leaves), stems removed and torn into pieces
4 cups high-quality, sour-dough bread toasted & broken into small chunks (optional)
4 cups chicken (or vegetable) broth
1/2 tsp pure salt
freshly ground black pepper to taste
shredded cheese (optional) (I like swiss on this!)
chopped chives or scallions for garnish (optional)
- Melt coconut oil in a large stock pot and saute onion over medium heat until lightly browned
- Add jalapeno and saute a few minutes longer
- Add sliced garlic and continue sauteing a few more minutes
- Add torn-up bread and mix until well combined
- Remove contents from pan into a bowl with slotted spoon and set aside
- Add chorizo into the same pan (breaking up with a wooden spoon as it browns)
- Once meat is browned, add kale and saute a few minutes longer
- Return onion/bread mixture to pan with meat & kale and toss to combine
- Add 4 cups broth, salt and pepper, and bring to a boil
- Spoon into individual bowls and top with fresh, shredded cheese and chives (if using)
_________________________________________________________________________
Side Notes:
~ If using jalapeno – you can include the seeds or not – depending on how spicy you like it. Chorizo already has a bit of a kick to it, so don’t overdo it if you like it mild or are serving kids!
~ I just kind of made this one up. Everything is optional. Make it vegetarian by omitting the meat. Make it vegan by omitting the cheese. Make it gluten free by omitting the bread (or using GF bread). It’s almost like french onion soup – but better!!!
~ It’s really thick & hearty. Double the broth (8 cups) if you want it soup-ier.
Enjoy 🙂
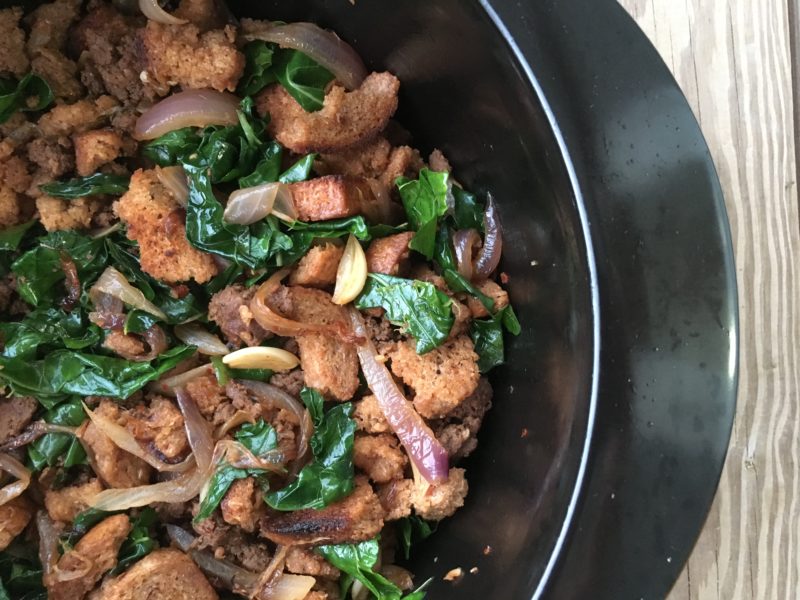
Before it got juicy:
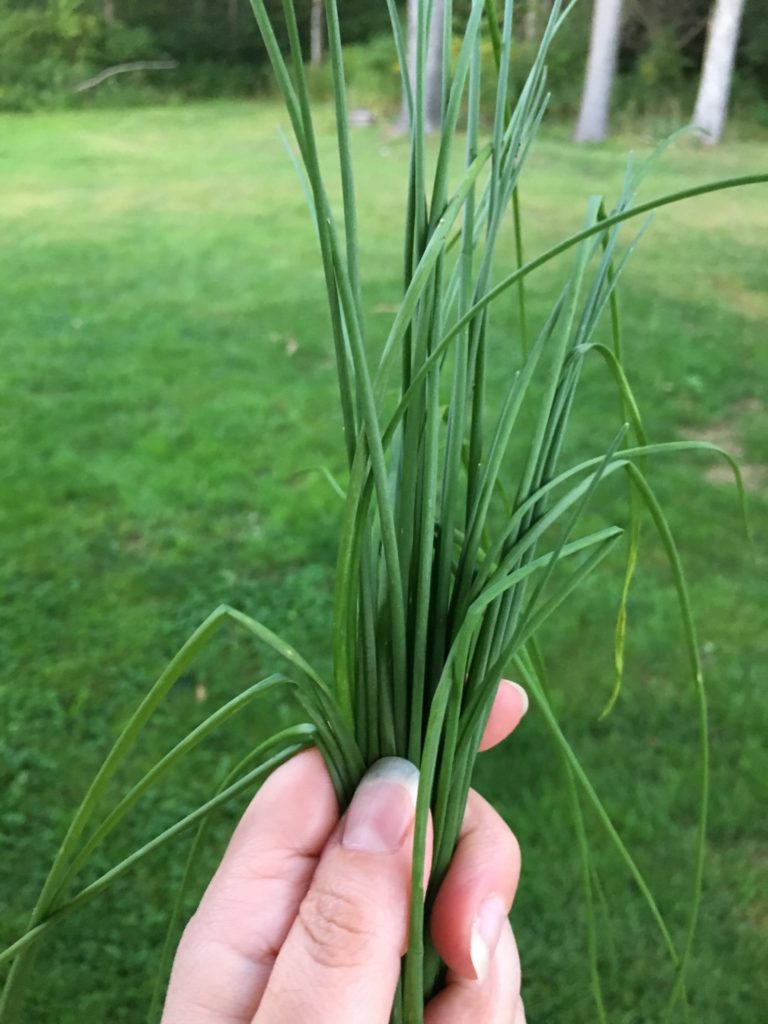
Chives, jalapeno & kale from the garden <3
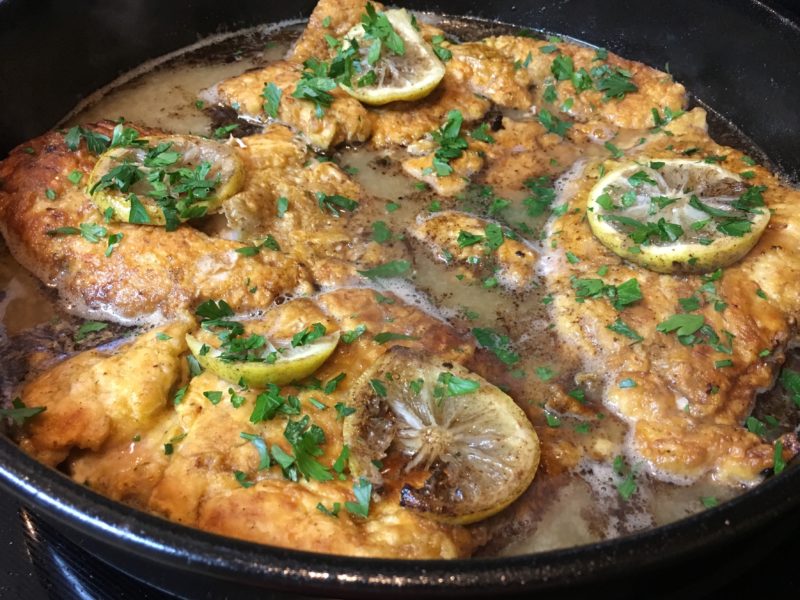
Chicken Francese

4 skinless, boneless, chicken breasts
Unbleached flour, for dredging
Salt & freshly ground black pepper
3 eggs
3 TBSP water (or milk if you prefer)
(real) Butter for frying
1 lemon, with rind, cut into thin rounds
½ cup dry white wine
1 cup chicken broth
½ of a lemon, juiced (about 2 TBSP)
More butter (optional)
¼ cup chopped parsley
- Place chicken on cutting board, cover with wrap or paper (I use unbleached parchment paper) and pound with a flat meat mallet until each are about ¼-inch thick
- Season chicken on both sides with salt and pepper
- Put some flour in a wide, shallow bowl
- In a separate wide bowl, beat eggs with the water or milk to make an egg wash
- Heat butter over medium heat in a large skillet
- Dredge both sides of the chicken in flour, then dip directly into egg wash to coat completely and let excess egg drip off (optionally, you can dip them back into the flour a second time after the egg wash to get a thicker coating)
- Wait until the butter is hot, then add the cutlets and fry on both sides until golden brown
- Remove chicken from skillet and set aside on a plate
- Toss lemon slices into the pan and cook for 1-2 minutes until fragrant.
- Add wine, broth, lemon juice, and simmer for 5 minutes to slightly reduce the sauce
- Optional – Roll 2 TBSP butter into flour and add it to the skillet (this will thicken the sauce) – stir to dissolve flour
- Reduce heat to medium-low and return chicken to pan – place lemon slices on top of the cutlets and spoon some sauce over each of them
- Simmer for a few minutes until chicken in heated through
- Season with salt & pepper and garnish with parsley
- Fist bump yourself (and/or your dining companion if applicable) and eat
_____________________________________________________________________________________________________
Side Notes:
- A chardonnay works well for the wine.
- No need to shy away from this dish if you’re gluten free…use any kind of flour you’d like. I’m not 100% gluten free, but I don’t eat too much of it. And in general, I don’t gravitate toward products made with flour. In the old days, I would have simply browned the chicken in butter (without the flour coating) and carried on. In the new days… whatevs. Enjoy!
- (It’s been a long hiatus for me…. But I’m back and will be posting recipes as time allows – I’ve got lots of new ones in rotation!)
Adapted from https://www.foodnetwork.com/recipes/tyler-florence/chicken-francese-recipe-1951951
Sweet Potato Mash
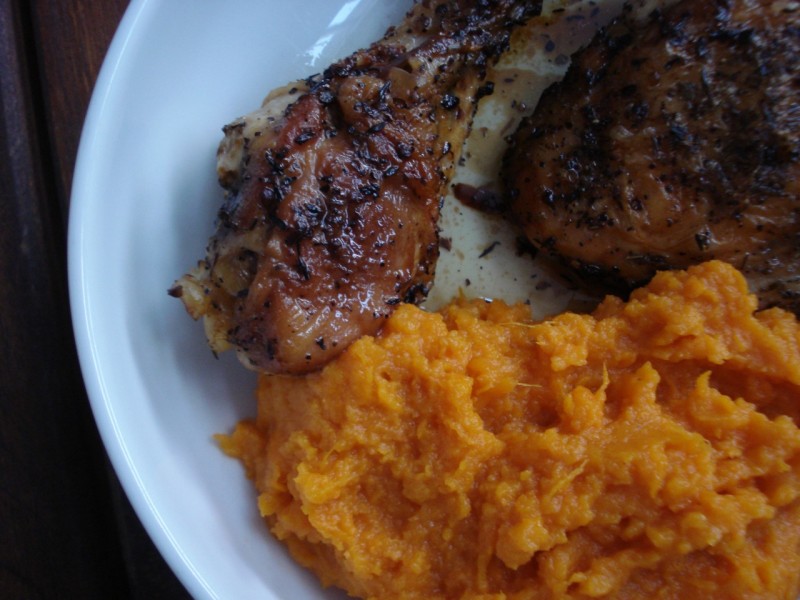
about 3 pounds sweet potatoes
1/4 cup whole milk or cream
2 TBSPs butter
2 TBSPs pure maple syrup
1/4 tsp pure salt
sprinkle of cinnamon (to taste)
- Bake the potatoes as you would if you were making baked potatoes (wash, prick with fork, and bake for 45 – 60 minutes at 400 degrees).
- When done, remove from oven and let cool off enough to handle.
- Meanwhile, add the remaining ingredients to a bowl large enough to eventually hold the potatoes.
- Peel off and discard the potato skin (simply pull it off with your fingers – it will be a little “baggy” after the potatoes have cooled so this will be easy).
- Add sweet potato flesh to the bowl holding the remaining ingredients and mash with a potato masher until well combined.
Serves 4 to 6.
SIDE NOTES:
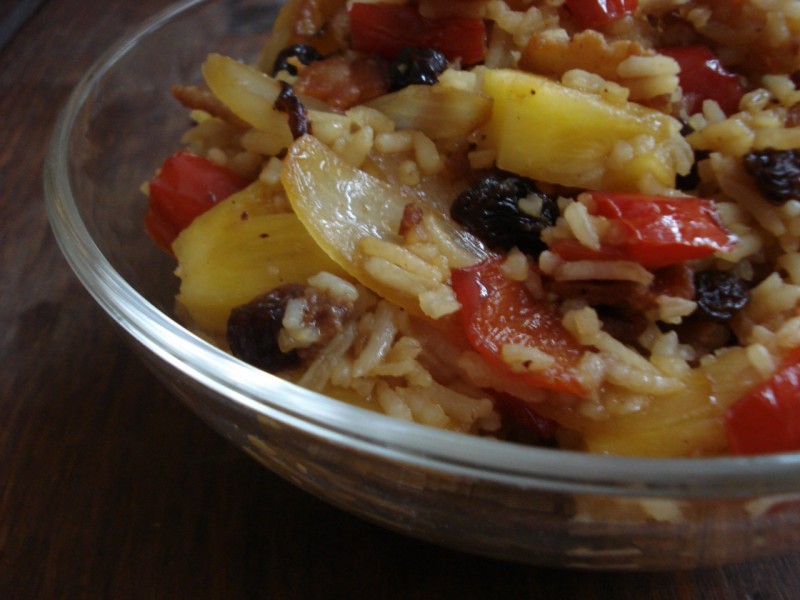
Hawaiian Fried Rice

1 lb chorizo, casing removed (optional)
1 medium onion, chopped
1 bell pepper, diced (about 1 cup)
1 large clove garlic, minced or crushed
1 TBSP coconut oil (not necessary to add oil if you’re using a meat product)
2 TBSP tamari
2 cups uncooked rice (cooked and then cooled if possible)
2 cans (14 ounces each) pineapple chunks
1/4 cup (about 2 oz) raisins
4 eggs, scrambled in a separate pan (can omit if including meat)
- Cook rice ahead of time (if possible) and let cool to room temp (or can refrigerate).
- In large saute pan (5 qt works well) on medium heat, saute the chorizo until cooked through (simply crumble the chorizo with the edge of a wooden spoon to break apart as sauteing).
- Remove meat from pan with a slotted spoon and set aside.
- In the same pan, saute the onions and peppers until lightly browned (use coconut oil if you have not used a meat product).
- Add the crushed garlic and cook a few minutes longer.
- Add the tamari, cooked rice, pineapple (with all its juice), raisins, and cooked meat if using.
- Mix thoroughly and cook for 6-8 mins or until all ingredients are heated throughout.
- If including egg…In a separate pan, scramble the egg, roughly chop, and add to rice mixture.
Serves 6.
_____________________________________________________________________
SIDE NOTES:
~ Chorizo is a delicious, spicy sausage. It’s most typically made of pork, but one of my local farms offers goat chorizo which is what I use.
~ We absolutely love this dish. It’s been in regular rotation for quite a while now. The chorizo adds a really nice kick which is a good contrast from the sweet pineapple & raisins.
~ You can easily substitute a high quality (nitrate-free) bacon for the chorizo. The dish will lose it’s spiciness, but for many, the flavor of bacon makes up for it enough =)
~ You can use freshly cooked (hot) rice if you need to. Sometimes that’s the way it works out for me if I forget to start it ahead of time. The reason cold or room temp rice works better is because it’s not as starchy/sticky after it’s cooled. But you won’t ruin the meal if using hot rice.
~ I use either egg or meat (depending on what I have on hand), but you can include both if you’d like. The dish will be more kid friendly using bacon and/or egg (unless your kids like spicy in which case the chorizo will hit the spot quite nicely!).
~ I’ve been on a chorizo kick the past year so will post more recipes on ways to use it moving forward…
~ If eating vegan (which as a nutritionist, I don’t recommend), omit both the meat and egg and substitute a suitable protein.
Enjoy! =)