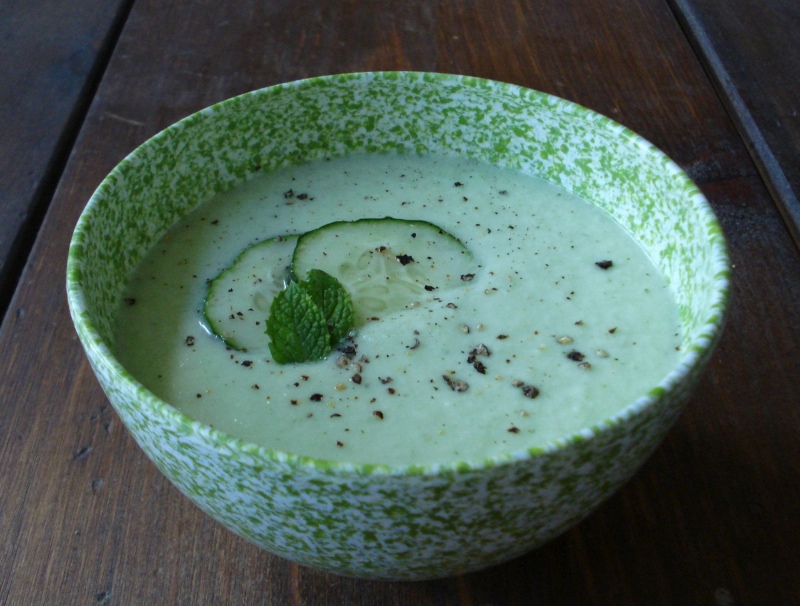
Cool Cucumber Mint Soup
3 large cukes (about 1 & 1/2 pounds), peeled
1 cup plain whole-milk yogurt
1 & 1/2 TBSP extra virgin olive oil
2 tsps red wine vinegar
1 TBSP chopped fresh mint
1 garlic clove, peeled
1 tsp pure salt
freshly ground black pepper
- Halve the cukes lengthwise.
- Scoop out their seeds with a spoon & discard.
- Coarsely chop the cucumber & transfer to a blender.
- Add the yogurt, olive oil, vinegar, mint, garlic, salt & blend until smooth.
- Season with a little black pepper.
- Chill in refrigerator until ready to serve.
______________________________________________________________________________________
SIDE NOTES:
~ Adapted from “Fresh Food Fast.” Great summertime soup. And more filling than you’d think. My daughter doesn’t like eating cucumbers, but for some reason loves this soup.
~ The recipe calls for 1 & 1/2 tsps salt, but we found it too salty the first time we made it.
~ This soup is cool & refreshing without chilling it (personally, I don’t like to eat or drink things that are ice cold). If you want it very cold, put it in the fridge for an hour or 2, or you can just throw in a few ice cubes as you’re blending.
Dairy Free, Gluten Free, Egg Free, Nut Free, Sugar Free, Grain Free, Vegan, Raw
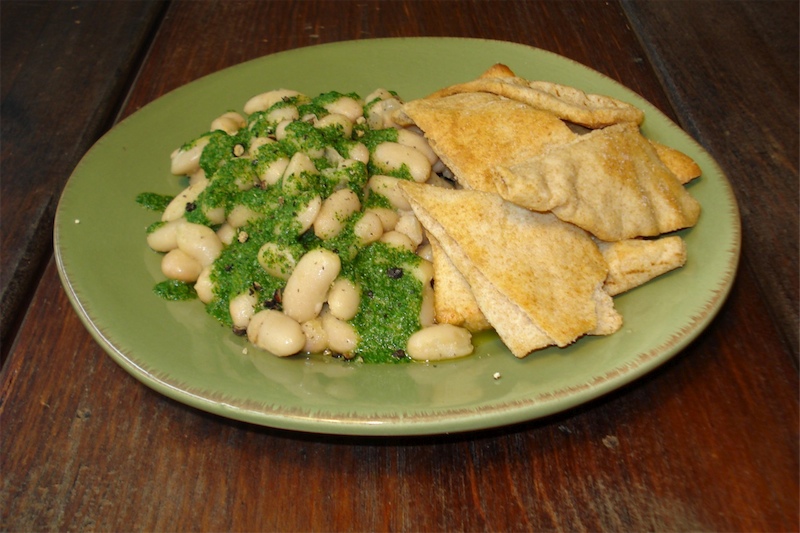
Spicy White Beans w/ Parsley Pesto
For the beans:
2 (15-ounce) cans cannellini beans
3 TBSP extra virgin olive oil
1/4 cup minced onions
1 & 1/2 tsps minced garlic
4 tsps lemon juice
1/4 tsp pure salt
1/4 tsp ground black pepper
Pinch cayenne
1/3 cup very finely grated Parmesan, or crumbled goat cheese (optional)
bread, cracker, or chip of choice for scooping
- Rinse beans & drain.
- Heat oil in a large skillet over medium heat.
- Add the onions and garlic and cook until soft and fragrant, about 2 minutes.
- Add the beans, lemon juice, salt, black pepper & cayenne, and cook, stirring, until softened and warmed through, about 3 minutes.
- You can either transfer the beans to one large serving bowl, or split up into individual serving bowls.
- Sprinkle with cheese if using.
For the parsley pesto:
1 & 1/2 cup fresh parsley leaves
1 & 1/2 tsps minced garlic
2 tsps lemon juice
1/4 tsp pure salt
1/4 cup extra virgin olive oil
- In a blender or small food processor, combine the parsley, garlic, lemon juice, salt.
- Add the oil (with the motor running if possible) and process until smooth.
- Drizzle pesto over the beans, add some fresh black pepper if you’d like, and serve with bread or chips for dipping.
______________________________________________________________________________________
SIDE NOTES:
~ Serves 2 adults for lunch, or more if using as an appetizer or snack.
~ You can use cannelinis & great northern beans interchangeably.
~ My small food processor doesn’t allow adding ingredients while motor is running, so don’t worry about that if yours doesn’t either, just pour it in & continue blending. (It’s not worth dirtying the big food processor unless you’re doubling the recipe.)
~ We eat this cheeseless & it’s AMAZING, so don’t think twice about skipping it. You can always sprinkle some on top if you decide you want it after tasting.
Dairy Free, Gluten Free, Egg Free, Nut Free, Sugar Free, Vegan, Grain Free, RawIf eating dairy free, omit the cheese. Can use gluten free crackers/chips/bread.
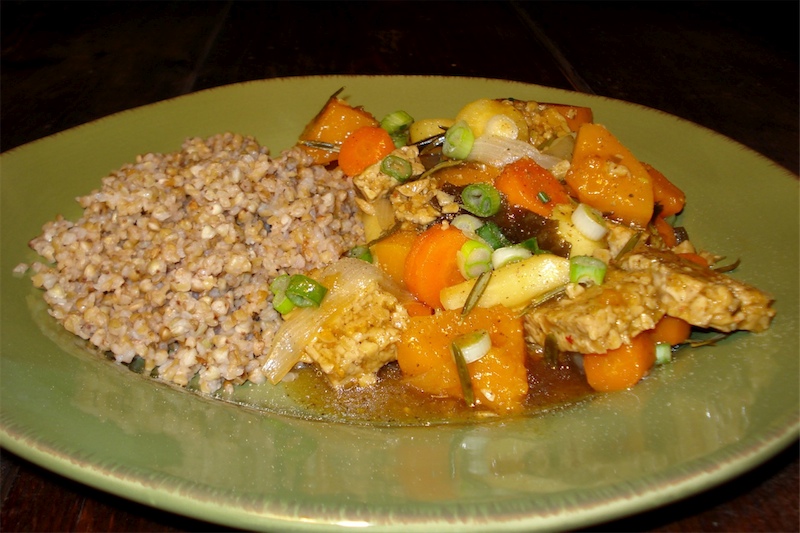
Tempeh & Veggie Stew
4 TBSP butter, ghee, or coconut oil
4 (3 to 4 inch) strips kombu seaweed, broken into 1 inch pieces
3 garlic cloves, chopped
1 TBSP peeled, minced fresh ginger
2 sprigs fresh rosemary or sage
2 (8 oz) packages soy tempeh, cut into 1-inch squares
4 TBSP tamari/soy sauce
1 TBSP pure maple syrup (or 6 drops of liquid stevia)
1 large onion, cut into 1/2 inch think slices
1 & 1/2 pounds winter squash, seeded & cut into 2-inch chunks
1 large or 2 medium parsnips, peeled & cut into 1/2 inch thick slices
2 large carrots, peeled & cut into 1/2 inch thick slices
pure salt
2 tsps arrowroot powder
2 scallions, thinly sliced
- Preheat oven to 400.
- Chop all the veggies.
- In a large corning ware over medium heat, melt the butter or oil.
- Add the kombu & saute for 2 mins.
- Add the garlic, ginger & rosemary or sage.
- Arrange the tempeh in a layer on top.
- In a small bowl, whisk 1 cup of water w/ 2 TBSP of the tamari & the maple syrup (or stevia).
- Pour over the tempeh.
- Top the tempeh w/ a layer each of onions, squash, parsnip, & carrot – in that order.
- Sprinkle w/ salt.
- Cover the casserole & bring to a boil.
- Transfer casserole to the oven & bake until the veggies are tender, about 25 mins (poke a large piece of carrot w/ fork to check).
- With a slotted spoon, transfer the vegetables & tempeh to a serving bowl, leaving the juices in the corning ware
- Place the corning ware over medium heat.
- In a small bowl, dissolve the arrowroot in 1 & 1/2 cups of cold water & add the remaining 2 TBSP soy sauce.
- Whisk this mixture into the juices in the corning ware.
- Simmer, stirring constantly, until the sauce thickens.
- Pour the sauce over the tempeh & vegetables.
- Gently fold in the scallions & serve w/ a side dish of your choosing.
______________________________________________________________________________________
SIDE NOTES:
~ Adapted from “Fresh Food Fast”
~ Make sure the cookware you choose can go both on the stove top & in oven (I use a large corning ware).
~ In reference to Kombu…….Sea vegetables are extremely nutritious with tons of phytochemicals, vitamins, minerals, fiber & even a little protein. They are said to prevent & treat many types of cancer, lower blood cholesterol & blood pressure, prevent ulcers and kill bacteria. You don’t need to eat a big seaweed salad to get the benefits, a sprinkle here & there is good. However, you can skip this step if you can’t be bothered. Been there.
~ I’d consider this a fairly complicated/time-consuming meal to prepare. In light of that – a few legal cheats – jarred, minced ginger (you can even get this organic if interested), and pre-peeled/pre-cut butternut squash.
~ Before you add the garlic & ginger, lower the heat for a few minutes. The first time I made this, there was sort of a popping explosion & garlic/ginger went flying all over the kitchen.
Dairy Free, Gluten Free, Egg Free, Nut Free, Sugar Free, Grain Free, Vegan, Raw
If eating dairy free, use coconut oil instead of butter. If eating gluten free, be sure to use a gluten free tamari and “soy” tempeh (not “three grain”, “flax”, or “veggie”). If avoiding sugar, use stevia instead of maple syrup.
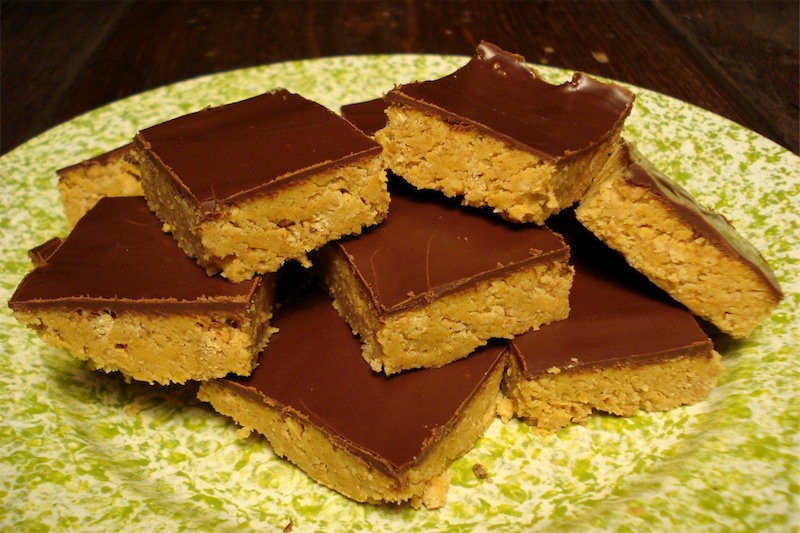
Peanut Butter Chocolate Bars
2 cups puffed, brown rice cereal, crushed
1 & 1/2 cups (1 full 16 oz jar) natural, crunchy peanut butter (or other nut/seed butter – see notes below)
2 cups organic powdered sugar
1/2 cup, plus 2 TBSP butter, or coconut oil, melted
1 tsp vanilla
heaping 1/2 cup mini chocolate chips
- Coat a 9X13 baking pan with coconut oil or butter.
- Combine crushed cereal, peanut butter, powdered sugar, 1/2 cup melted butter, and vanilla in a large bowl.
- Press mixture into baking pan.
- Melt the chocolate chips with remaining 2 TBSP butter and stir to combine.
- Spread chocolate mixture over the peanut butter mixture and let set for about 2 hours in refrigerator.
- Cut into squares.
________________________________________________________________________
SIDE NOTES:
~ Got this recipe over a year ago from friend Sharon Shiner who offers her own nutrition/recipe information via ‘Thyme to cook’. Check her out!
~ I keep these peanut butter squares in the freezer & pull them out for special occasions, or when some trading is necessary. For example, I sometimes trade them to the kids for candy they acquire at parties/halloween…etc. They get one square for 3 pieces of candy. These bars are soooooo tasty that it’s worth a 3 to 1 ratio – even to them. Of course, they contain a lot of sugar, but at least I’m in control of the other ingredients and get to omit all the food colorings, preservatives & other unpronounceable additives. You can actually pack a decent amount of nutrition into these things by using a good nut butter, high quality butter or coconut oil, and high quality, antioxidant rich dark chocolate.
~ On the rare occasion powdered sugar comes into my life, I like “Wholesome Sweeteners” brand.
~ You can crush the cereal either by beating it up a bit while still in its sealed plastic bag, or pouring into a bowl & using a potato masher/meat tenderizer/back of big spoon…etc. (FYI – EnviroKids “Koala Crisp” is dairy & gluten free)
Dairy Free, Gluten Free, Egg Free, Vegan, Nut Free, Sugar Free, Grain Free, Raw
If eating dairy free, use coconut oil instead of butter, and be careful choosing your chocolate. If eating gluten free, use an alcohol free vanilla, and gluten free chocolate. If you can’t eat nuts, but are Ok with sunflower seeds, substitute sunbutter for the peanut butter (which would make this recipe nut free).
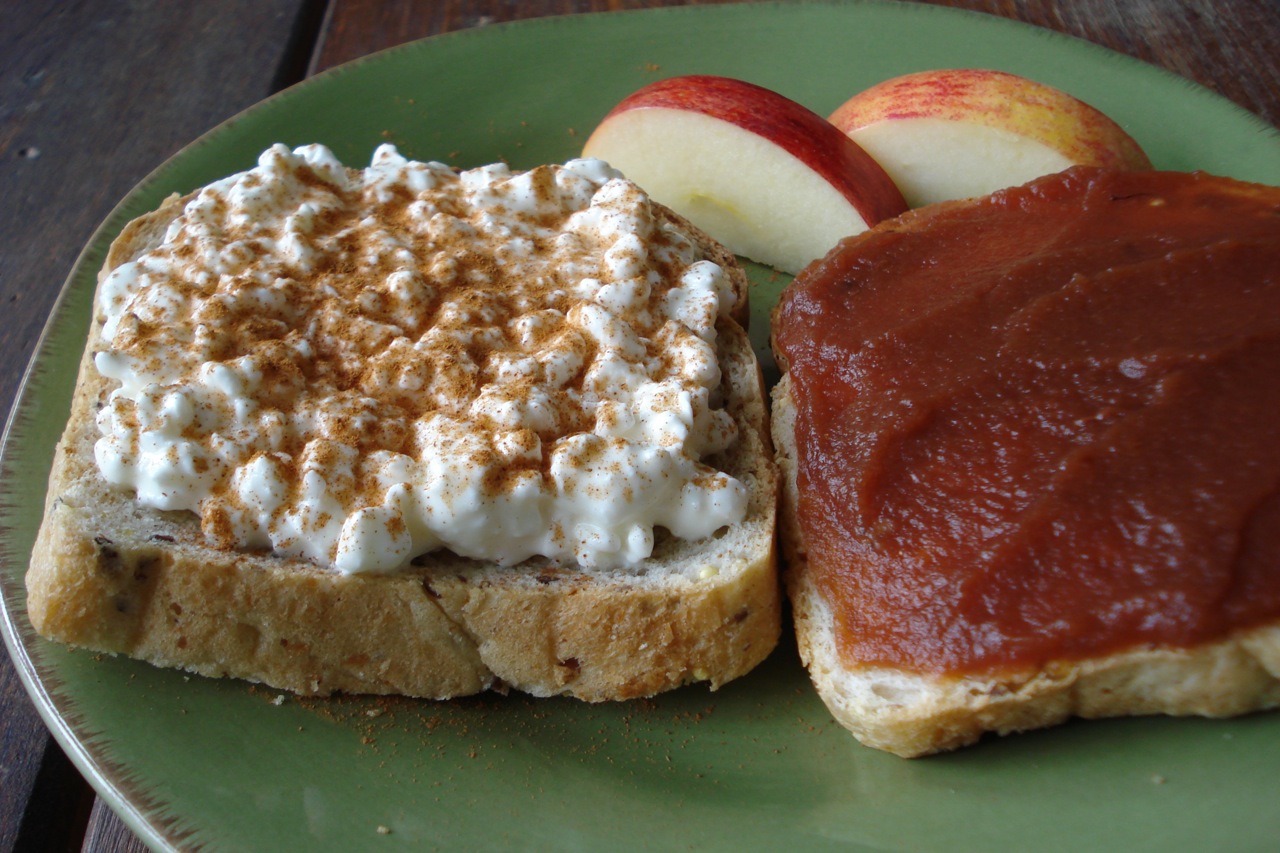
Cottage Cheese & Apple Butter Sandwich
cottage cheese
apple butter
cinnamon
thinly sliced apples (optional)
______________________________________________________________________________________
SIDE NOTES:
This is my son’s favorite lunchbox sandwich. Sometimes I add a layer of thinly sliced apple in addition to the apple butter.
For more ideas on ways to enjoy cottage cheese click HERE
If you’re eating gluten free, be sure to use a certified gluten free bread (or if avoiding grains entirely, simply omit the bread and eat the cottage cheese, apple & cinnamon on its own – delicious!). Check your apple butter ingredients if eating sugar free (Eden brand has only one ingredient – apples).Dairy Free, Gluten Free, Egg Free, Nut Free, Sugar Free, Grain Free, Vegan, Raw
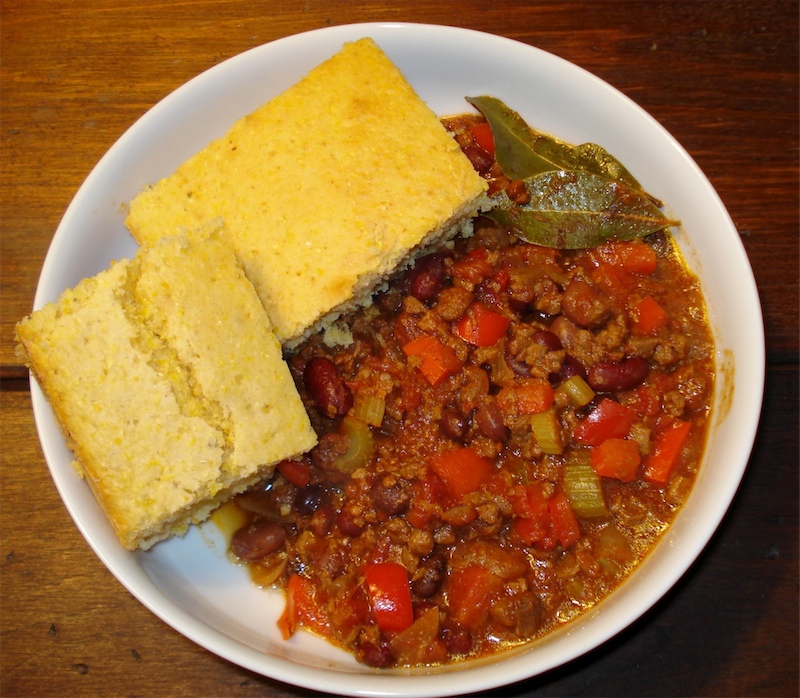
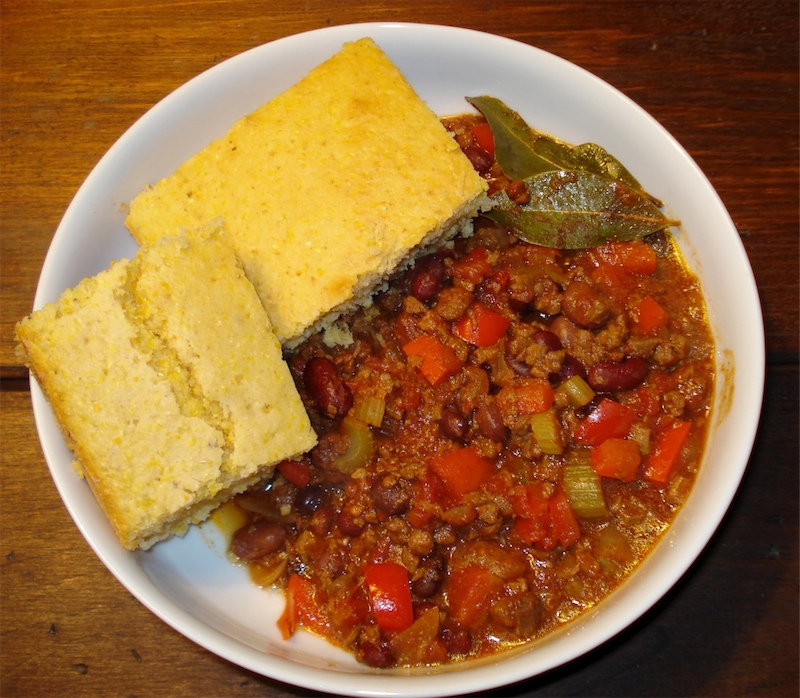
Smokey Tempeh Chili
2 TBSP coconut oil, butter, or ghee
2 stalks celery, chopped
1/2 large onion, finely chopped
2 cloves garlic, finely chopped
8 oz soy tempeh, chopped well (1 package)
1 TBSP chili powder
1 red bell pepper, diced
1 13 oz can peeled, ground or crushed tomatoes
1 bay leaf
2 tsps natural sugar (or 4 drops liquid stevia)
2 TBSP brown rice vinegar
2 TBSP tomato paste
1 tsp pure salt
1 can (14 & 1/2 oz) chili beans (pinto, kidney, black, or a combination)
1/4 tsp liquid smoke
- Crumble or chop the tempeh.
- In a large, heavy based saucepan, heat the oil and on low and saute the celery, onions and garlic until soft.
- Add the tempeh and allow to brown slightly.
- Add chile powder, red pepper, bay leaf, and tomatoes with their juice (plus, after adding the tomatoes, I put enough water in the package to swish around & grab any remnants of tomato clinging to the package. The chili actually tends to be a little too dry without this added water.)
- Simmer, covered for 30 mins.
- Add sugar, vinegar, tomato paste dissolved in a little hot water, and salt.
- Drain/rinse the canned beans and add them as well as the liquid smoke, & simmer 10 mins longer.
Serve with corn bread. Serves a family of four. (I usually double this recipe.)
______________________________________________________________________________________
SIDE NOTES:
~ Adapted from the “Complete Vegetarian Cookbook”
~ I love my “KWIK-KUT” gadget for quickly chopping the tempeh.
~ Liquid smoke is just water & hickory smoke concentrate. You can usually find it by the bbq sauce/marinades/salad dressings. Ours is “Wrights all natural hickory seasoning liquid smoke.” THIS IS A MUST FOR THE RECIPE – DO NOT OMIT!!!!
~ The only ingredient in tomato paste should be tomatoes, so check the label & make sure you don’t pick up one w/ additives.
Dairy Free, Gluten Free, Egg Free, Nut Free, Sugar Free, Grain Free, Vegan, RawIf eating dairy free, use coconut oil instead of butter. If eating gluten free, be sure to use “soy” tempeh (as opposed to “three grain”, “veggie”, or “flax”). If eating sugar free, use stevia instead of sugar. Remember to always double check labels on any packaged goods you may be using (tomatoes, beans, etc…)
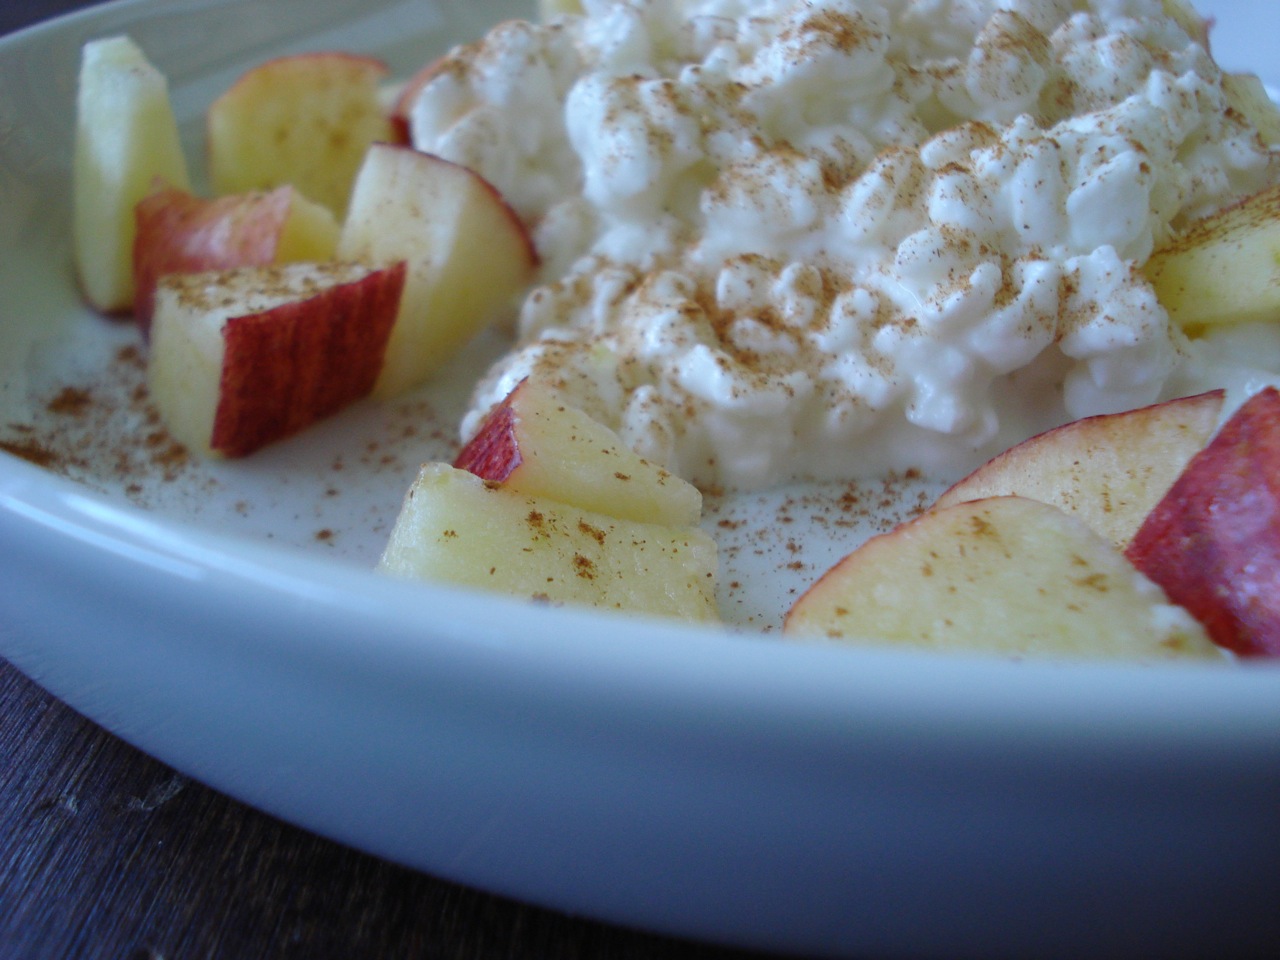
Cottage Cheese, Apple & Cinnamon
cottage cheese
chopped apple (or pear)
cinnamon
This is a delicious, protein packed snack or light lunch.
Dairy Free, Gluten Free, Egg Free, Nut Free, Sugar Free, Grain Free, Vegan, Raw
________________________________________________________________________
Here are other cottage cheese combinations we like:
COTTAGE CHEESE AND……….
~ fresh sliced peaches w/ sprinkle of cinnamon
~ cantaloupe (cut in half, scoop out seeds, and fill w/ cottage cheese)
~ plain yogurt (equal portions of each & a little honey stirred together)
~ COTTAGE-CHEESE-&-APPLE-BUTTER-SANDWICH
~ mixed with some raisins
~ stir in your favorite type of berries
~ as a dip w/ crackers
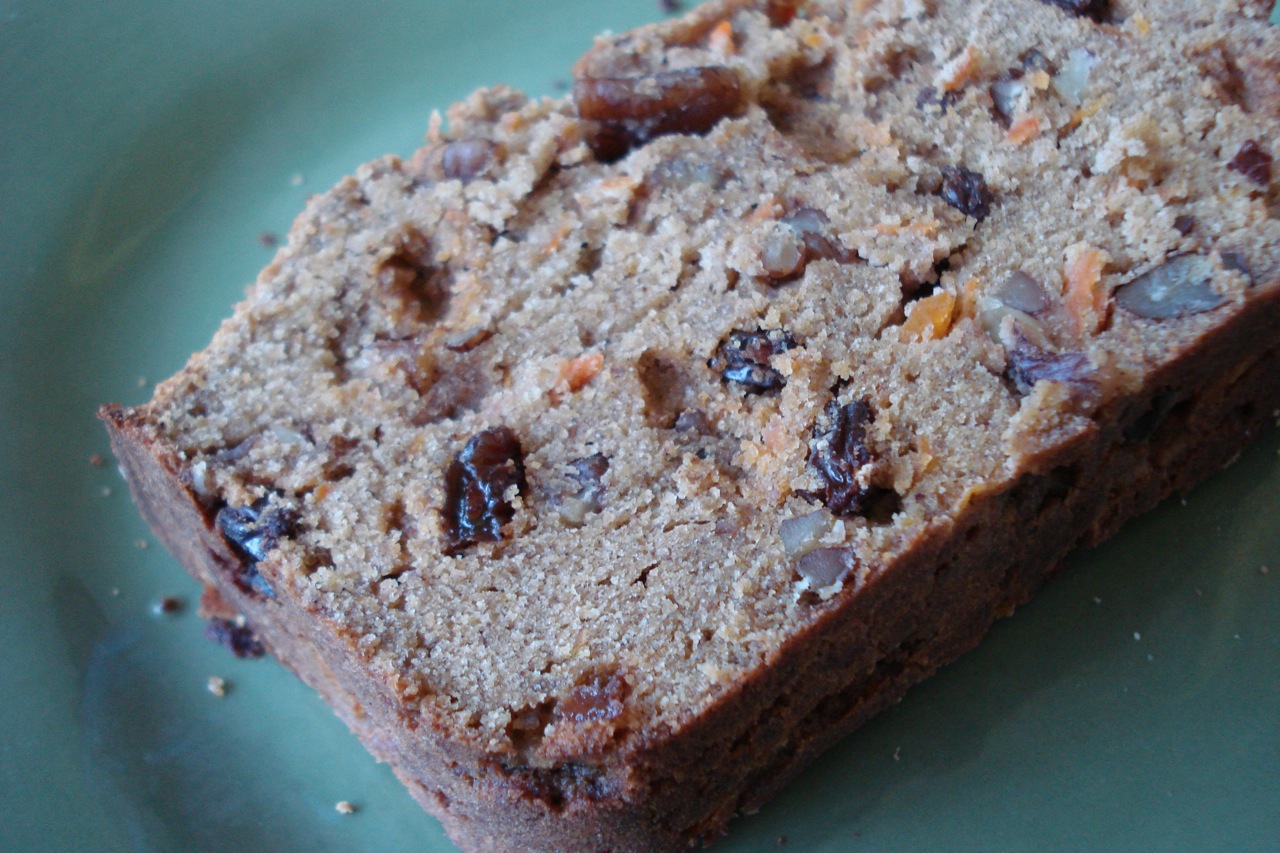
Carrot Cake Bread
3/4 cup loosely packed, shredded carrot
8 eggs
1/2 cup coconut oil or butter, melted
1/2 cup natural sugar
1 tsp pure vanilla extract
1 & 1/2 tsps cinnamon
1/2 tsp nutmeg
1/2 tsp pure salt
3/4 cup coconut flour, sifted
1 tsp baking powder
1/2 cup pecans, chopped (optional)
- Preheat oven to 350 degrees.
- Blend together eggs, oil, sugar, vanilla, cinnamon, nutmeg & salt.
- Combine coconut flour with baking powder & whisk throughly into batter until there are no lumps.
- Fold in shredded carrot & nuts (if using).
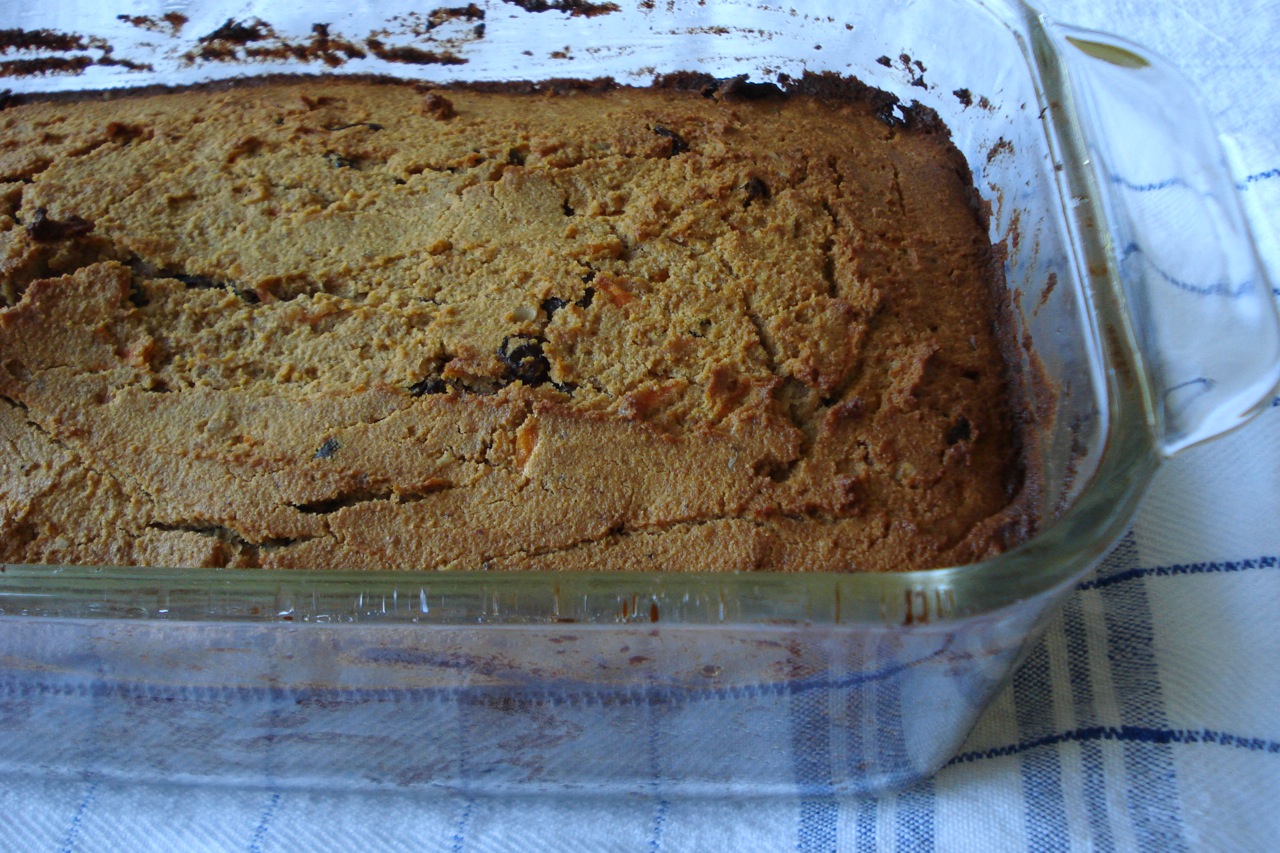
- Pour into greased 9x5x3-inch loaf pan & bake for 1 hour.
- Remove from pan & cool on rack.
______________________________________________________________________________________
SIDE NOTES:
~ Adapted from “Cooking w/ Coconut Four”. Original recipe calls for mace instead of nutmeg. In general, the 2 can be used interchangeably, so use whichever one you happen to have.
~ Can use a cheese grater to shred the carrot (or a food processor w/ shredding blade attachment).
~ The batter will be on the dry side for this one. Just press it firmly into the greased baking dish to avoid air pockets within the loaf (I use a glass baking dish, so can see the spots where I have to press a little firmer).
~ If you’re using coconut oil (like I do), when you melt, use very low heat & remove from burner right away (as the idea is to melt it, but you want to heat it as little as possible). Also, I add the coconut oil last, when everything else is blended together. If you add the warm oil into the bowl with the cold eggs, the oil will harden. Once the eggs are blended w/ everything else, this is not an issue). An alternative is to let the eggs sit out at room temp for a little while before you crack them.
~ My loaves don’t always slip easily out of the pan. If this is the case, don’t force it out. Just place the whole thing – pan & all – on a wire cooling rack.
Dairy Free, Gluten Free, Egg Free, Nut Free, Sugar Free, Grain Free, Vegan, Raw
If eating dairy free, use coconut oil instead of butter. If eating gluten free, be careful choosing your vanilla. Omit the pecans if avoiding nuts.
~ Freezes well (I freeze individual slices which are great to pull out as needed for a school snack).
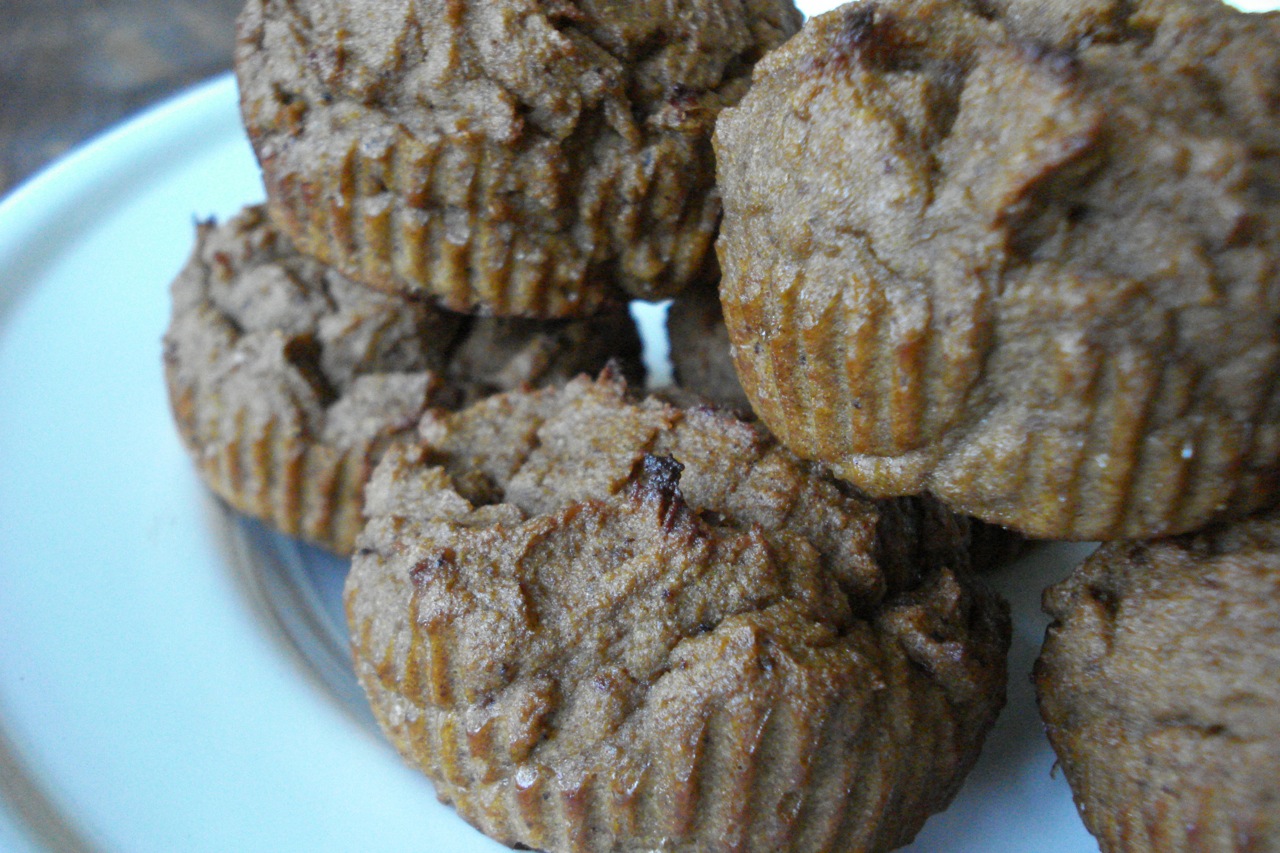
Pumpkin Muffins
6 eggs
1/4 cup butter or coconut oil, melted
1/2 cup mashed sweet potato or pumpkin
1 cup natural sugar
1 tsp ground cinnamon
1/4 tsp ground nutmeg
1/2 tsp pure salt
1 tsp pure vanilla extract
1/2 cup coconut flour, sifted
1/2 tsp baking powder
- Preheat oven to 400 degrees.
- Blend together eggs, oil, pumpkin, sugar, cinnamon, nutmeg, salt & vanilla.
- Combine coconut flour w/ baking powder & whisk into batter until there are no lumps.
- Pour batter into greased muffin cups.
- Bake for 18 mins.
Makes 12 muffins.
______________________________________________________________________________________
SIDE NOTES:
~ Adapted from “Cooking w/ Coconut Flour” – these muffins are delicious. Been doing a lot of baking lately =)
~ Original recipe calls for mace instead of nutmeg. In general, you can use them interchangeably, so use whichever one you happen to have.
~ You should be able to find organic canned sweet potato puree, or organic pumpkin at your local health food store if you prefer the can. Otherwise, bake a sweet potato ahead of time & mash it up (w/o the skin of course).
~ If you’re using coconut oil (like I do), when you melt, use very low heat & remove from burner right away (as the idea is to melt it, but you want to heat it as little as possible). Also, I add the coconut oil last, when everything else is blended together. If you add the warm oil into the bowl with the cold eggs, the oil will harden. Once the eggs are blended w/ everything else, this is not an issue). An alternative is to let the eggs sit out at room temp for a little while before you crack them (or just use butter).
~ Can use muffin papers to line the cups to avoid having to grease the pan. Admittedly, it’s a bit wasteful, but I like to use the papers. Aside from simply not liking to grease the pan, sometimes muffins end up sticking anyway, even if you grease, and become difficult to remove w/o turning into crumbles. I like “If you care” brand which are unbleached. To save resources & money, the papers can actually be reused if you put them in a ziplock bag in the freezer.
~ The muffins freeze well & are great for a school snack
Dairy Free, Gluten Free, Egg Free, Nut Free, Sugar Free, Grain Free, Vegan, Raw
If eating dairy free, use coconut oil instead of butter. If eating gluten free, be careful choosing your vanilla.
Almond Milk
1 & 1/2 cups raw almonds, soaked 8 – 12 hours
6 cups cold water
4 & 1/2 medjool dates (more or less)
3/4 tsp pure vanilla extract
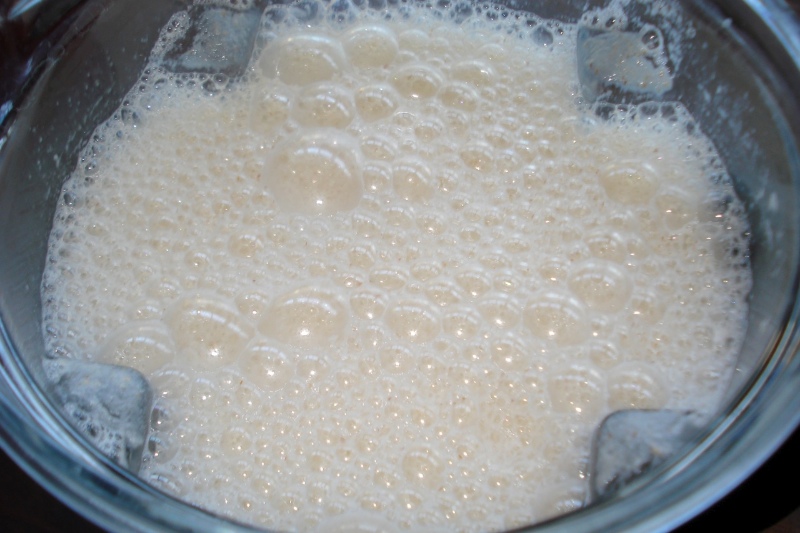
- Put everything in vitamix, turn on, immediately turn dial to 10, flip to high speed & blend for 2 minutes.
Done!
______________________________________________________________________________________
SIDE NOTES:
~ I use (& highly recommend) raw, unpasteurized almonds from www.livingnutz.com.
~ Soaking – Soak your almonds in room temperature water in a covered glass jar or bowl, on the counter. The water will become brown & sludgy looking. It’s good to rinse & refill the jar with fresh water once or twice during the 8 – 12 hour period if you think of it, but not mandatory. If you’re soaking over night (as I sometimes do), obviously don’t worry about that step. Also, if you’re around, give the jar a jiggle every now & then as you pass by to assure even water distribution among the almonds. Once the soak time is up, rinse thoroughly (discarding the soak water) & drain.
~ If not using a Vitamix, you should soak the dates (after you cut in half & remove pits) for about 30 mins. Processing dates is hard work for the average blender. After they’ve soaked, you might want to cut them into smaller pieces before blending (alternately, consider substituting honey, maple syrup, or other pliable sweetener). Also, if not using a Vitamix, it’s likely you’ll have to strain the milk.
Dairy Free, Gluten Free, Egg Free, Keep in mind, if eating raw, you need to seek out truly raw (unpasteurized) almonds, and use vanilla bean instead of extract. If eating gluten free, be careful choosing your vanilla extract.Nut Free, Sugar Free, Vegan, Grain Free, Raw
~ If using vanilla bean instead of extract, the vitamix will blend skin & all. For other blenders, you’ll need to open up the vanilla bean and scrape out the inner, tiny, vanilla seeds.
~ Mason jars work well for storing the almond milk.
______________________________________________________________________________________
For those deeply entwined with the details (& controversies) of nutrition, read on. All others run the other way…..
~ Almond skins? Way back when…. I wouldn’t have even bothered trying to make almond milk in the first place if someone told me I had to peel the almonds. I’m telling you now that you don’t. Either way yields delicious, nutritious, almond milk. I used unpeeled almonds for over a year in the beginning. I started peeling by accident at some point, as some of the skins were practically hanging off after soaking (the skins slip off pretty effortlessly after they’re soaked – the longer they soak, the looser the skins). From that point on, each time I made almond milk, I’d peel more & more of the almonds, until somehow, I was peeling all of them. All you do is squeeze an almond between thumb & fingers & the almond usually pops right out. It takes me roughly 7 minutes to peel a heaping 1/2 cup of almonds. It didn’t go that fast in the beginning, but it’s like typing, the more you do it, the faster you get.
In all honesty, I didn’t want to bring up the almond skins, as it’s a confusing topic (and somewhat embarrassing admission). However, due to the video w/ peeled almonds in plain sight, I couldn’t very well ignore it. Being vague is not my style, obviously =) Although we may be the nutty minority, I know there are others who ponder these things…..so….this is for you……..
There are reasons both for and against peeling almonds.
Reasons to peel:
~ Peeling the almonds improves their digestibility….. Almond skins contain tannis (tanic acid) which are very astringent, can make the almonds difficult to digest, and can interfere with mineral & protein absorption.
~ Some feel the texture, color, and taste of the milk is better when using peeled almonds.
~ Peeled almonds will still sprout, and therefor still contain vital nutrients and enzymes.
Reasons not to peel:
~ Almonds are a whole food, and should be consumed as such – skin and all.
~ Studies have shown the antioxidant content of almonds to be concentrated within the skins.
~ Some feel that the tannis from the almond skins, for the most part, end up in the soak water which is drained & discarded (rinse your almonds well after soaking!).
~ Just not doing it – nope.
So there you have it. There really is no right or wrong. Do what works for you.


