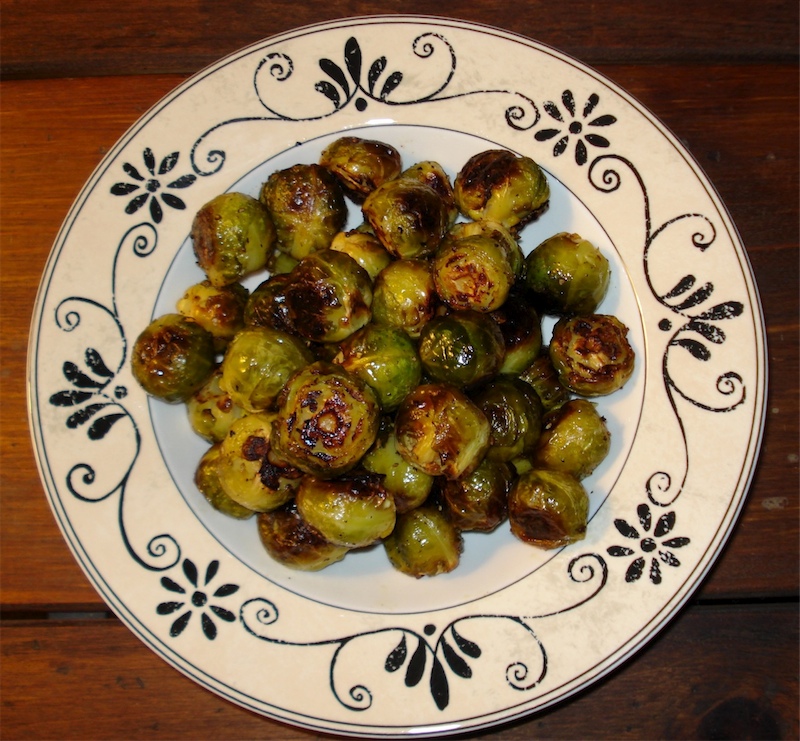
Roasted Brussels Sprouts

brussels sprouts
butter, ghee, or coconut oil, melted
pure salt & freshly ground, black pepper
- Preheat oven to 400.
- Cut the stem end off of the brussels sprouts & remove the outer leaf (if it looks ratty, yellowish..etc).
- Rinse them well, then pat dry with a paper towel (unless you have time to let them sit & air dry a little).
- Put them in a large mixing bowl & add enough melted butter or oil to coat (mix well).
- Add salt & pepper – mix again.
- Place the brussels sprouts on a parchment paper covered cookie sheet (or pyrex dish).
- Bake anywhere from 20 – 40 minutes (until done to your liking).
- About half way through, put an oven mitt on & just give the pan a few good shakes so they brown more evenly.
______________________________________________________________________________________
SIDE NOTES:
~ Use middle oven rack
~ You can omit the parchment paper & just put them right on the cookie sheet or pyrex. I got used to parchment paper at some point & really like the way vegetables come out when I use it.
~ CAULIFLOWER is THE BEST cooked this way as well. In fact, roasted cauliflower is an ingredient in the african groundnut stew and it’s a major exercise in restraint for me not to dive face first into it as soon as that pan comes out of the oven. mmmmmmmmmm. My mom used to make cauliflower the same way you’d make breaded chicken cutlets (dip in flour, egg & breadcrumbs – then fry). I used to go nuts when she made that. But sheesh, pretty labor intensive (thanks mom). Roasting them this way though is just as good and way easier!
Dairy Free, Gluten Free, Egg Free, Nut Free, Sugar Free, Grain Free, Vegan, RawIf eating dairy free, use coconut oil instead of butter.
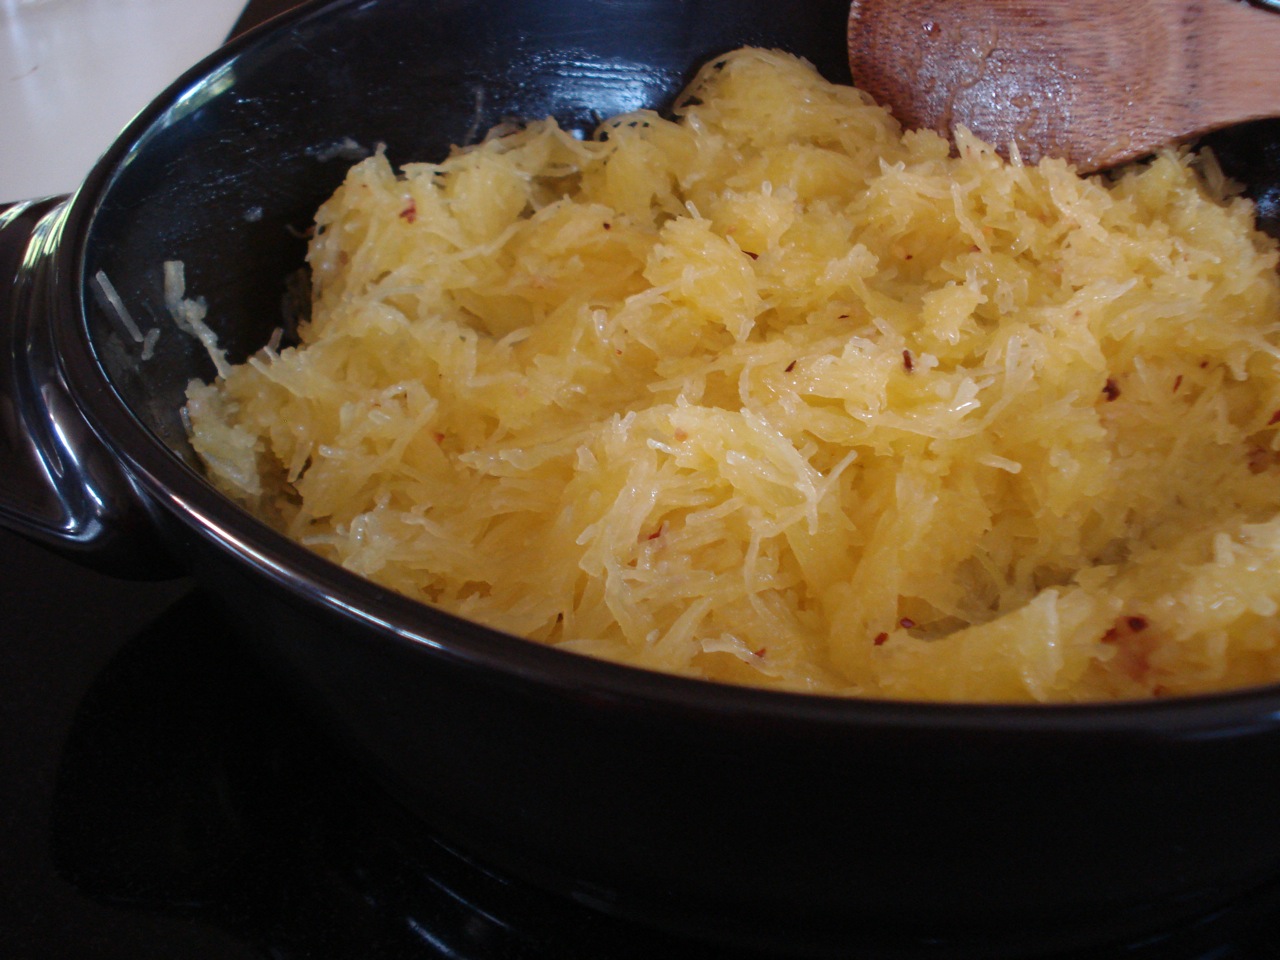
Spicy Sauteed Spaghetti Squash

Version 1
1 medium spaghetti squash
3 TBSP butter, ghee, or coconut oil
3 garlic cloves, minced
1/4 tsp red pepper flakes (or to taste)
pure salt
- Preheat oven to 375 degrees.
- Liberally prick the spaghetti squash with a fork to prevent it from bursting when baking.
- Place the whole squash on a baking sheet & bake for about 1 hour or until the squash is tender when pierced with a knife.
- Cool for 10 – 15 mins.
- Halve the squash lengthwise & discard the seeds.
- Use a fork to extract the stringy flesh & place in a bowl (drag the fork from one end of the squash to the other until all stringy flesh is removed).
- Heat ghee in a large skillet and add garlic & red pepper.
- Cook over medium heat, stirring until the garlic just begins to color, about 2 mins.
- Add the squash flesh & salt and toss together until heated through.
_________________________________________________________________________________

(Don’t burn the pine nuts like I did this particular time!)
Version 2
1/4 cup pine nuts, toasted
1 medium spaghetti squash
2 TBSP butter, ghee, or coconut oil
1/2 cup chopped fresh basil
pure salt & freshly ground, black pepper to taste
- Preheat oven to 375 degrees
- Toast pine nuts in a dry skillet over low heat until just toasted (or you can put them on a baking sheet & bake in the oven for a few minutes). Careful not to burn them – they cook quickly!
- Set aside to cool.
- Liberally prick the spaghetti squash with a fork to prevent it from bursting when baking.
- Place the whole squash on a baking sheet & bake for about 1 hour or until the squash is tender when pierced with a knife.
- Cool for 10 – 15 mins.
- Halve the squash lengthwise & discard the seeds.
- Use a fork to extract the stringy flesh & place in a bowl (drag the fork from one end of the squash to the other until all stringy flesh is removed).
- In a large skillet, melt the butter over low heat.
- Add the squash strands, and toss while reheating.
- Stir in the pine nuts, basil, salt & pepper.
_________________________________________________________________________________
SIDE NOTES:
~ Definitely worth noting… These 2 versions are good combined into one. How can you go wrong adding garlic & red pepper to basil & pine nuts? I use any combination of these ingredients when I make this (depending on what I have on hand).
Enjoy!
Dairy Free, Gluten Free, Egg Free, Nut Free, Sugar Free, Grain Free, Vegan, Raw
If eating dairy free use coconut oil instead of butter. If avoiding nuts, omit the pine nuts (or use version 1).
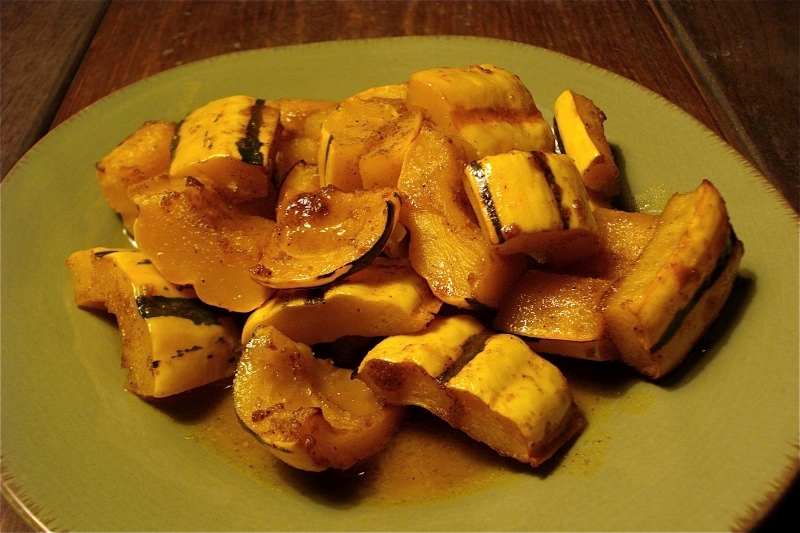
Roasted Winter Squash w/ Curry Butter & Apple Cider

3 TBSP butter, ghee, or coconut oil
2 TBSP brown sugar (or 12 drops liquid stevia)
1 TBSP curry powder
1/4 tsp salt
2 lbs winter squash, peeled if necessary, seeded, & cut into 2-inch chunks
1 cup apple cider
- Preheat oven to 450.
- Melt butter in an ovenproof casserole large enough to hold the squash in a single layer.
- Add the sugar, curry powder & salt, and stir until combined.
- Add the squash & toss to coat.
- Gradually pour the cider down the side of the pan without pouring it directly over the squash.
- Increase the heat & bring to a boil.
- Transfer the casserole to the oven & roast for about 30 mins, basting midway through the cooking time.
- The squash is done when the tip of a knife does not meet with any resistance when inserted into the squash.
______________________________________________________________________________________
SIDE NOTES:
~ From ‘Fresh Food Fast’. Makes a tasty & easy side dish

~ I like delicata squash for this dish (pictured above), which has tender, edible (& nice looking) skin. Other winter squash that don’t require peeling are butterCup, red kuri & hokkaido. If you can’t find any of these less common varieties, you can use butterNut squash, but it’s less convenient as it must be peeled.
~ Hot madras curry powder, located in the spice aisle of most supermarkets, adds a nice level of heat to this dish. Substitute regular curry powder for a milder flavor.
~ Corningware can go both on top & inside the oven (& my squash doesn’t exactly fit in a single layer – some over-lap is fine).
Dairy Free, Gluten Free, Egg Free, Nut Free, Sugar Free, Grain Free, Vegan, Raw
If eating dairy free use coconut oil instead of butter. If avoiding sugar, use 12 drops of liquid stevia or 2 TBSP lakanto.
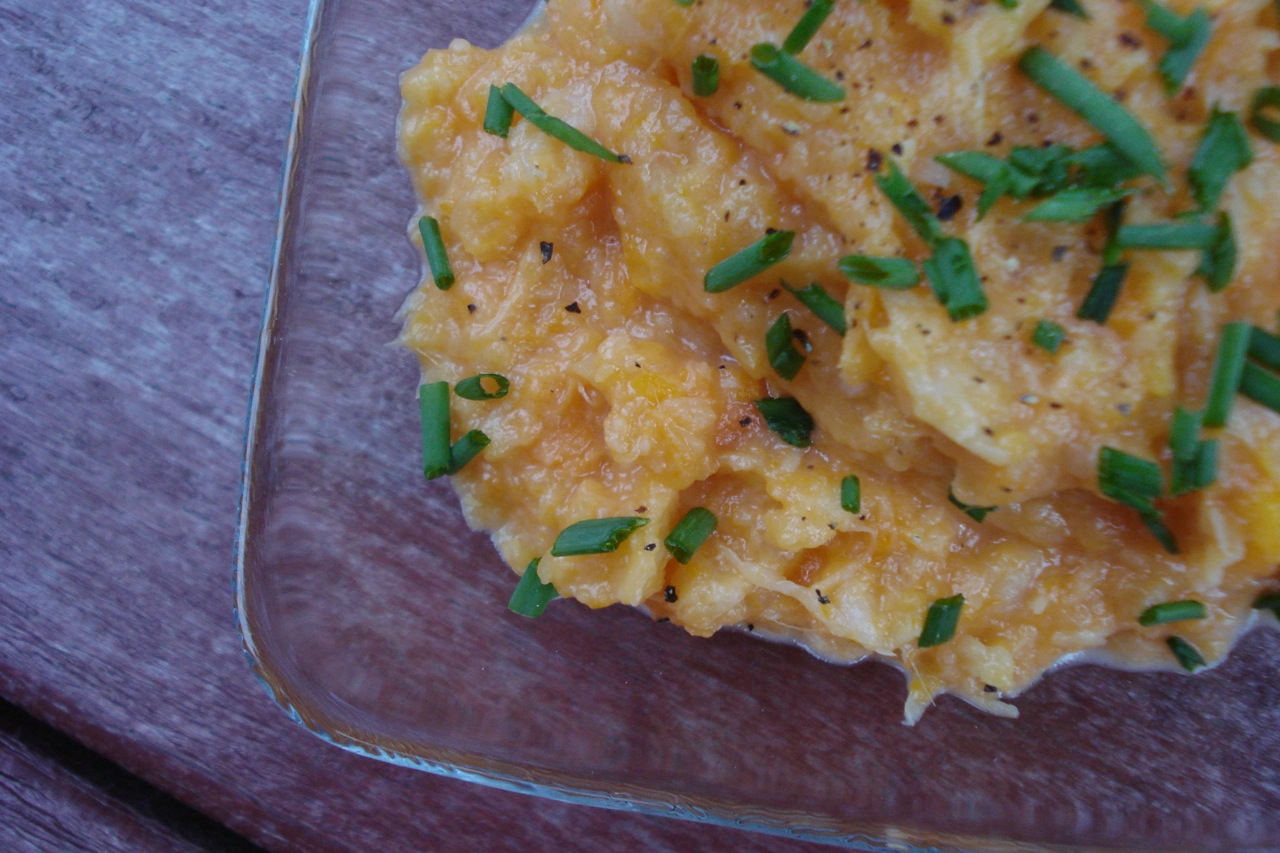
Savory Mashed Root Vegetables

3 & 1/2 pounds assorted root vegetables (carrots, parsnips, turnips, rutabaga, sweet potato), peeled & coarsely chopped
4 garlic cloves
1 tsp pure salt
2 cups heavy cream (or whole milk)
1/2 cup (1 stick) butter
2 sprigs fresh thyme
2 sprigs fresh rosemary
2 bay leaves
pure salt & freshly ground black pepper
1 bunch fresh chives, chopped (optional)
extra virgin olive oil (optional)
- Place all the veggies & garlic in a large pot & fill with cool water (to cover veggies) & add 1 tsp salt.
- Bring to boil over medium heat & simmer covered for about 25 mins (give or take a few), until veggies are very tender.
- While vegetables are cooking, combine the cream, butter & herbs in a small pot & heat over low heat to melt the butter & infuse the herb flavor into the cream – DO NOT ALLOW TO BOIL.
- Shut off heat, cover & let steep until needed.
- When ready to use, remove the herb stems & bay leaves.
- Drain veggies & put into a large mixing bowl.
- Mash with a potato masher.
- Stir in the warm cream mixture & mix until the liquid is absorbed.
- Season w/ salt & pepper to taste.
- Put the mashed root veggies in a serving bowl, garnish w/ chopped chives & drizzle with a healthy dose of olive oil.
______________________________________________________________________________________
SIDE NOTES:
~ My Mom makes this every year for Christmas. It’s absolutely to die for. She got the recipe a few years ago from the Tyler Florence cooking show.
~ It’s best if you use a variety of root veggies (don’t rely on just one or 2 types). It’s the combination of flavors that make this dish special. Use at least one of each type of root vegetable. If you’re going to omit one, the sweet potato is the least important.
~ When adding the cream mixture to the veggies, add it a little at a time. Personally, I don’t always need all of it to get the right consistency (you don’t want it to end up too thin).
~ And don’t be afraid of butter and cream. As long as you’re using high quality, real butter and cream (or whole milk), it will be very nourishing. Marketing strategies tend to put spooky masks on a variety of wholesome foods, while directing us to run right into the arms of the real monsters.
Dairy Free, Gluten Free, Egg Free, Nut Free, Sugar Free, Grain Free, Vegan, Raw
Braised String Beans, Asian Style


2 TBSP coconut oil
4 medium scallions, thinly sliced
2 medium garlic cloves, minced
3/4 cup veggie or chicken broth
3 TBSP tamari/soy sauce
1 TBSP brown rice vinegar
2 tsps natural sugar (or stevia)
1 pound sting beans
2 TBSP minced fresh basil
freshly ground black pepper
- Heat oil in a large saute pan over medium heat.
- Add scallions & cook until softened, 2 – 3 mins.
- Add garlic & cook for 1 min.
- Add broth, soy sauce, vinegar, & sugar & simmer until liquid thickens slightly, about 5 mins.
- Add string beans & a few grindings of pepper to pan.
- Stir well, lower heat, cover, & cook, stirring occasionally, until beans are tender but still offer some resistance to the bite, about 20 mins.
- Stir in basil & serve immediately.
______________________________________________________________________________________
SIDE NOTES:
~ Adapted from “The Best Recipe”
~ Any color string beans will do – green/yellow/purple
Dairy Free, Gluten Free, Egg Free, Nut Free, Sugar Free, Grain Free, Vegan, RawIf eating gluten free, be sure to use a gluten free tamari and dobule check the labels of any packaged goods you’re using (such as broth). If eating sugar free, use stevia or lakanto instead of sugar.
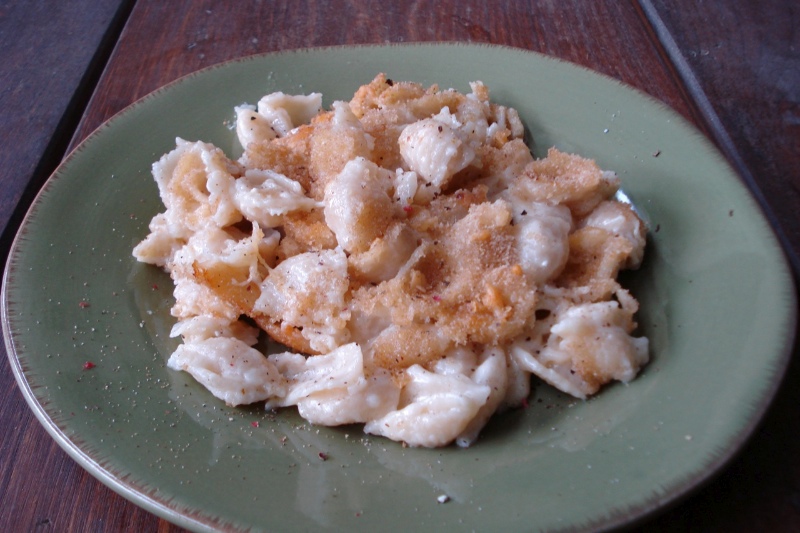
Baked Mac & Cheese

5 & 1/2 TBSP butter
1 cup whole milk, half & half, or heavy cream
8 oz sharp cheddar cheese (or whatever type of cheese you prefer)
1 tsp pure salt
1 pound small shells (or other small pasta shape)
pinch of ground nutmeg
1/2 tsp ground mustard (optional)
1/2 tsp cayenne pepper (optional)
1/3 cup plain bread crumbs
1/4 cup grated Parmigiano-Reggiano cheese (or regular parmesan)
- Preheat oven to 400 degrees.
- Use 1/2 TBSP of the butter to grease a 9×13 inch baking dish & set aside.
- Dice 4 TBSP of the butter & place in a large bowl (big enough to fit the pasta).
- Pour the milk into a small saucepan & heat (but do not boil).
- Cover, remove from heat & keep warm.
- Shred the cheese (you should have about 2 cups) & set aside.
- When the water comes to a boil, add 1 TBSP salt and the shells.
- Cook until they are 1 – 2 mins shy of al dente & then drain (for Tinkyada brown rice small shells, this is about 6 mins).
- Stir the shells into the bowl w/ the butter, tossing to coat well.
- Stir in the warm milk & cheese and stir until the cheese starts to melt.
- Mix in 1 tsp salt, the nutmeg (and ground mustard / cayenne if using).
- Pour mixture into the baking dish.
- Combine the bread crumbs & Parmigiano-Reggiano and sprinkle evenly over the pasta.
- Dice the remaining 1 TBSP butter & dot the crumb topping with small pieces of butter.
- Bake until the cheese sauce is bubbling & the topping turns golden brown, about 20 mins.
Serve immediately.
______________________________________________________________________________________
SIDE NOTES:
~ Adapted from “The Complete Italian Vegetarian Cookbook”
~ I sometimes double the recipe (using two 9 x 13 baking dishes), and put one whole tray in the freezer. Comes in really handy on a night when all I can do is pull something out of the freezer & stick it in the oven to warm. Pyrex makes 9 x 13 glass baking dishes with snap on lids. Perfect for something like this. They come in all sizes actually, and I highly recommend having a variety of them on hand for freezing all kinds of left overs.
~ There’s no faking mac & cheese. Real butter, real milk & real cheese are requirements! I’ve tried a lot of mac & cheese recipes over the years & was never satisfied until this one.
~ FYI – The original recipe calls for fontina cheese in case you’d like to give that a go. I’ve used mild cheddar, sharp cheddar and fontanella which have all tasted great.
~ Parmigiano-Reggiano is the king of parmesan cheese. You can usually get it at the regular grocery store, though it’s on the pricey side. If interested, you can buy organic Parmigiano-Reggiano online. If you have extra, cut it into small blocks & freeze. This way, you can just take out a small portion to defrost & grate as needed (it tends to dry out if you grate it first and then freeze). Of course, any type of parmesan you have on hand will work.
~ It’s extremely easy to make your own bread crumbs at home. Just dry out 2 slices of bread in the oven, break apart into blender, and process. For more detailed instructions, click HERE.
~ Of course only use the mustard & cayenne if you like your mac & cheese with a good kick =)
Dairy Free, Gluten Free, Egg Free, Nut Free, Sugar Free, Grain Free, Vegan, RawIf eating gluten free, use an appropriate pasta (brown rice pasta is our personal preference), and bread crumbs (“Gillians” brand makes a GF version or make your own).
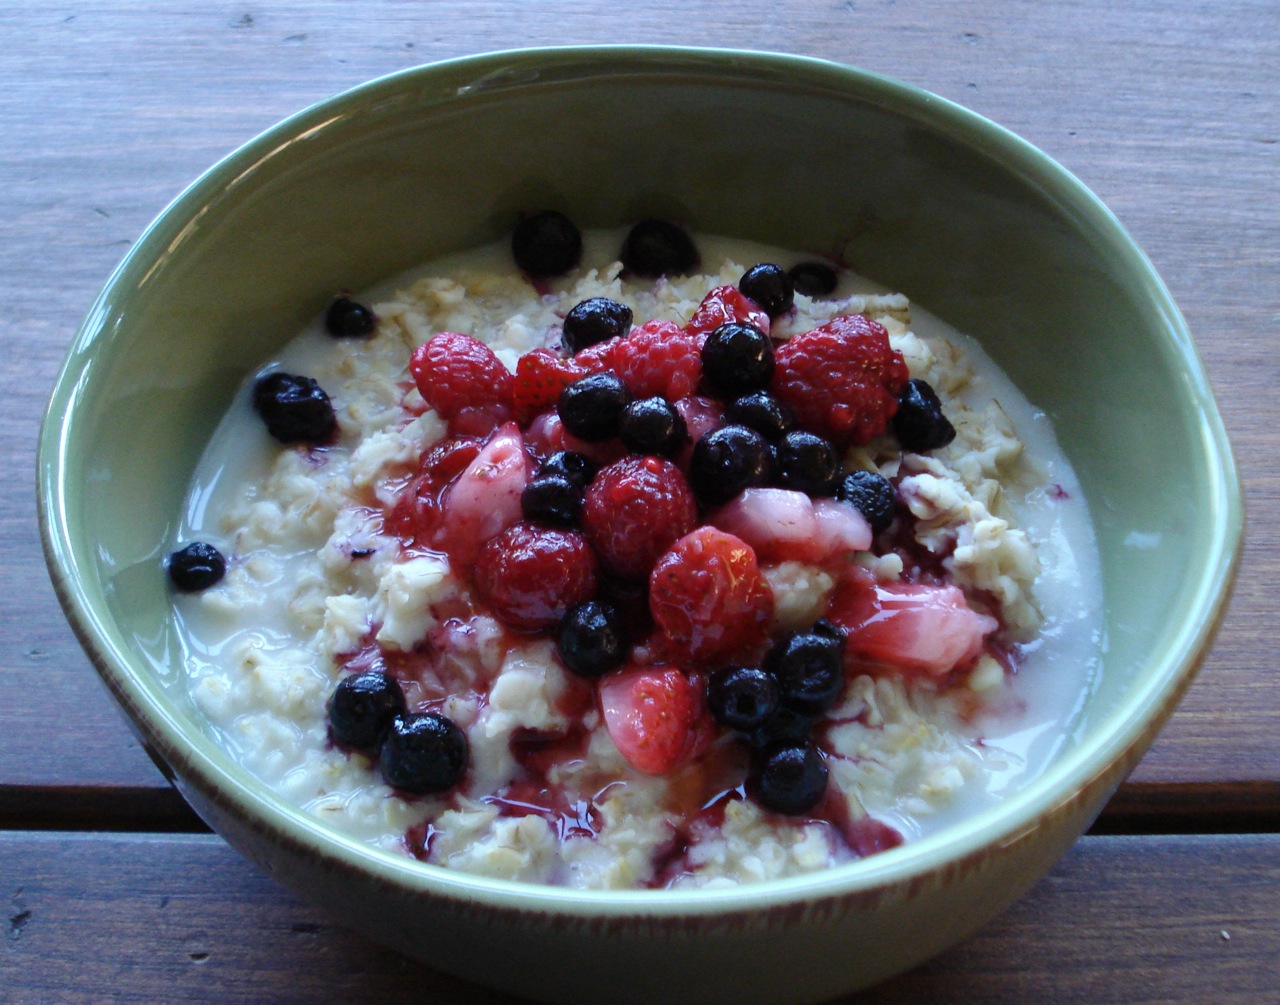
Oatmeal w/ Berries

1 cup rolled oats (or steel cut)
1 cup water for soaking
1 cup water for cooking
1/2 tsp pure salt
berries of choice
sweetener of choice
- Soak oats overnight in 1 cup of water, covered in a warm place (right in the pot you’ll be cooking them in).
- In the morning, in a separate pot or tea kettle, boil an additional cup of water, and stir into soaked oats along with the salt.
- Cook on med-low heat, covered, for 3 – 5 mins.
- Mix in sweetener of choice, berries and any other optional add in.
Serves 2.
________________________________________________________________________
SIDE NOTES:
~ Soaking old-fashioned rolled, or steel cut oats overnight cuts down on the cooking time in the morning and makes the grain more digestible – yielding a fast & nutritious breakfast.
~ Optional add-ins include nuts & seeds – either ground or whole, bananas, apples, pears, dried fruit, cinnamon, coconut shreds, coconut butter, coconut oil, milk, yogurt, cream, and butter.
Dairy Free, Gluten Free, Egg Free, Nut Free, Sugar Free, Vegan, Grain Free, Raw
If eating gluten free, be sure to use certified, gluten free oats. If eating sugar free, use stevia or lakanto as a sweetener.
~ FYI – Oats don’t inherently contain gluten, but the crop is often grown on the same fields that grow wheat, so cross contamination is inevitable. Certified gluten free oats are grown in areas strictly for gluten free crops.
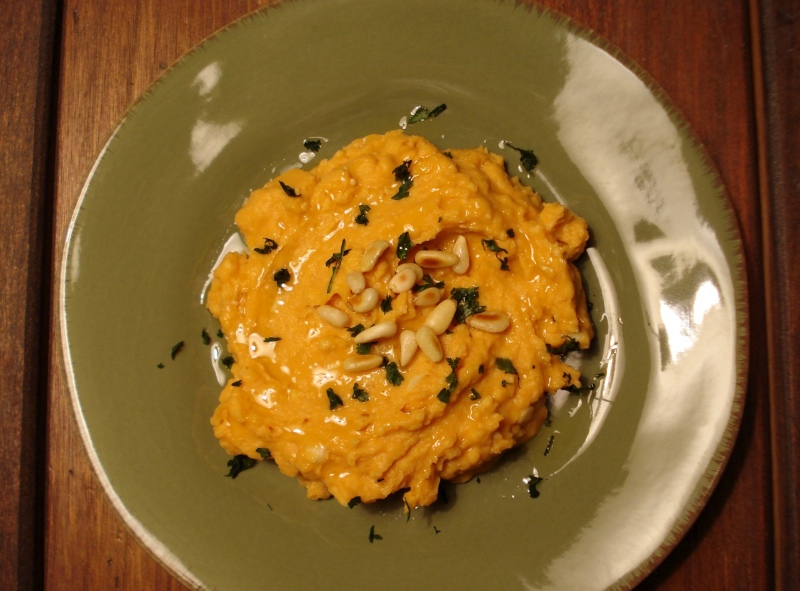
Cannellini Bean Yam Hummus

1 can cannellini beans
3/4 cup cooked yam (or sweet potato)
3 TBSP lime or lemon juice
1 small to medium clove garlic, chopped
2 TBSP extra-virgin olive oil
1/2 tsp chipotle powder or 1 tsp chipotle hot sauce (more or less to taste)
1/2 tsp pure salt
freshly ground black pepper to taste
1/4 cup toasted pine nuts (plus extra for garnish) (optional)
2 TBSP fresh cilantro, chopped (optional)
- Use a fork to stick a few holes in the potato and place it whole (& unpeeled) on a baking sheet lined w/ parchment paper.
- Bake @ 400 for 45 – 60 mins (depending on size) until very soft when pierced.
- Take out & let cool for at least a few minutes before handling.
- In a food processor or blender, combine all ingredients except pine nuts & cilantro & puree until very smooth.
- Add pine nuts & puree just a little, leaving some texture.
- Serve drizzled w/ a little extra olive oil & a sprinkling of pine nuts & cilantro.
______________________________________________________________________________________
SIDE NOTES:
~ From “Vive la Vegan!”
~ In reference to BEANS…. If you’re using canned – I highly recommend EDEN organic. One of the problems with canned beans (& all canned products) are the additives (including salt, sugar, corn syrup, dextrose, calcium chloride [a firming agent], & disiodium EDTA [a preservative]) (baked beans & kidney beans seem to be the worst). Eden beans do not contain salt, sugar or artificial additives of any kind. They also use enamel lined cans (BP-A free) so no metals leech into their fine food. Of course, it’s always better to start with dried beans & soak, as some of the vitamin content diminishes due to the high heat of the canning process, but I do like the convenience of the can now & then & feel good about Eden’s products. We’ve all got to cut corners somewhere in order to do what we do 🙂
~ For the yam…..I double the recipe & use one large yam. You don’t have to be exact measuring this, but the author does recommends not to “pack” it tightly into the measuring cup as the dip might end up too sweet, so careful not to overdo it.
~ Prefer this with lime juice, & the cilantro is awesome!
~ To toast the pine nuts…..Put in dry skillet over med-low heat for just a few minutes. Watch them closely, as they can burn pretty quickly – check & stir them often.
Dairy Free, Gluten Free, Egg Free, Nut Free, Sugar Free, Vegan, Grain Free, RawIf eating nut free, omit the pine nuts. If eating gluten and/or sugar free, use chipotle powder as opposed to hot sauce (unless you find an acceptable hot sauce).
~ Can eat this dip with chips, pita, veggies, or as a sandwich spread with cukes, sprouts, lettuce….whatever!
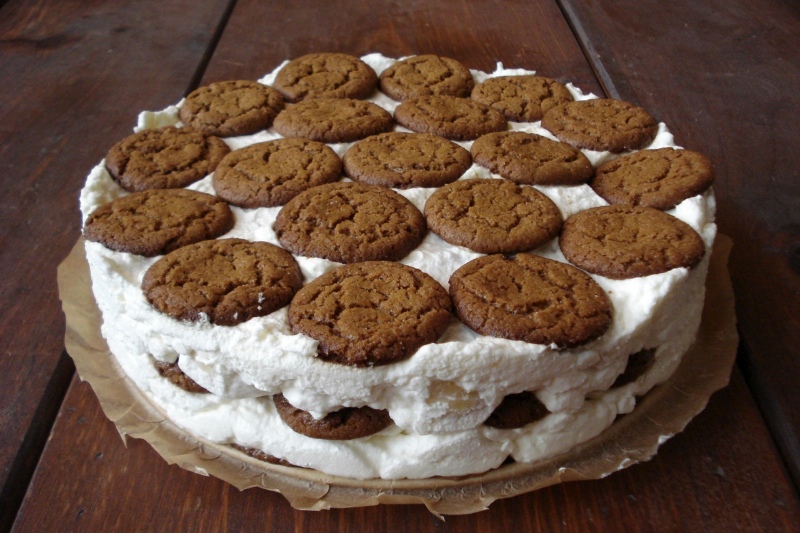
Banana-Whipped Cream Refrigerator Cake

2 cups heavy cream
4 TBSP sugar
2 tsp pure vanilla
3 cups chopped ripe bananas (speckled or even very speckled!)
1 pound gingersnap cookies
- In a large bowl, beat the cream with an electric mixer until stiff peaks form.
- Add the sugar and vanilla and beat once more, until just combined.
- Fold in the bananas.
- Place a layer of gingersnap cookies in a 9 inch spring-form pan.
- Spread 1/2 of the banana mixture over the cookies.
- Top with another layer of cookies.
- Spread remaining banana mixture over the cookies.
- Top w/ a final layer of cookies.
- Cover w/ plastic wrap & place in the fridge at least 6 hours or overnight.
- Release side of pan to serve.
______________________________________________________________________________________
SIDE NOTES:
~ Been making this on & off for the kid’s birthdays for about 10 years. It’s very rich & sweet, though you can adjust the sweetness w/ how much sugar you use & how speckled the bananas are. Extremely easy to make. I have to say that I find it hard to understand why sometimes the grown-ups like this more than the kids. What’s not to like about cookies, fresh whipped cream & bananas!!?? Personally, I can’t stand regular birthday cake. In fact, aside from this rare treat, the only other cakes that will make my eyes open wide are tiramasu & carrot cake – so I guess I’m a bit of a cake snob!
~ Make sure you check the quantity on the cookie box, as you may need 2 boxes to make a pound (or of course, you can make your own GINGERBREAD-COOKIES – just keep them on the smaller side for this cake).
~ Chocolate chip or plain chocolate cookies work equally as well for this cake!
~ Before I put anything on the pan, I like to lay down a piece of parchment paper. This way, once you need to put leftovers away, it’s easier to transfer the cake into a container. So once you tighten the spring to get started layering, the paper will be tightly in place, and the edges hanging out on all sides. If you’ve never worked with a spring-form pan before, you probably have no idea what I’m talking about, but trust me, this makes things easy! (Make note – I cut a lot of the excess parchment paper off for the photo, but it’s best to leave quite a bit of it hanging around all sides)
Dairy Free, Gluten Free, Egg Free, Nut Free, Sugar Free, Grain Free, Vegan, Raw
If eating gluten and/or grain free, use my recipe for GINGERBREAD-COOKIES.
August 2001

Whole Wheat Oatmeal Crackers
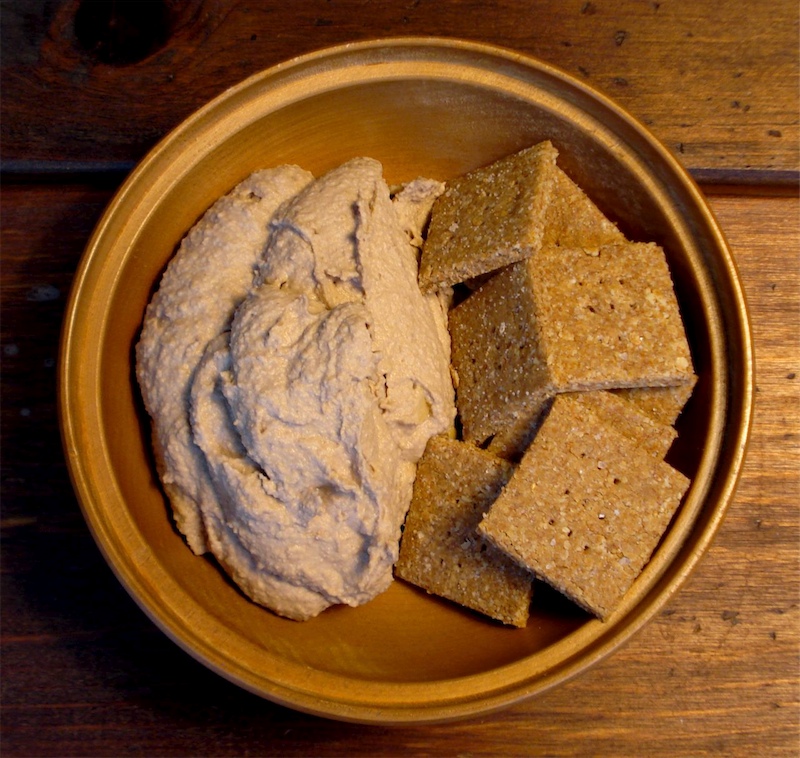

Shown here with LEMON-WALNUT-HUMMUS.
1 & 1/2 cups rolled oats
1 cup whole wheat flour
1/2 cup wheat germ
1 TBSP natural sugar
1/2 tsp pure salt
1/4 plus 1/8 cup melted coconut oil, butter, or ghee
1/2 cup water
- Preheat oven to 350.
- Put all ingredients in food processor & process until blended into a ball of dough (add 3 TBSP water, a tablespoon at a time while blending).
- If dough gets stuck, stop the processor & scrape the sides down as often as needed.
- Roll dough directly onto a floured cookie sheet.
- To get the dough thin enough, try to cover the entire sheet.
- Use a pizza cutter or knife to cut dough into squares (doesn’t have to be cut all the way through, will break apart easily after baking).
- Using a fork, poke holes in each cracker – to keep the dough from rising & to make them look cute =)
- Sprinkle crackers with salt (use plenty) and lightly roll over once or twice with rolling-pin.
- Bake up to 25 mins, but start checking at about 15. Crackers around the edges will cook faster so take pan out & remove those crackers. Then continue cooking the rest, checking often so they don’t burn.
- Cool on wire rack.
Store in airtight container in a dry, cool, dark place.
______________________________________________________________________________________
SIDE NOTES:
~ Crackers? Why crackers? I don’t know….why not?! I don’t make them all the time, just once in a blue when I’m in the mood. They’re so easy to make & really healthy & tasty. If it’s a lazy Sunday & you feel inspired, or if you’re having company & want to make your guests oooo & ahhh – put out homemade crackers. I swear they’ll make even the most boring dip very exciting =) Anyhow, that’s how I got the recipe. I was an oooo-er/ahhh-er many years ago @ a friend’s house. (thx for passing on the recipe Lynn!)
You don’t need any fancy equipment to make these crackers, but you do need 3 things…..a food processor, a 12×19 inch cookie sheet and a homemade rolling-pin. If you try to use a regular rolling-pin with handles, you won’t be able to spread the dough all the way to the edges of the pan. And by the way, when you get the dough on the pan & start rolling, you’ll be thinking – this dough will never stretch out to cover the entire pan. It will (or it will at least come close – keep rolling!!…..thin dough is what you want for crackers). Ask your favorite handyman to cut you a wooden dowel 11 inches in length (I think this is something you’d make a curtain rod out of) (mine is a little over an inch in diameter). If your pan is a slightly different size, you will need a different sized dowel. You want it to fit perfectly inside the pan {see photo} so measure before you cut. If you can’t find anyone to do this for you, let me know & I’ll put it on Al’s “to do” list 😉
Dairy Free, Gluten Free, Egg Free, Nut Free, Sugar Free, Grain Free, Vegan, Raw
If eating sugar free, omit the sugar or use lakanto or stevia. If eating dairy free, use coconut oil.

(what the crackers look like just before you put them in the oven)