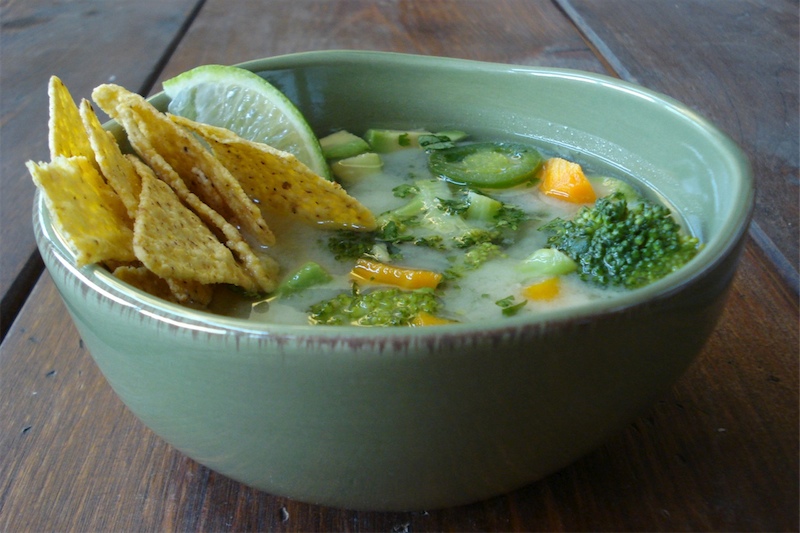
Garlic Soup – Mexican Style
1 head garlic, cloves separated, peeled & crushed
1/2 cup fresh cilantro leaves, chopped (save stems for the broth)
1 large ripe avocado, quartered & sliced
2 limes
2 cups bite-size broccoli florettes
1 large carrot, peeled, halved lengthwise & diced
1 jalapeno pepper (with seeds), sliced into paper-thin rings
1/2 cup white miso, or to taste
- In a medium saucepan over high heat, combine 6 cups of water, garlic & the cilantro stems and bring to a boil.
- Reduce heat & simmer, covered, for 10 minutes.
- Strain out the solids & return the broth to the saucepan.
- Cover to keep warm.
- Juice 1 lime (or use 2 TBSP jarred) & cut the other lime into wedges.
- In a small bowl, toss the avocado pieces with the lime juice & set aside.
- Add the broccoli, carrot & jalapeno to the broth & simmer over medium heat for 3 mins, until the veggies are crisp-tender.
- Place 1/2 cup miso in a small bowl.
- Add a little of the hot soup broth & stir until the miso becomes creamy.
- Transfer the miso to the soup & simmer 1 minute longer.
- If desired, add more miso to taste.
- Stir in the chopped cilantro leaves (& add avocado to each individual bowl, as they may get mushsed if you add to soup pot & stir around).
- Serve with tortilla chips & lime wedges.
______________________________________________________________________________________
SIDE NOTES:
~ From “Fresh Food Fast.” Ay carumba!
~ A garlic press works well 4 this one.
~ I don’t like chopping large amounts of cilantro/parsley/basil by hand & always use my small food processor for this type of work.
Dairy Free, Gluten Free, Egg Free, Nut Free, Sugar Free, Grain Free, Vegan, Raw
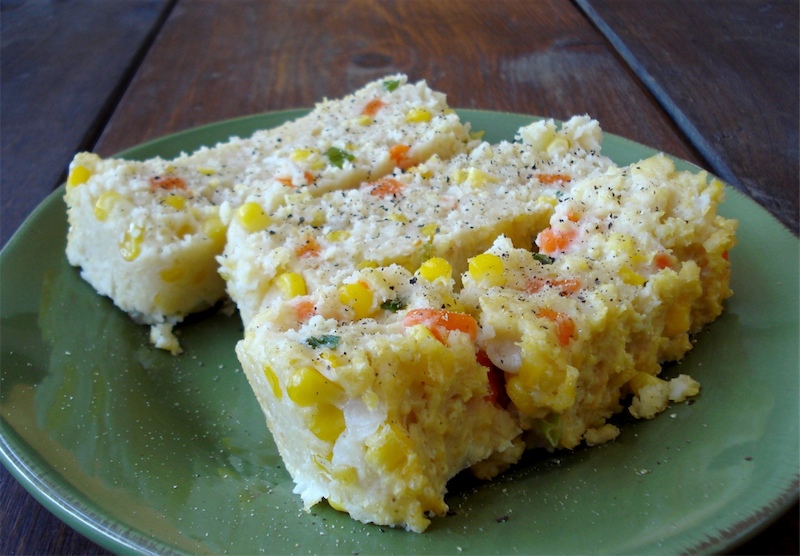
Millet-Corn Loaf
1 small onion, diced
1 or 2 carrots, diced
1 bag frozen corn
1 & 1/2 cups millet, rinsed
6 cups water
pure salt
2 scallions, thinly sliced
2 TBSP umeboshi vinegar
3 heaping TBSP sesame tahini
- In a medium pot, place diced onion, carrot, frozen corn & millet.
- Add water & 1/2 tsp salt.
- Cover & bring to a boil over medium heat.
- Give it a stir, reduce heat, & simmer, covered for about 25 mins (make the heat even lower toward the end as there is less & less water in the pot – don’t want it to burn on the bottom….stir it to see how it’s doing).
- Add an additional 1/2 tsp salt & simmer 5 mins longer.
- Stir in scallions & remove from heat.
- Preheat oven to 300.
- Lightly oil a loaf pan.
- In a small bowl, whisk together umeboshi vinegar & tahini & stir into cooked millet.
- Press mixture into prepared pan & bake, uncovered, for about 15 mins.
- Allow to cool slightly (maybe 10 mins) before slicing so the loaf firms up.
- Cut into slices, add lots of fresh black pepper, & serve with tahini gravy.
Will generously feed a family of 4.
Tahini Gravy:
1 & 1/2 cups broth (veg or chicken) or water (I use broth)
1/2 cup tahini
2 TBSP tamari/soy sauce
1 TBSP maple syrup (or 6 drops liquid stevia)
freshly ground pepper
- In a small saucepan over medium heat, whisk all ingredients together & bring to a slow boil.
- Cook (stirring w/ whisk) until it has thickened to desired consistency.
Start the gravy about 30 mins before you need it.
______________________________________________________________________________________
SIDE NOTES:
~ Loaf recipe from “Cooking the Whole Foods Way”. Gravy is mine =)
~ The photo was taken on day 2, as leftovers. Day one, they weren’t so much slices as they were scoops. It tasted just the same both days (delicious), so don’t worry if your loaf is a little soft & you can’t slice it. After it sat in the fridge over night of course, I was able to make nice slices the next day for lunch after heating up.
~ This recipe won’t all fit into one loaf pan. It’s more like a loaf & a half, so if you have an extra loaf pan (or any other type of small baking dish for the extras) – that would be great.
Dairy Free, Gluten Free, Egg Free, Nut Free, Sugar Free, Grain Free, Vegan, RawIf you’re eating gluten free, be sure to use a gluten free tamari for the gravy. If eating sugar free, use stevia instead of maple syrup for the gravy.
32 Favorite Tools/Gadgets
_______________________________________________________________________________________
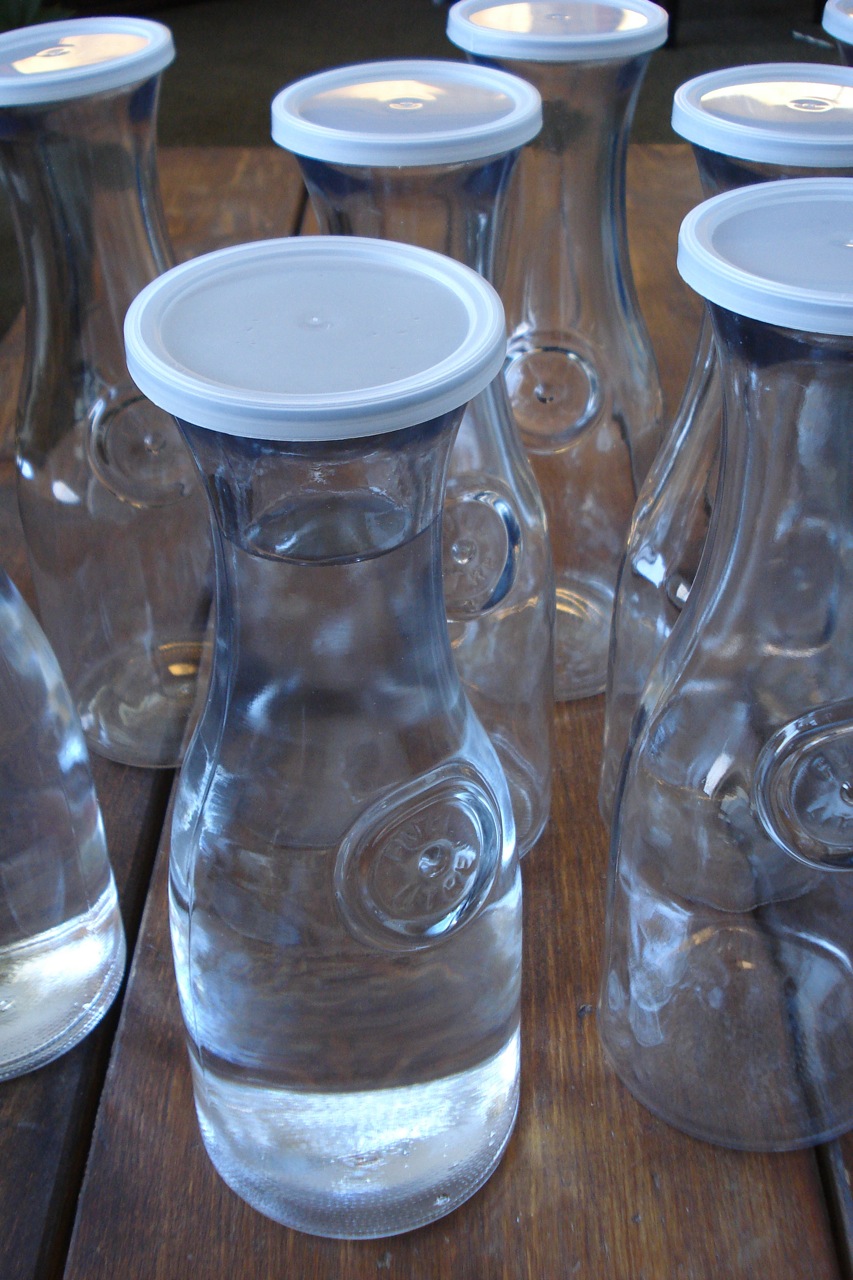
WATER CARAFES
I use these containers to store [back up] water from our reverse osmosis filter. For those of you who already have an RO filter in your home, you know that the tank holds 2 gallons of water at a time. That means, if you decided to fill up a giant 2 gallon pot with water, for the following several hours, water would just dribble out of the spout until the water reserve was built back up (It takes time for the unit to do this). Sometimes, we do go through water faster than other times, like if we have guests staying with us, or if I need to fill up a big pot of water for cooking, or if we’re just extra thirsty that day…etc. I always have 6 – 12 filled carafes in the pantry for these times. If I have empty carafes sitting around, I’ll just fill up one or two in the early morning, or before bed to be sure I always have a reserve of pure drinking water in the pantry. Of course, they would also come in handy for other drinks such as nut milks, iced tea, juice, wine…etc. My carafes came from the [online] container store. I think they were only 4 or 5 bucks each. Pier 1 also carries carafes (with lids) very similar to these, but I remember making a mental note that they were double the price (of whatever it was I paid at the container store).
On a side note….I just did some research, and found that larger RO tanks are available if the 2 gallon tank does not meet your needs. We had our unit installed many years ago, and at that time, the 2 gallon tank was our only option. I just came across some that now hold up to 20 gallons on the following website (can easily be added onto your existing unit):
http://www.waterfilters.net/Residential-RO-Tanks.
_____________________________________________________________________________________________
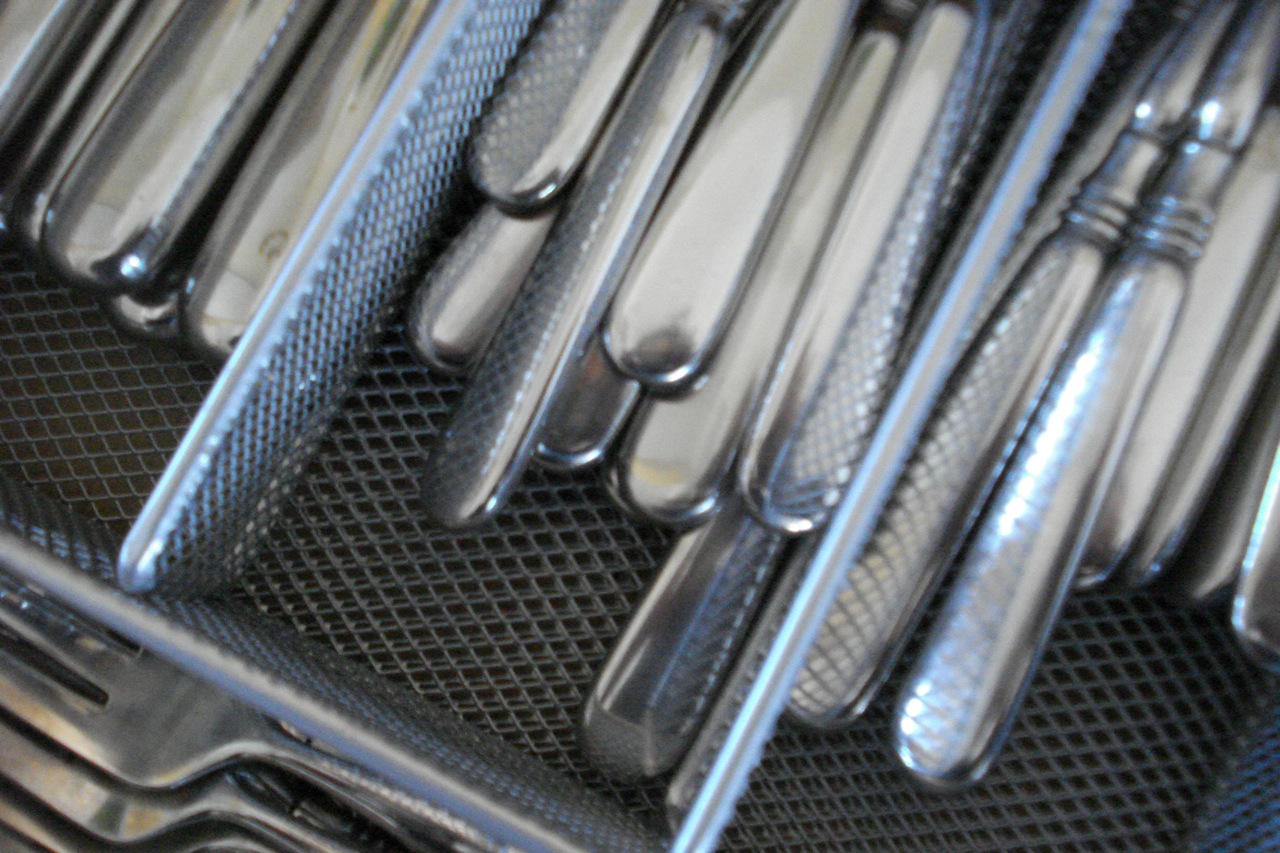
MESH UTENSIL HOLDER
I don’t like my utensils sitting in a collection of crumbs! This type of tray is awesome because any crumbs that inadvertently fall into the drawer simply fall through the mesh holes. Last time I visited a family member, & opened up the utensil drawer to get a spoon, I was not shy to suggest this type of mesh utensil holder. She liked the idea so I figured I’d share it here too. You can probably get these anywhere they sell kitchen stuff, but I picked mine up at Bed Bath & Beyond. I don’t know why, but for most of us, cleaning out the utensil drawer seems to be one of those things that’s put off until it’s absolutely disgusting. This mesh tray helps to eliminate that type of [crummy] problem. And by the way, the one I have is expandable to fit any drawer, but I’ve since noticed not all the mesh ones have that feature. So, if you’re planning on picking up one of these, measure your drawer before shopping to be sure the one you choose will fit, or get the expandable version.
_____________________________________________________________________________________________
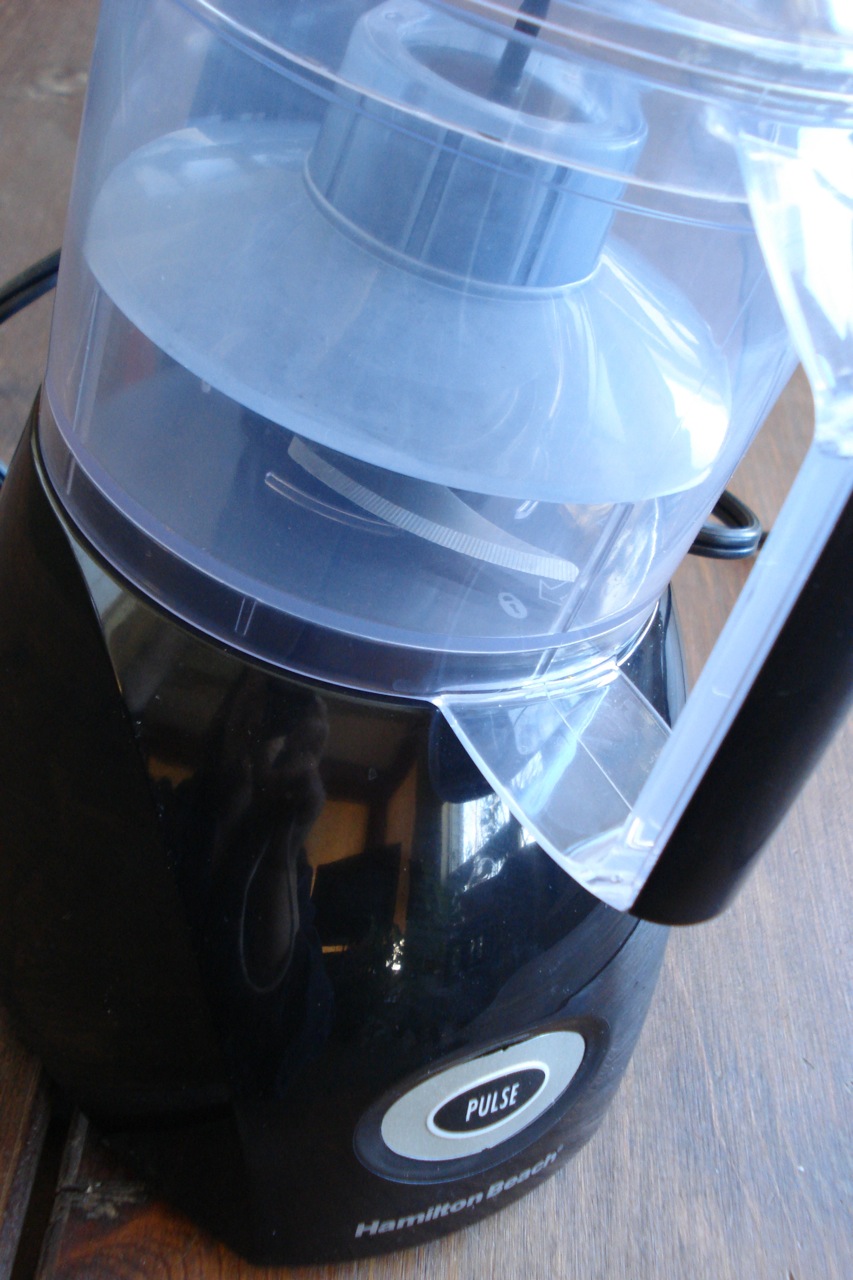
HAMILTON BEACH MINI FOOD PROCESSOR
This is what I’d consider a special mini food processor because of the (removable) “lamp-shade-like” piece inside the work-bowl. Let’s say you’re putting in 6 cloves of garlic. Of course, for that small amount of food, the entire work bowl is unnecessary – little garlic pieces would shoot up to the top of the bowl, & you’d have to keep stopping & scraping them down to put them back into the blade area. By using that little “lamp” gadget (only needed when what you’re processing amounts to a very small amount of food), it keeps all the food directly in the blade area the entire time it’s processing, so no need to keep stopping & scraping. This feature is very cool (to me anyway!). I came across this mini processor about 8 months ago when I realized my cuisinart food processors were not BPA free. After researching, I found that Hamilton Beach is the only company that makes BPA free food processors (& in fact, they don’t use BPA at all, in any of their products). I replaced both my large and small cuisinart processors with Hamilton Beach units, and they work just as well, and in the case of this mini food processor – even better because of the above mentioned, added feature. There are times when I put hot foods into these machines, and I feel much better doing so with BPA free units. If looking for this small food processor, I think Hamilton Beach calls it a “Deluxe Food Chopper.” The larger one is called “Big Mouth Food Processor” (FYI – only the small unit has that “lamp shade” feature).
_____________________________________________________________________________________________
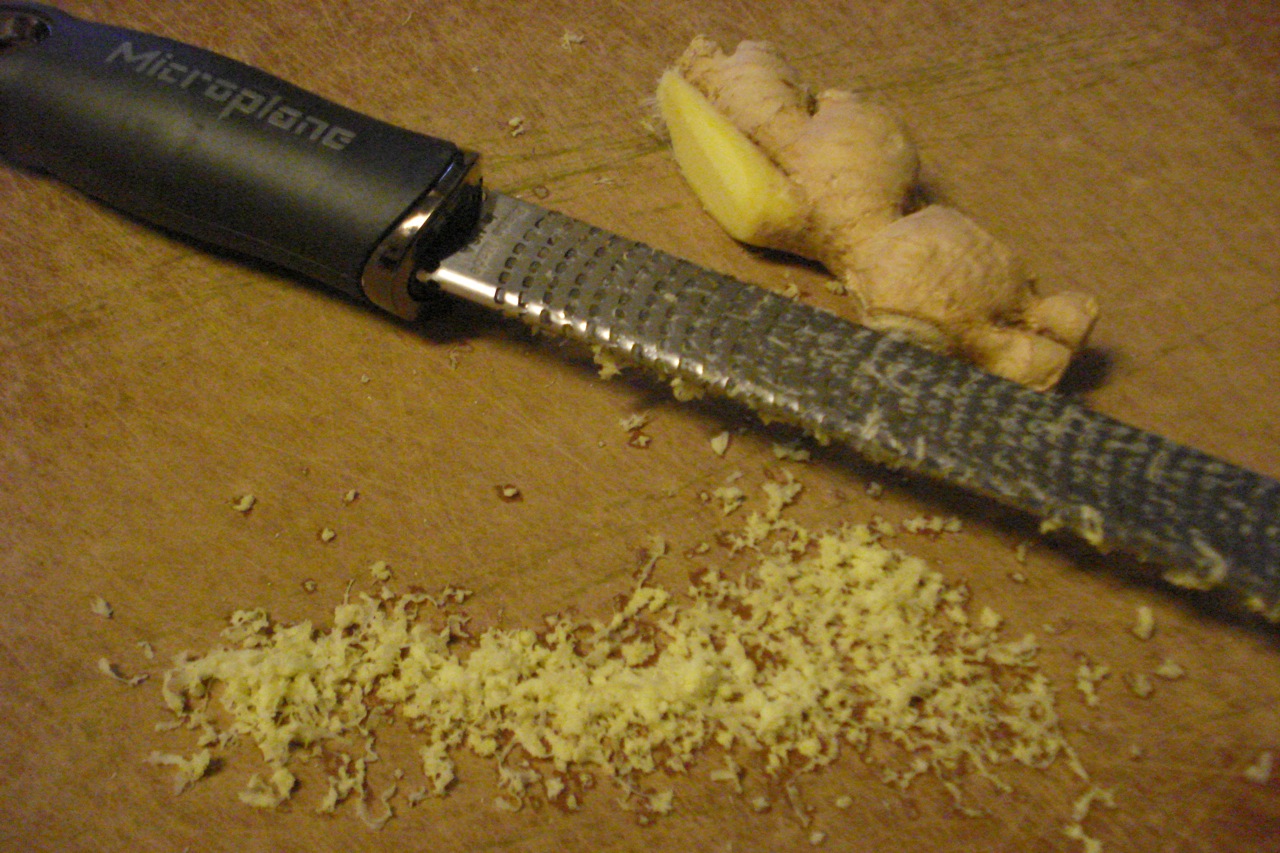
ZESTER/GRATER
This is by far the best zester I’ve ever owned. I don’t know what you’d call the kind of zester I used in the past, but regardless, it was ridiculously laborious & annoying to use. I basically went years, consciously or unconsciously, avoiding recipes that called for zest because I really disliked using that tool. I also avoided dealing with fresh ginger & relied primarily on pre-chopped jarred ginger when called for. Once I got the tool pictured above, & tried it on ginger, I couldn’t believe the ease of use. I also inadvertently figured out a little trick to it (grating ginger) which is to store the ginger (whole, unpeeled) in the freezer. It’s so much easier to grate when frozen. Simply wrap a bulb of ginger in a piece of parchment paper, put it in a freezer bag, and pull it out as needed. Peel just the portion you’ll be using (can use a potato peeler or paring knife), grate it, then wrap it back up & put it away. Storing it in the freezer also assures you’ll always have fresh ginger around when you need it. That was my original intent in keeping it in the freezer. I used to buy a bulb of it, use a little, and by the time I needed it next, it would be shriveled up & too far gone. Keeping it in the freezer eliminated that problem. However, I had no idea it would make it so much easier to grate. Good thing I forgot to thaw it until the last minute, or I might never have known the ease of using frozen ginger (in combination with this neat tool). Of course, this tool is also great for zesting citrus fruits. I’ve seen them around, here & there. I got mine at William Sonoma (not sure if the quality varies from brand to brand, so am mentioning it just in case).
_____________________________________________________________________________________________
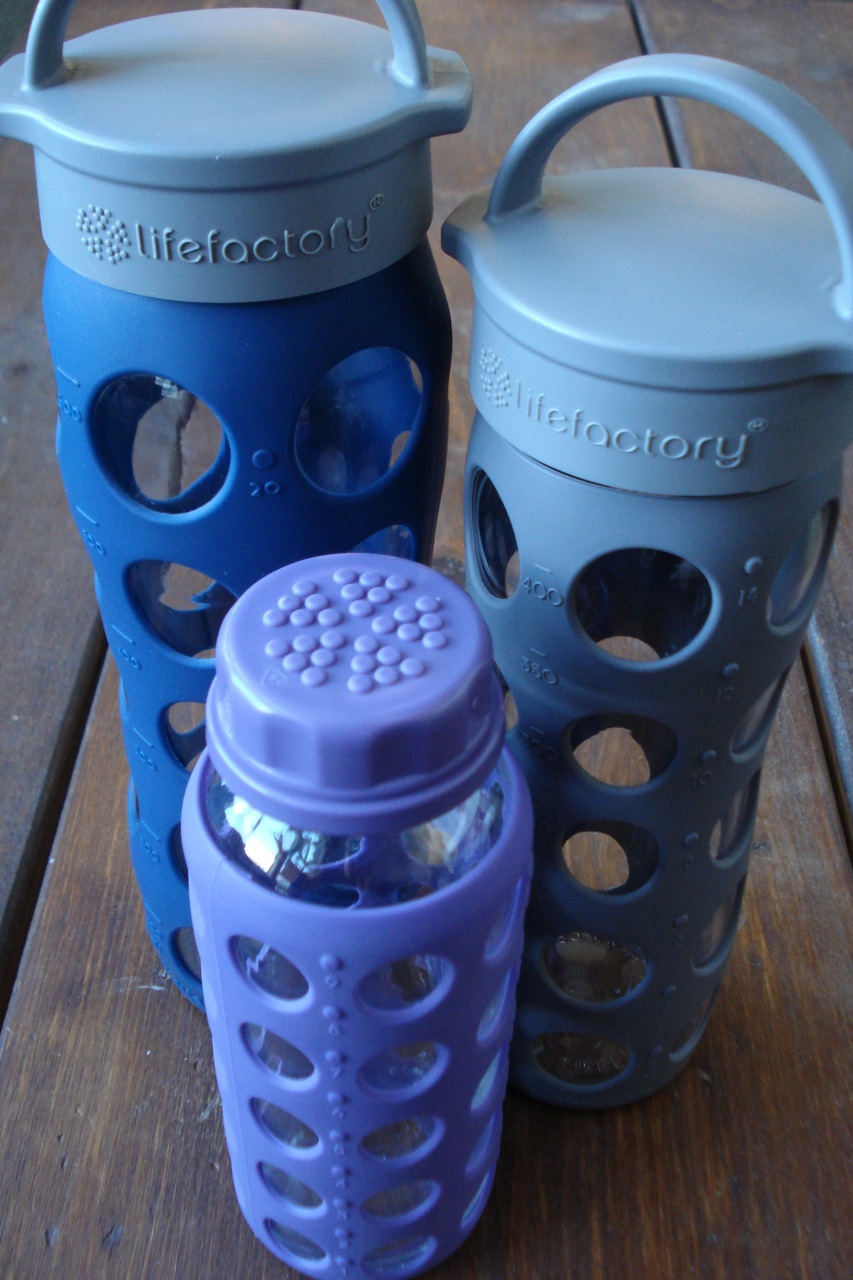
LIFE FACTORY WATER BOTTLES
Invention of the decade! I received two of these as a gift in August (thanks Wen!) and was instantly enamored (I know, I need to get out more). Water on the go never tasted so good. As far as taste goes, it used to be a plastic-y problem, next it was a slight metalic-y problem, but now, no problem at all. In case you can’t tell by the picture, they’re glass jars covered in a silicone sleeve. I’ve acquired quite a few of these in different sizes since August, and they’ve been put to good use. Worth mentioning, they’ve been dropped on pavement, and one time took a roll down the wooden stairs, but the silicone sleeve protects the glass exceptionally well. I’m sure it could break in some circumstance, but it seems you’d have to be trying to break it. The smaller 9 oz size works great for sending to school w/ the kids. They can go right in the dishwasher (no need to remove the silicone sleeve). The company also makes silicone covered, glass, baby bottles (which are the best baby bottles I’ve ever seen).
_____________________________________________________________________________________________
SILICONE BRUSH
I used to have one of those basting brushes (if that’s what it’s called) w/ real bristles. Every now & then I’d find one of the bristle “hairs” in the food (eww). I don’t have to worry about such things since I switched to this type of [non-toxic] silicone brush. The bristle type was also difficult to clean (always had an oily residue no matter how many times I cleaned it). I just put this silicone one in the dishwasher & it comes out perfectly clean.
_____________________________________________________________________________________________
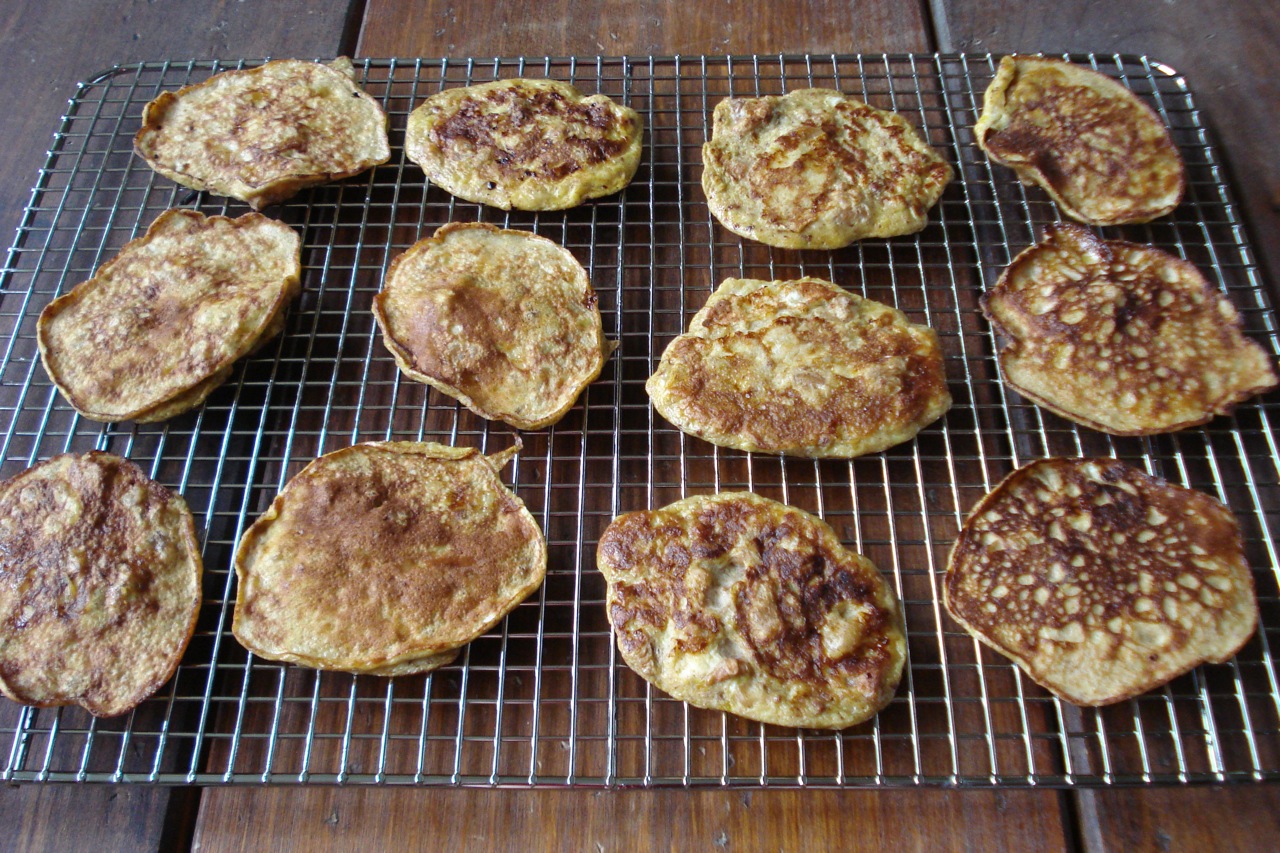
COOLING RACK (not prone to rusting)
I used to have a set of 3 tiered, stackable cooling racks and absolutely loved them. It was a great space saver, as it supplied a large amount of surface area using a minimal amount of counter space. However, in no time, they rusted like crazy. It grossed me out to lay my food on something that was rusty, so would sometimes lay parchment paper on top of the racks before I put the food down. Other times, I would examine the rack closely as I put each piece of food down, as to try to place them in an area without rust (was difficult!). Either way, it was either a waste of paper, or just plain annoying. I didn’t think I had a choice, as every rack I’ve ever owned has eventually rusted, but the one pictured above, which I’ve had for about 8 months now is still looking good (& it’s in & out of the dishwasher A LOT). It’s called the CIA Masters Collection 12×17 Wire Cooling Rack – Chrome Plate Steel (got mine on amazon).
_____________________________________________________________________________________________
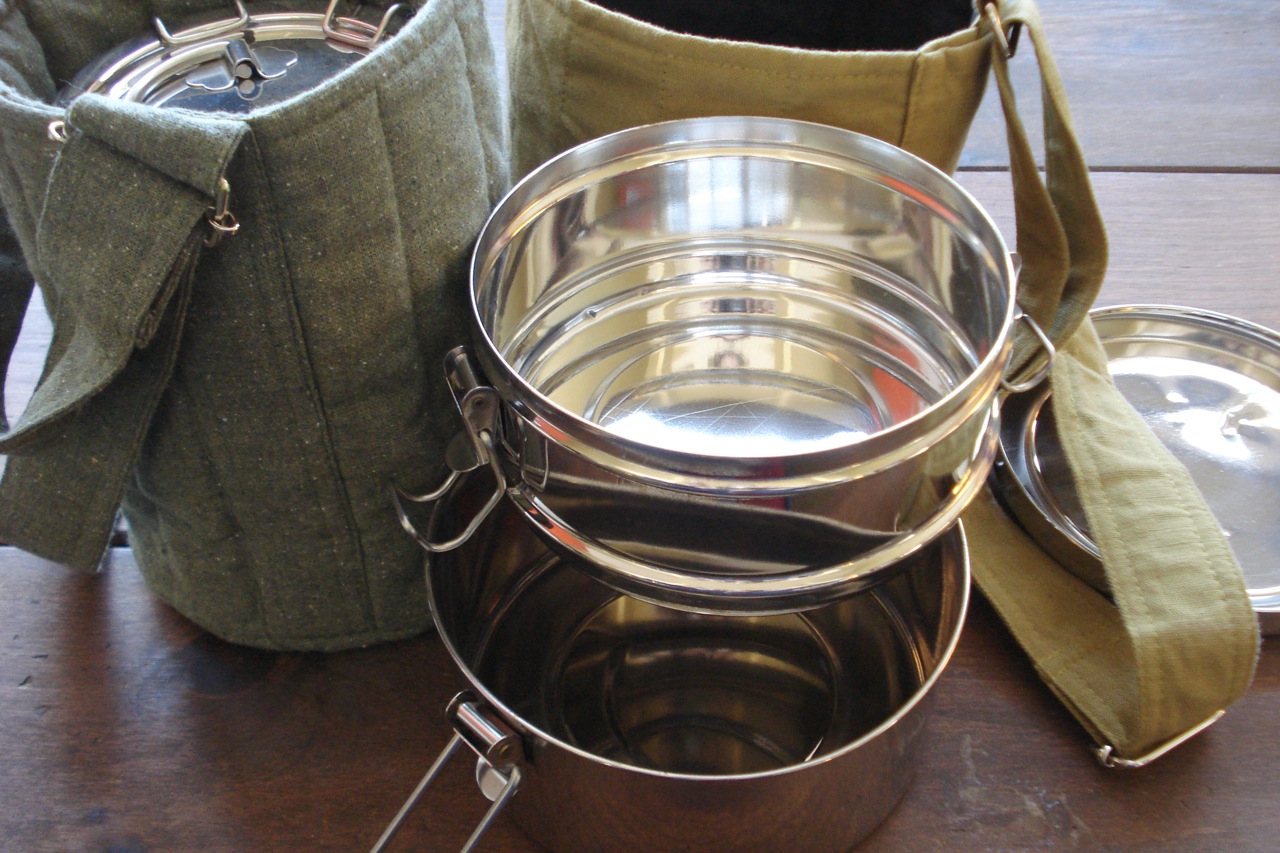
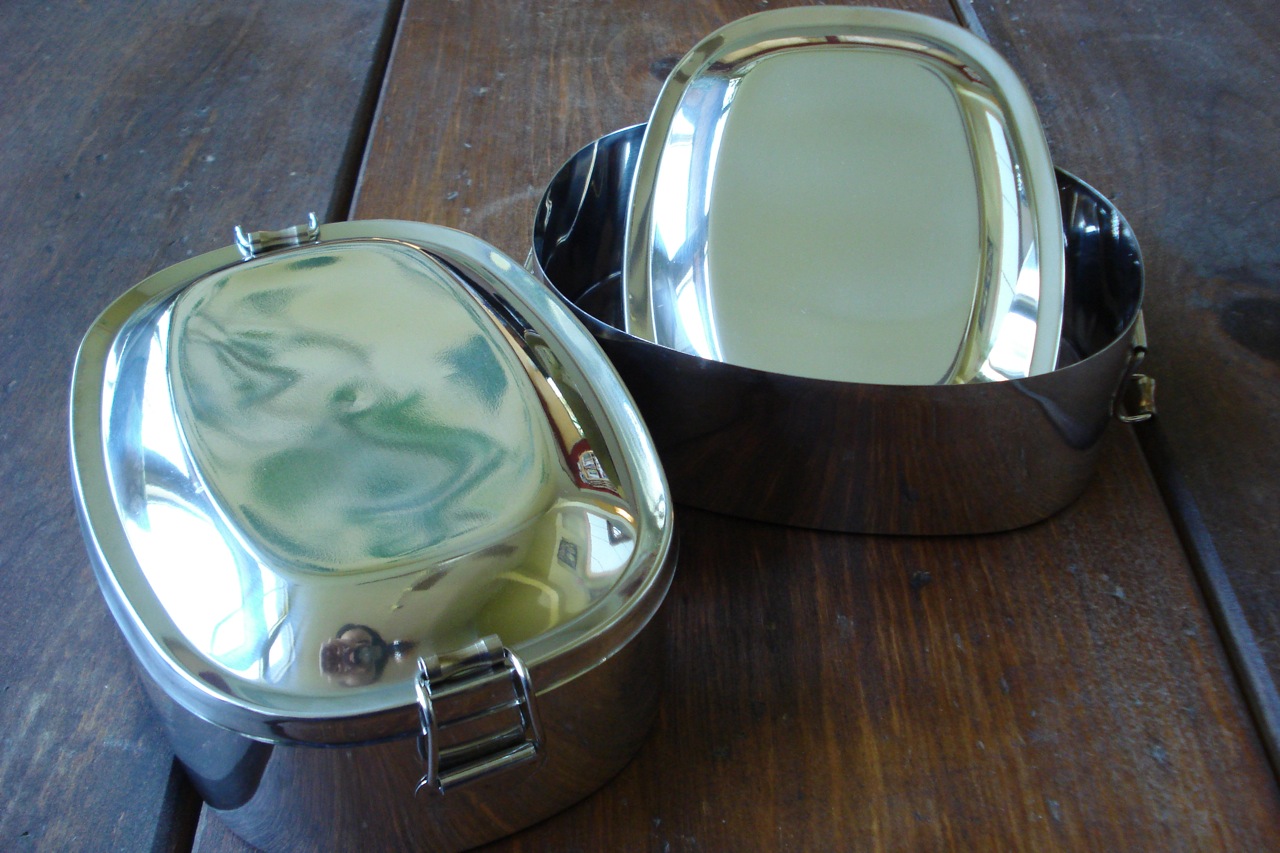
TO-GO WARE tiered storage containers
Love these containers!! Let me explain what they are for those who don’t know…. They are tiered, stainless steel, storage containers that lock together. One is a two tier system & the other three. I take one or the other with me when we eat out, so we can bring home any leftovers in something other than styrofoam (which is not eco-friendly, and leaches not so nice stuff into food – especially if the food is hot). We get mixed reactions…. Sometimes it’s an “aren’t you clever” kind of look, and other times more like “weirdos at table 3” =) They also come in handy for packing a lunch. They’re completely airtight, so work well for soups/stews & such. It’s great because you can keep a salad or sandwich in a completely separate compartment, but it’s still just one unit in the end once you snap it together. The lid can even be used as a plate, and the little carrying bags (which are made by and support women in various refugee camps around the world) makes the whole system convenient to use.
I will mention that the smaller “side kicks” & dressing containers (that can be purchases separately from the same company) tend to develop rust spots on the inside after going through the dishwasher. When I had called customer service about the problem, they were extremely nice, and sent out new side kicks right away (without me even having to return the rusty ones). However, the same thing happened to the second set. I have never had this problem with the larger, meal sized containers pictured above (& I’ve had them a long time). I can tell that the quality of the stainless steel isn’t as heavy for the smaller containers & I guess that’s the problem. Keep in mind, it was a long time ago (2 years?) when I encountered this rust problem, so perhaps they have made improvements since then for the smaller sized containers. In any case, I thought it was worth mentioning, as at this point in time, I only recommend the larger meal containers which are of excellent quality and very useful. You can find them on amazon or purchase directly from the manufacturer’s website.
_____________________________________________________________________________________________
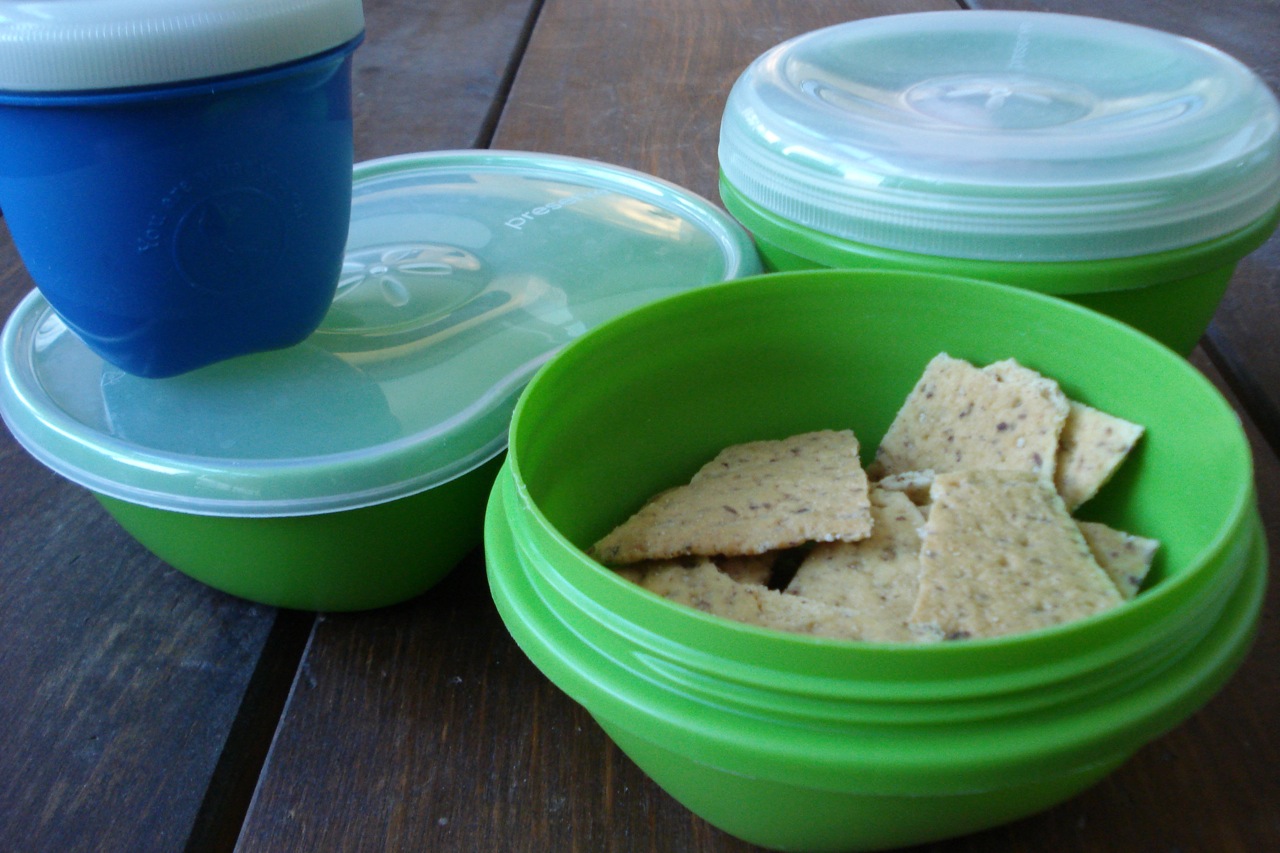
“PRESERVE” FOOD CONTAINERS
These are great snack containers for the kid’s lunch box (one is sized right for a sandwich too). Made of safe, non-toxic (bpa free) plastic. I ended up finding these after the “side kicks” from To-Go Ware didn’t work for us. Can be purchased on amazon or from the manufacturer’s website.
_____________________________________________________________________________________________
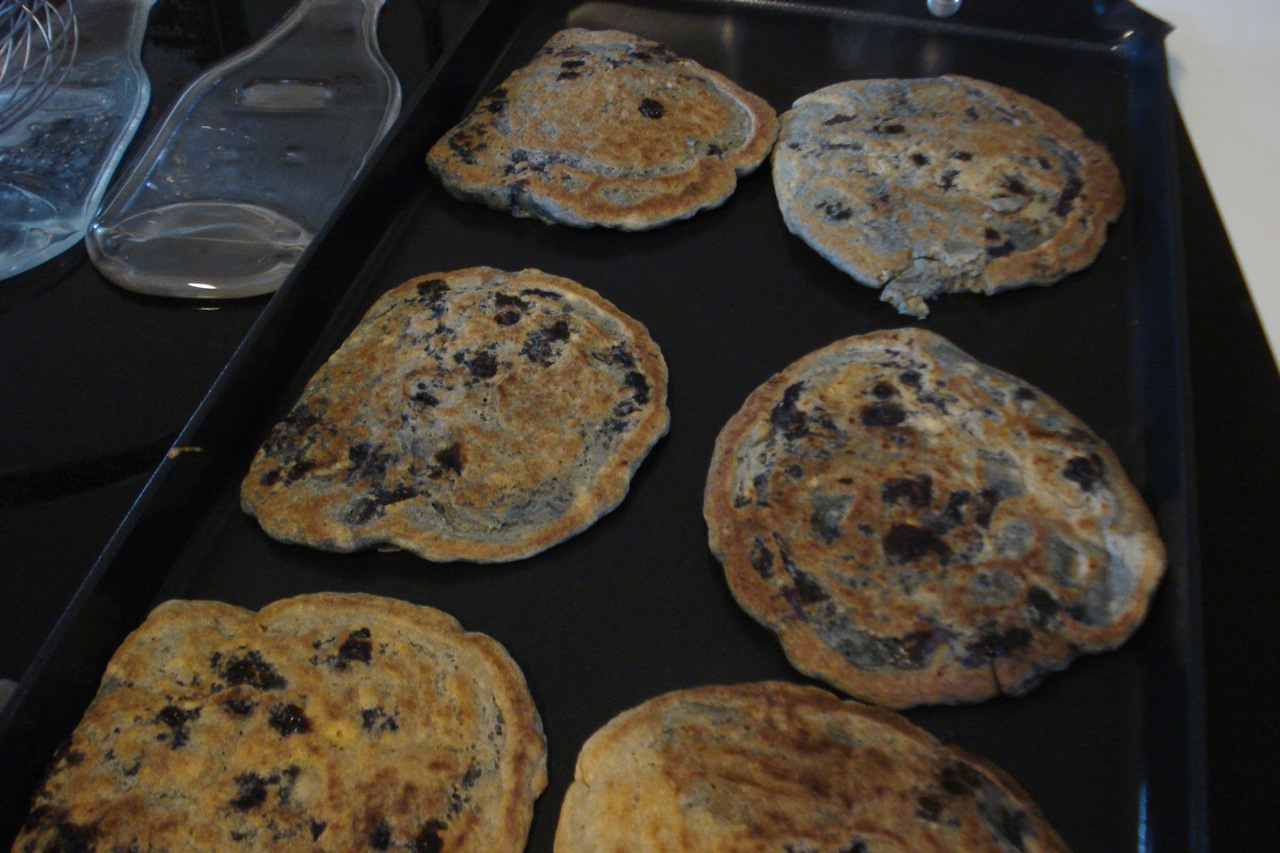
GREEN GOURMET GRIDDLE (made by Cuisinart)
This is a great, stove-top, (double burner) non-stick griddle that is not made of dangerous teflon/PFOA. Our favorite blueberry-oat-pancakes pictured above!
_____________________________________________________________________________________________
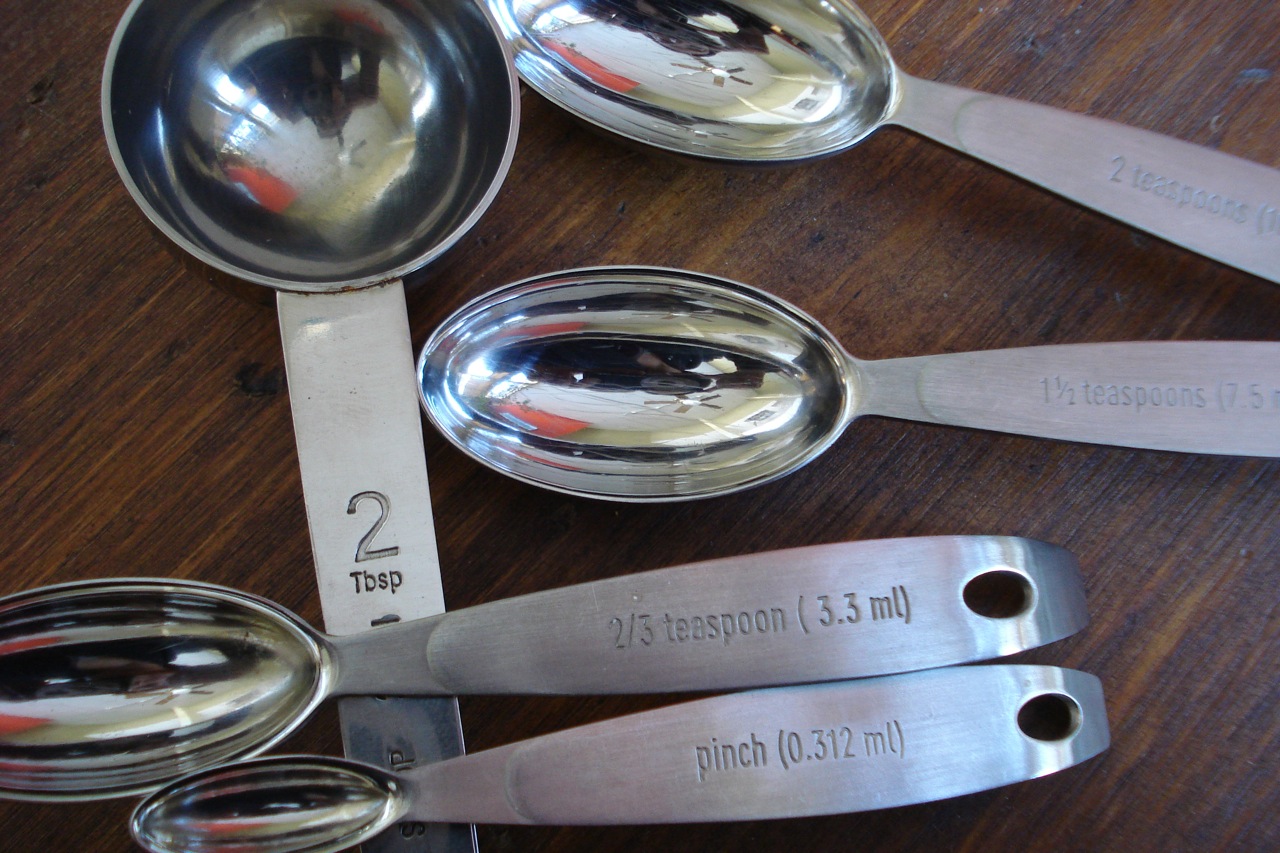
ODD SIZED MEASURING SPOONS
Some people are measurers, some just sprinkle and toss. Personally, I like consistency and most often measure when adding spices & other condiments to a dish. These spoons come in really handy for me, as I’m often increasing the recipe by 1.5 or 2, or cutting in half, etc… My husband makes fun of that little “pinch” spoon, but I tell ya, every now & then, when I need a pinch of ground cardamom (or something), and I’m almost out of it – not being able to reach my fingers to the bottom of that narrow, little jar – I do pull out that cute little spoon =) I’ve had these so long that I don’t remember where they came from – some cooking catalog. I’m sure you can find them, if interested, through a google search.
____________________________________________________________________________________________
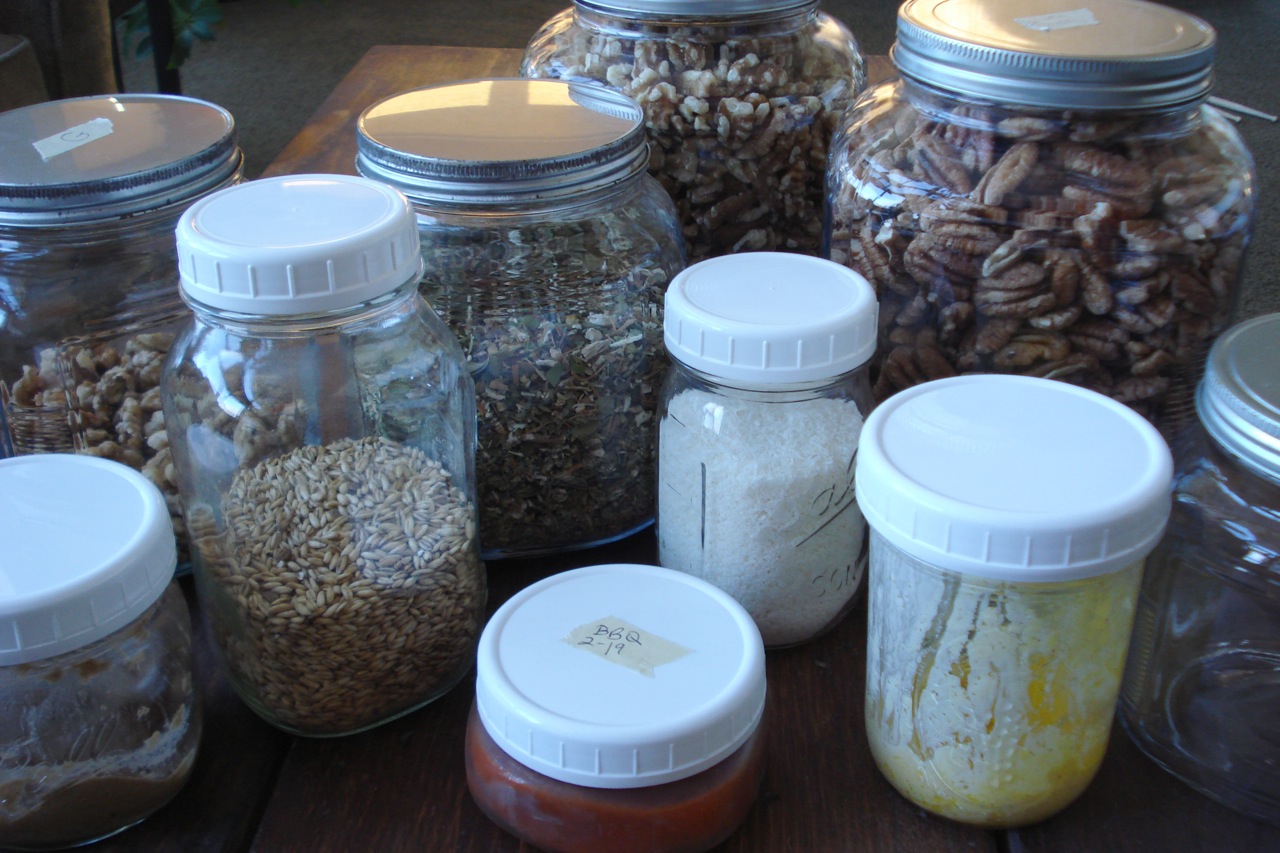
GLASS MASON JARS (of all sizes!)
I use these for just about everything & anything – nuts, seeds, grains, mayo, milks, coconut shreds, flour, sauces, beans, nut butters, & on & on….. They’re indispensable. You can usually pick up the normal sized jars at the grocery store. I found the extra-large ones, and the smaller ones at Target. I really like the plastic, BPA-free lids (which I bought separately on amazon). Most metal lids have a liner that unfortunately contains BPA (probably not that big of a deal unless the jar is holding a liquid you need to shake up before use). But also, they do get rusty & yuckie over time. Back to the jars themselves….They’re also great for the freezer. For instance, when I make bbq-sauce, I split it into 3 portions in the smallest jars, label, freeze, & pull out as needed. And by the way, when labeling jars, I’ve found the typical label stickers are terrible, as it’s so hard to peel them off. Masking tape works much better! [Keep in mind, the plastic lids come in two sizes – regular & wide mouth, so be sure to know which size you need before ordering.]
_____________________________________________________________________________________________
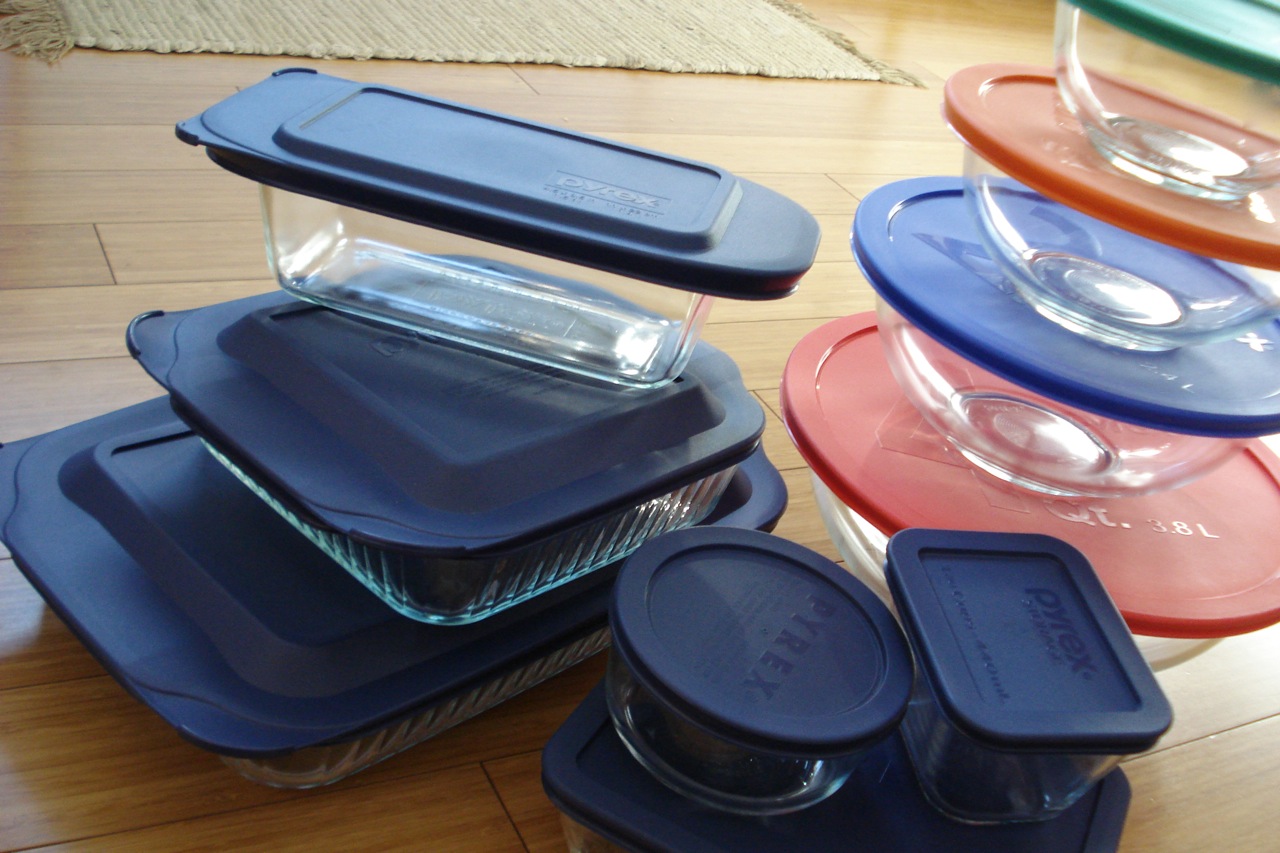
PYREX BAKING DISHES & BOWLS w/ LIDS
I couldn’t live w/o these covered glass containers (well, reading this back, I guess that’s an extreme statement, but you get the idea!). They are so convenient because you can take them directly from the freezer or fridge and place them in the oven (w/o the lid of course!). Glass is the safest, most non-reactive material you can store your food in. After making a big batch of soup, I don’t want to put extra (hot) soup into plastic containers. These glass containers with snap on lids are the perfect solution. It also eliminates the need to cover anything with plastic wrap which saves money. Years ago, these containers replaced all my old tupperware that were discolored, scratched & cracked, potentially leaching plastic-y chemicals into our food.
_____________________________________________________________________________________________
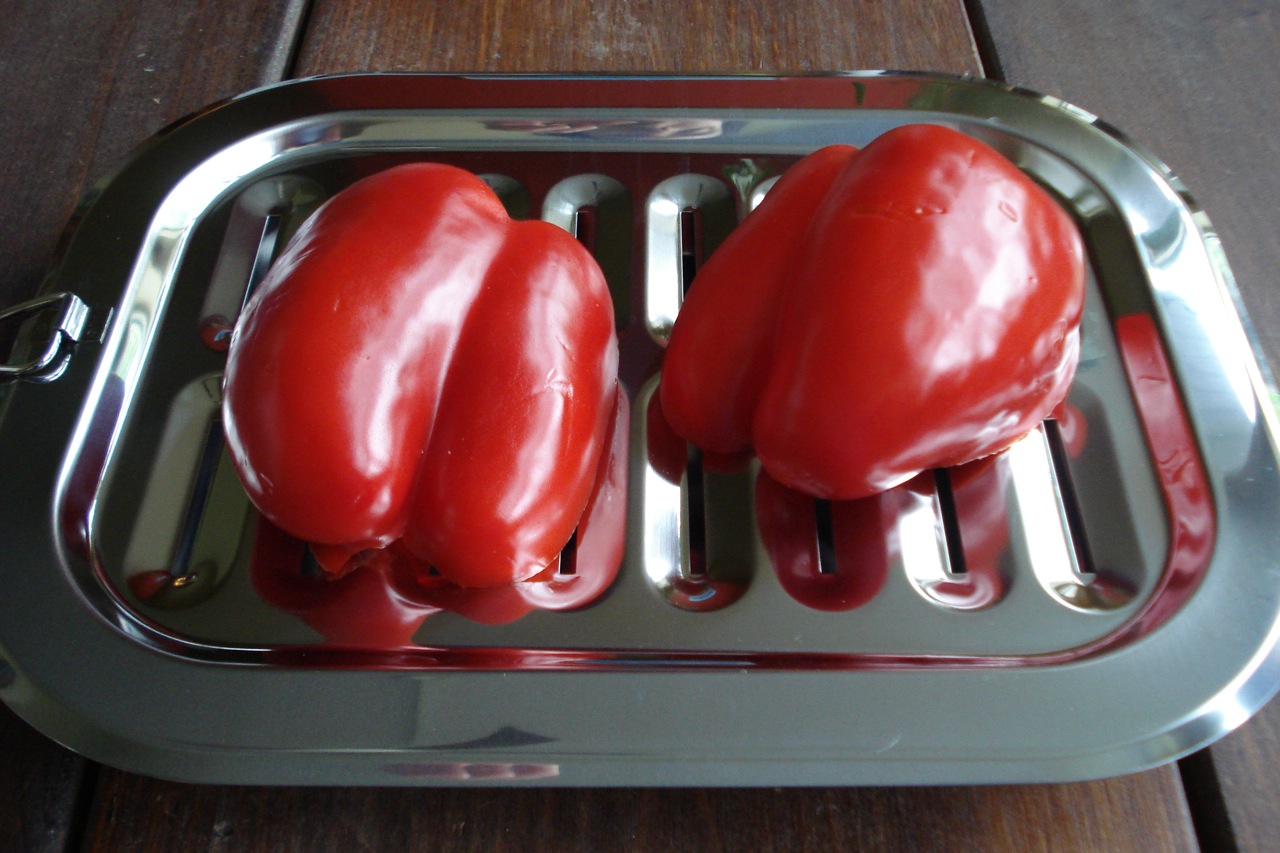
STAINLESS STEEL BROILER PAN
Most broiler pans are made of aluminum. I don’t use any aluminum products in my kitchen, so was happy (after a long search) to find a broiler pan (on amazon) made of high quality stainless steel. They come in two sizes (smaller size pictured above). They’re made by Progressive International & called “Stainless Steel Broiler Pan” (or “Petite Stainless Steel Broiler Pan” depending on which size you choose).
_____________________________________________________________________________________________
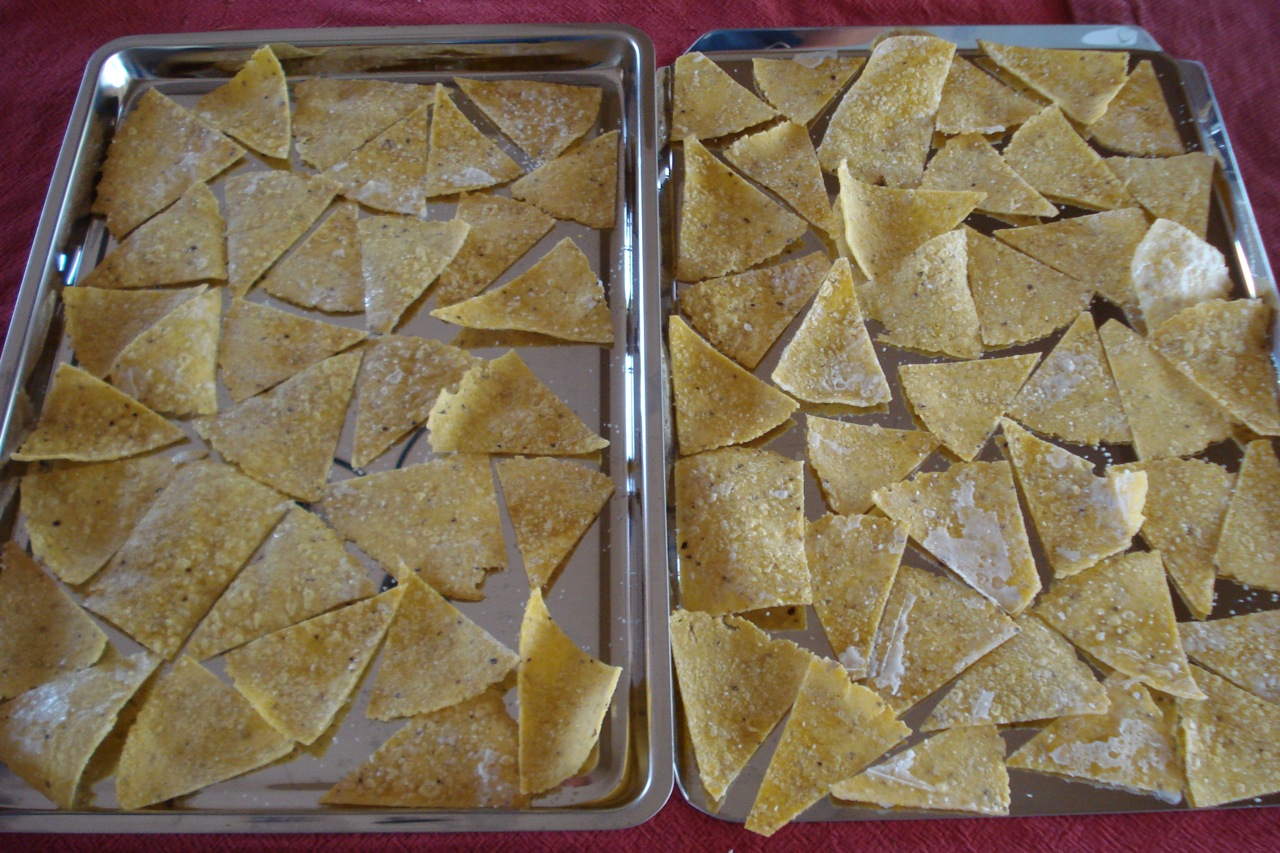
STAINLESS STEEL BAKING TRAYS
Again, I don’t like to use lo-fi, aluminum (& ultimately rusty) baking pans. These are great. I ended up purchasing 2 separate sets from amazon at 2 different times (2 pans per set). The first set I bought was not as thick & sturdy as the second (I inadvertently purchased from 2 different vendors & the grade of stainless steel was different). FYI – The better set came from “Home Naturals Inc.” (through Amazon).
_____________________________________________________________________________________________
TOVOLO and ORKA ICE POP MOLDS
For those who’ve already visited my ice-pop-page, this will be old news, but I thought this page would also be a good place to mention how much we love making homemade ice pops using fun shaped molds. I use 4 different shapes from 2 companies, and have chosen them because they’re made of non-toxic plastic or silicone. Pictured above is banana-cinnamon on the bottom, and mexacin-ice-cream on top. A tasty combination! If interested, scroll down to the bottom of my ice-pop-page for links to the specific molds I use, or do a google search for “TOVOLO” and “ORKA.”
______________________________________________________________________________________________
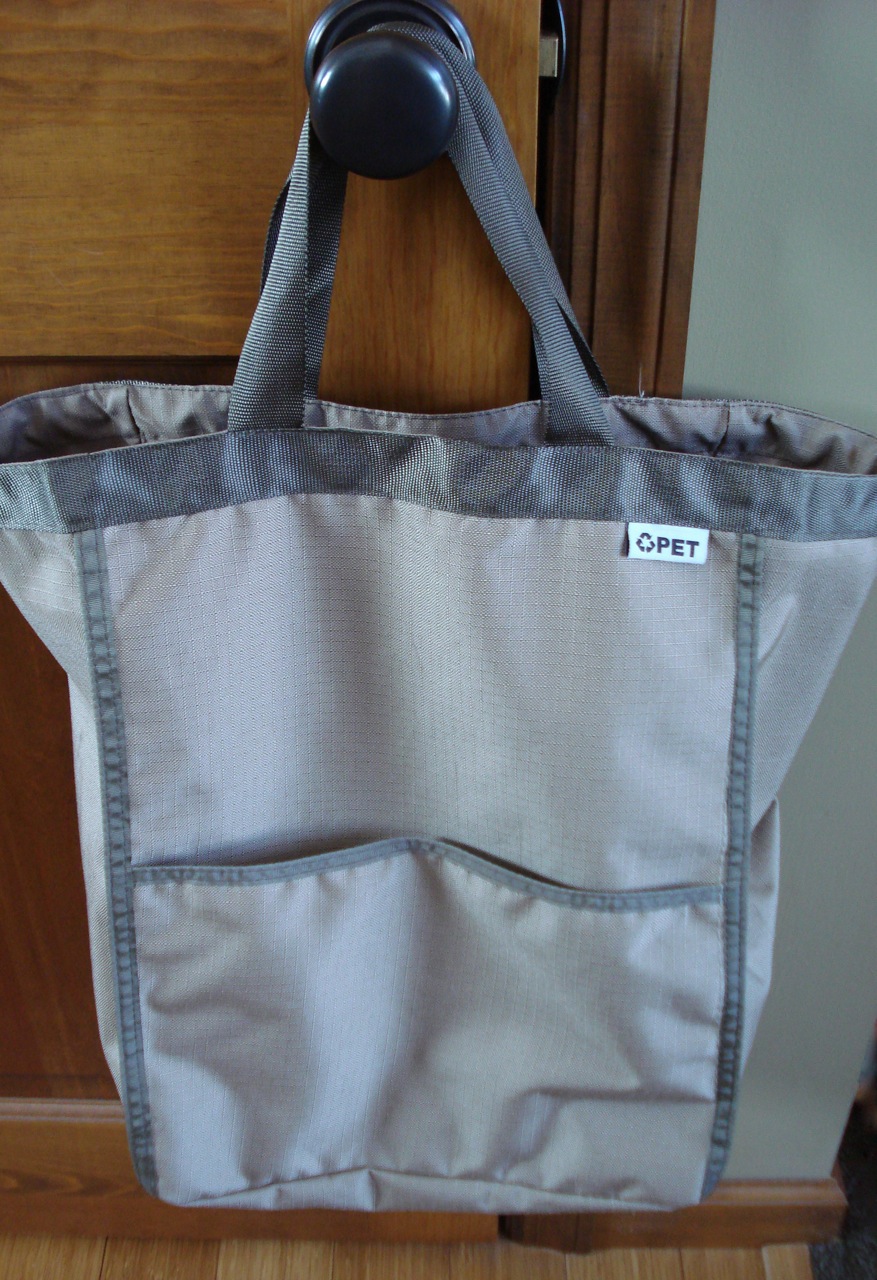
“REUSEIT RECYCLED PET EARTHTOTE” GROCERY BAG
These bags are the bomb! Made of recycled plastic bottles & containers. I own 4 of them, and would be surprised if they didn’t last me my whole life. They are ridiculously strong and roomy. I ordered mine from reusablebags.com (which to my knowledge has since changed their website name to “reusit.com”). I’ve been using my own grocery bags for a long time now, but of course, in the beginning, the hardest part was having them with me when I needed them. It probably took a good 3 months before I didn’t have to try so hard to remember them. The two tricks that worked for me were 1 – as soon as I unloaded the groceries, I put the empty bags by the front door so I always remembered to toss them in the car on my next trip out, and 2 – When I forgot to take them into the grocery store with me, I made myself walk back to the car to get them! Now, it’s like wearing underwear. I just don’t forget =)
________________________________________________________________________________________
KWIK-KUT
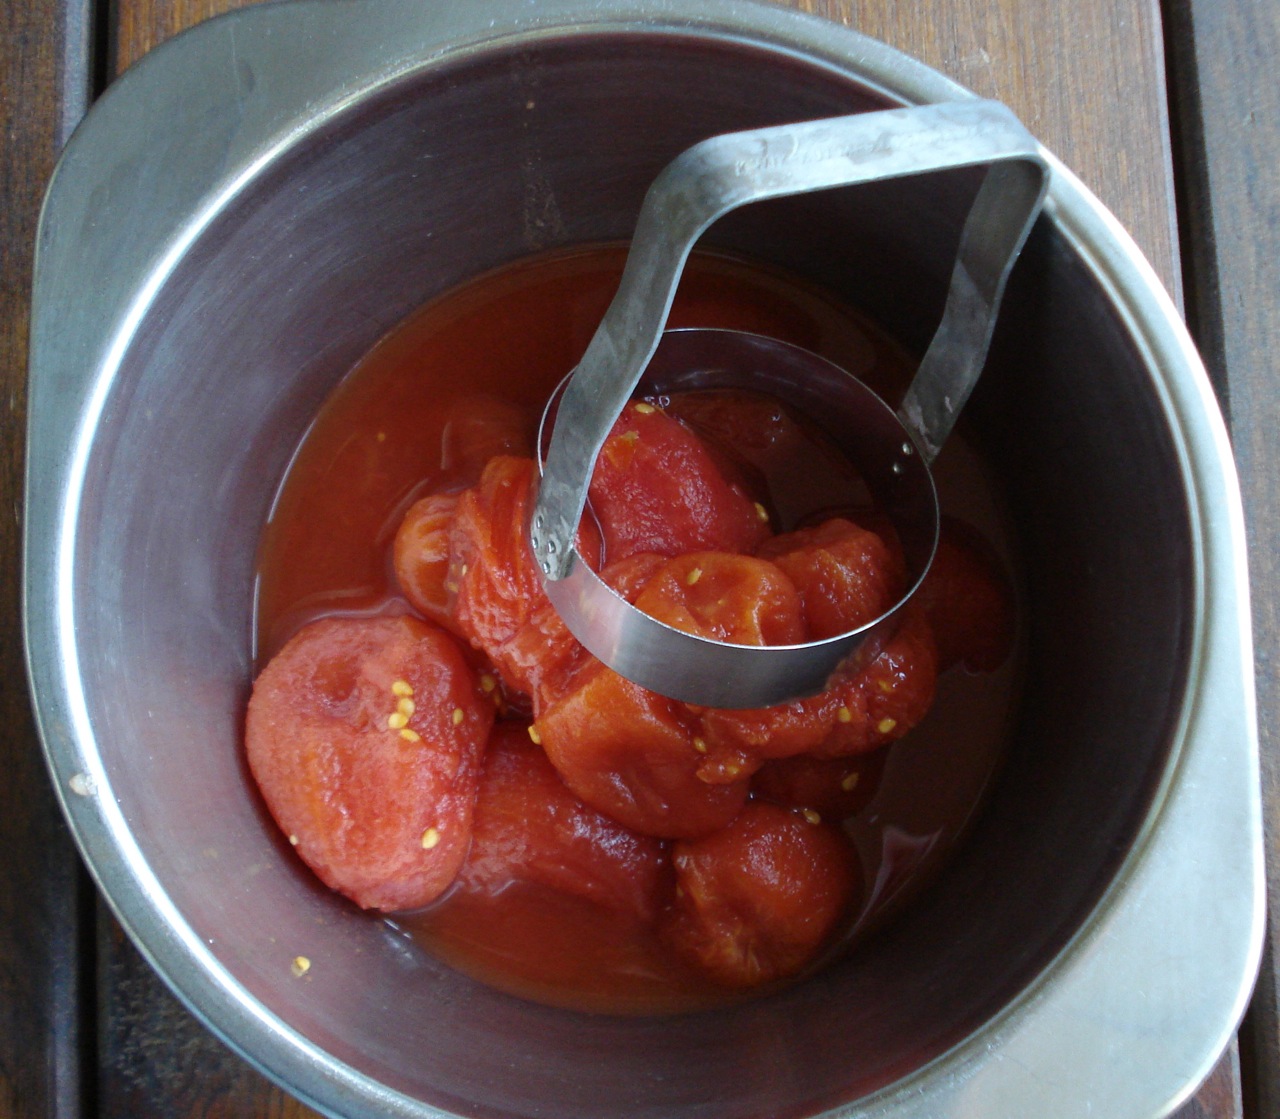
I really love this simple little gadget. I use it to quickly chop things like tomatoes, hardboiled eggs, avocados, chick peas, strawberries, nuts, tempeh, etc. In my opinion, the one with the flat bottom (pictured above) works best. I used to also have the one with the serrated edge, but I gave it away, as it never seemed to accomplish the job at hand. Anyway, this little thing is less than $5. And made in the USA. Nice!
_______________________________________________________________
CUBE TRAY W/ LID
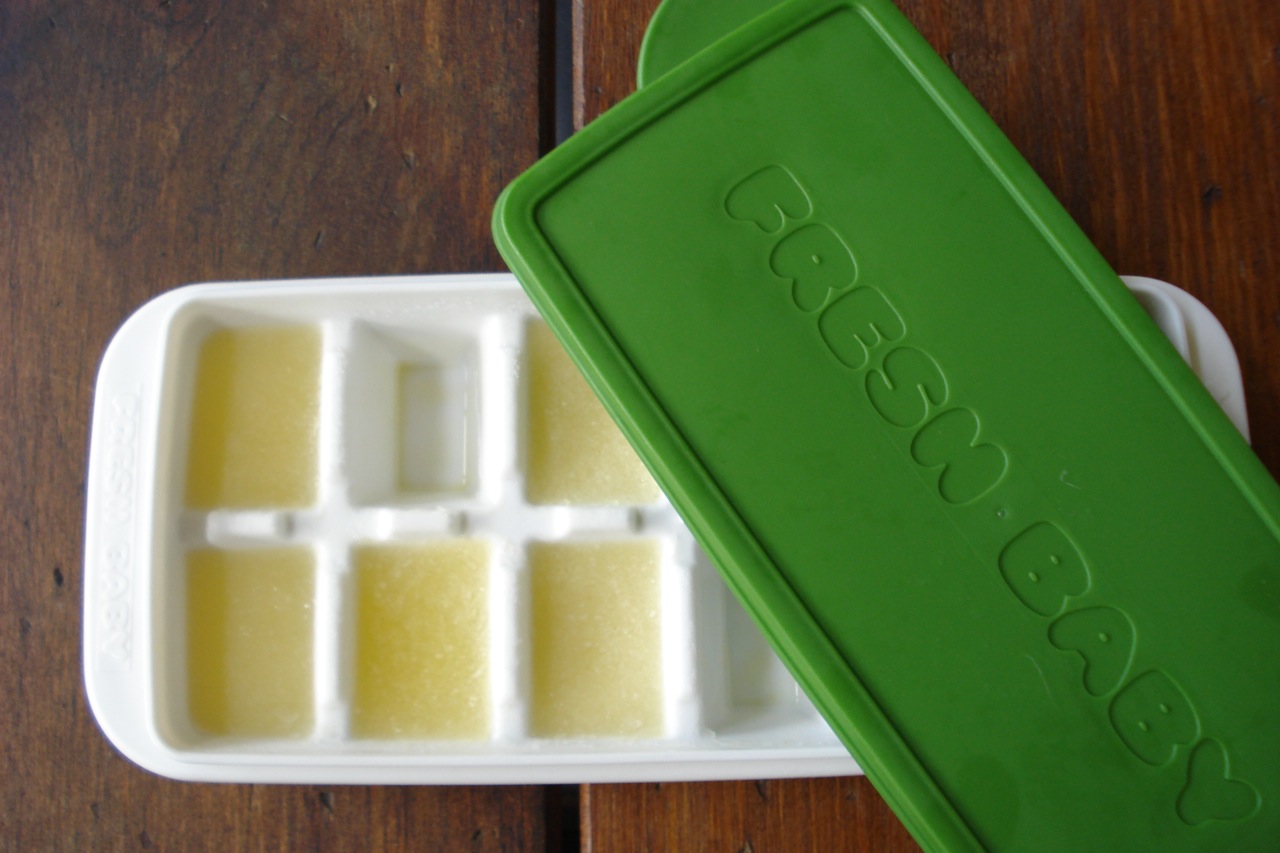
These cube trays are GREAT! They’re actually made & marketed for baby food and breast milk, but are not limited to such uses. I have a few foods I like to freeze into cubes (yogurt, lemon juice, pesto, & the Italian pepper base for my favorite marinara sauce). The problem I’ve had in the past is that once my foods/liquids were frozen into cubes, I’d have to transfer them to either a freezer bag, or other storage container, in which they’d always end up with freezer burn. Using the “fresh baby” trays, my cubes are completely protected from freezer burn (being that I never have to remove them from the cube tray until I need them. I really love that they’re high quality, food safe plastic: no BP-A, PVC, or phthalate (& made in USA).
LEMON JUICE TIP – Sometimes I don’t have fresh lemons on hand when I need them. On the other hand, if I buy a bottle of lemon juice, I’m inevitably at some point holding half a bottle in my hand, alternating between sniffing & wondering if those floating white “things” are supposed to be there. I’ve found the best thing to do is to buy a whole bunch of organic lemons when I can get a good deal on them, juice them all, and put them into my cube trays in 1 TBSP servings. This way, when I need a tablespoon or 2 of fresh lemon juice, I just pop out a couple of cubes!
_______________________________________________________________
KLEAN KANTEEN W/ LOOP CAP
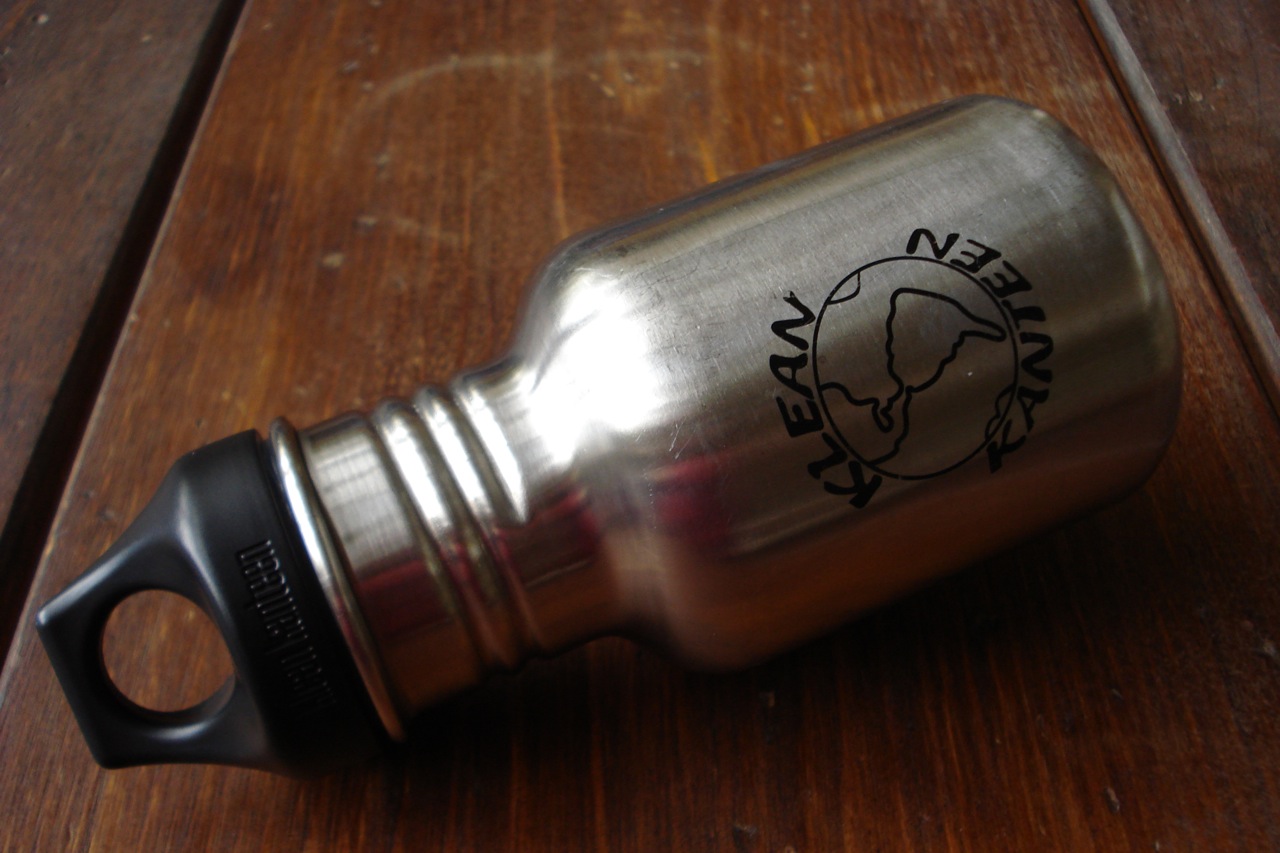
We had a Reverse Osmosis water filter installed in our home about 10 years ago & have no regrets. I’m sure it’s more than paid for itself over the years. In fact, if I think about it now…. As a family of 4, if we spent $10 a week on bottled water (which I think is a reasonable estimate), 10 years later, that adds up to $5,200. It cost us approx $1,500 for the RO unit (including installation), so we’re ahead of the game for sure (and I believe RO units have since come down in price). We like using Klean Kanteens when we’re taking off for the day, but the reason for this post is actually to mention a tid bit of info about the klean kanteen caps. There are a few different options & we’ve used all of them. In our experience, the loop cap (shown in photo) is the only one that doesn’t collect water. In other words, when the caps are washed (either in the sink or the dishwasher), there must be some ity-bity seam that allows water to seep in & become trapped within the cap (if you shake the cap you can hear it – but you can’t shake it out). I don’t particularly want old, dirty, dishwater stuck in the caps of my water bottles so, thought I’d mention the loop cap is the way to go if you’d like to avoid that as well. Come to think of it, the sports cap doesn’t collect water either if you like that style cap (we tried the KK sports cap but it didn’t work for us – can’t remember why). And I guess, while we’re on the topic…..
_____________________________________________________________
NEW WAVE ENVIRO STAINLESS STEEL FOOD CONTAINER
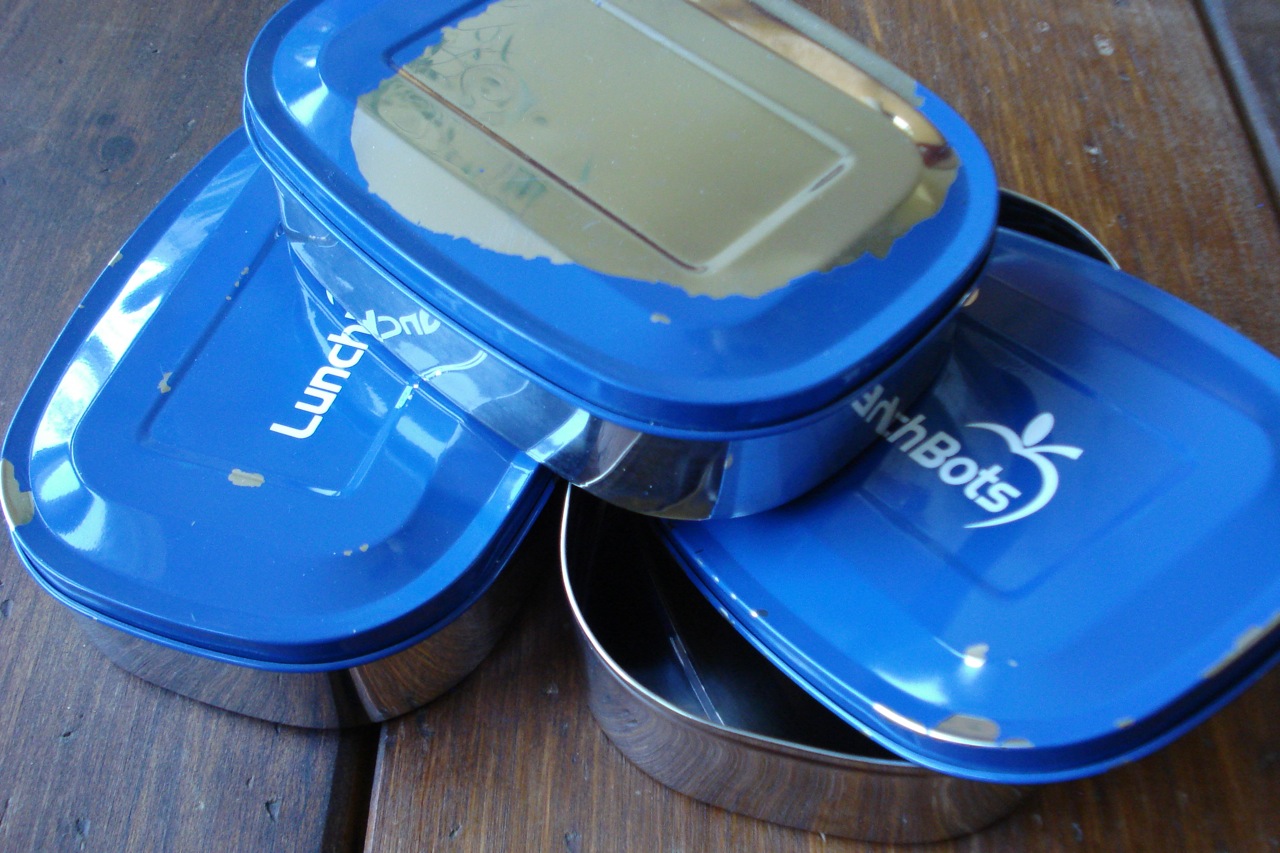
Really like these to pack school lunches. The clasps that hold the lid on are easy enough for the kids to open & close (might be a little difficult for ages 6 & under), & they’re dishwasher safe. You can find them on amazon. Don’t make the mistake of buying “lunchbots.” Had those first, and noticed the paint bubbling & chipping off the lids right from the get-go. Tried to completely pick the paint off of the container that was in the worst shape – thought maybe I could salvage it that way – but couldn’t get it all off. They were great containers otherwise, but I’m not really interested in blue paint chips becoming part of my kids lunch (see photo below)….
___________________________________________________________________________
TEA BAG PRESS
When I came home with this cute little thing about 6 months ago, my husband rolled his eyes. Funny thing is, it turns out he uses it no less than 5 times a day =) I think it was about 3 bucks from bed bath & beyond.
______________________________________________________________________
FOOD PROCESSOR
http://www.hamiltonbeach.com/kitchen-appliances-food-processors.html
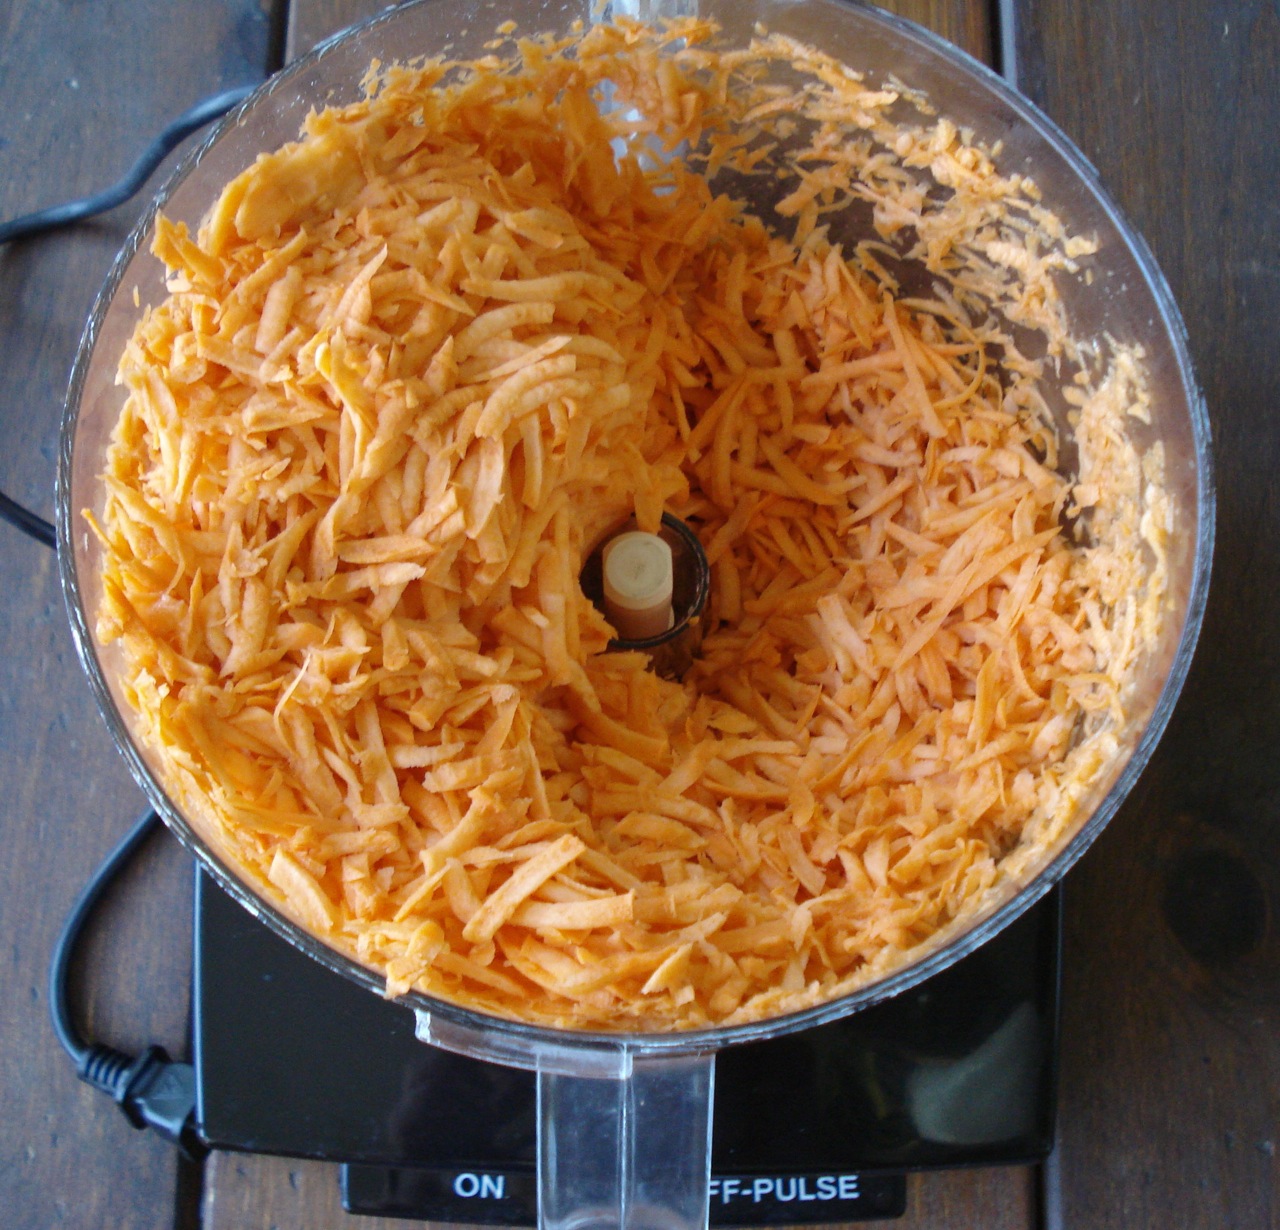
How else would one shred 8 cups of sweet potato in 60 seconds??? I’m doubtful that I would do what I do without helpful kitchen appliances like a food processor. Admittedly, preparing home-cooked meals takes time. If cooking is important to you, it’s really worthwhile to invest in a few appliances that can help with some of the dirty work & save precious time (as of course, there are other things we like to do too!) =) Be sure to get one with attachment blades for shredding & slicing. Off the top of my head, it comes in so handy for shredding or slicing large amounts of carrots, potatoes, cheese, zucchini, onions, cabbage. With the regular S blade – it’s great for pureeing things like dips, beans, sandwich spreads & pestos, and also for making dough. Mine is a super-large, 14 cup capacity, as I sometimes double or triple recipes & like being able to fit everything in – in one batch. I also have a mini food processor which I LOVE for quickly chopping fresh herbs such as basil, parsley, cilantro, or for mincing several cloves of garlic at once. I’ll also use the mini processor for a small, single batch of hummus or other dip/spread. It’s nice to have the option not to have to dirty the giant food processor for only a small amount of food. A high quality, large capacity food processor isn’t cheap, but well worth it if you spend time in the kitchen.
_______________________________________________________________________
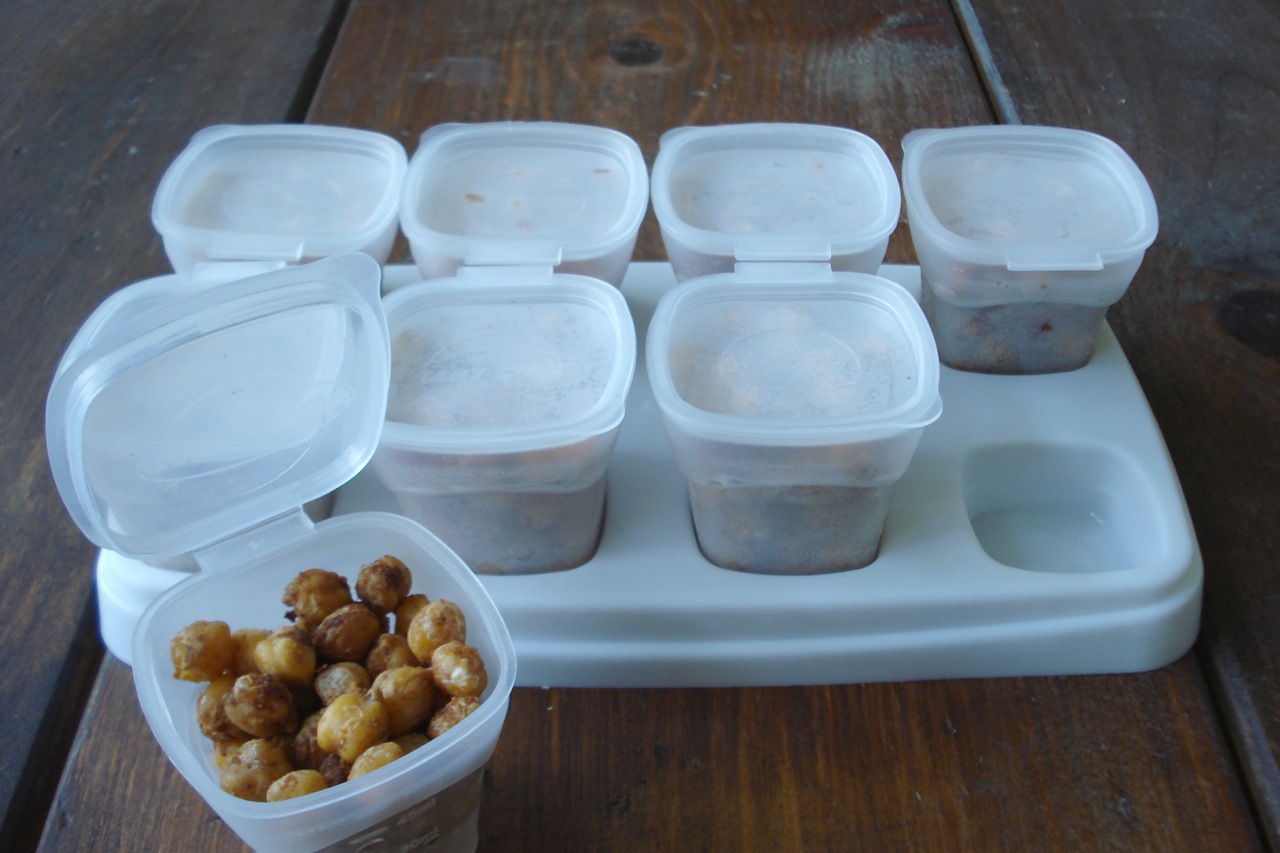
SMALL PORTION FREEZER CONTAINERS
www.petitecreations.net/babycubes
These little containers come in really handy for freezing small portions. They’re also made from safe plastic (free of phthalates & BP-A) and are dishwasher safe. Like the cube trays listed above, they’re meant for baby food, but again, I find many other uses for them.
______________________________________________________________________
Love this type of apple slicer. I originally had a cheap one, maybe 4 or 5 bucks from the grocery store. The handles were really uncomfortable though, when pressing down, and the blades were on the dull side. At some point I replaced it with the oxo brand & it does the job perfectly without hurting my hands. Comes in extremely handy when making applesauce!
___________________________________________________________________
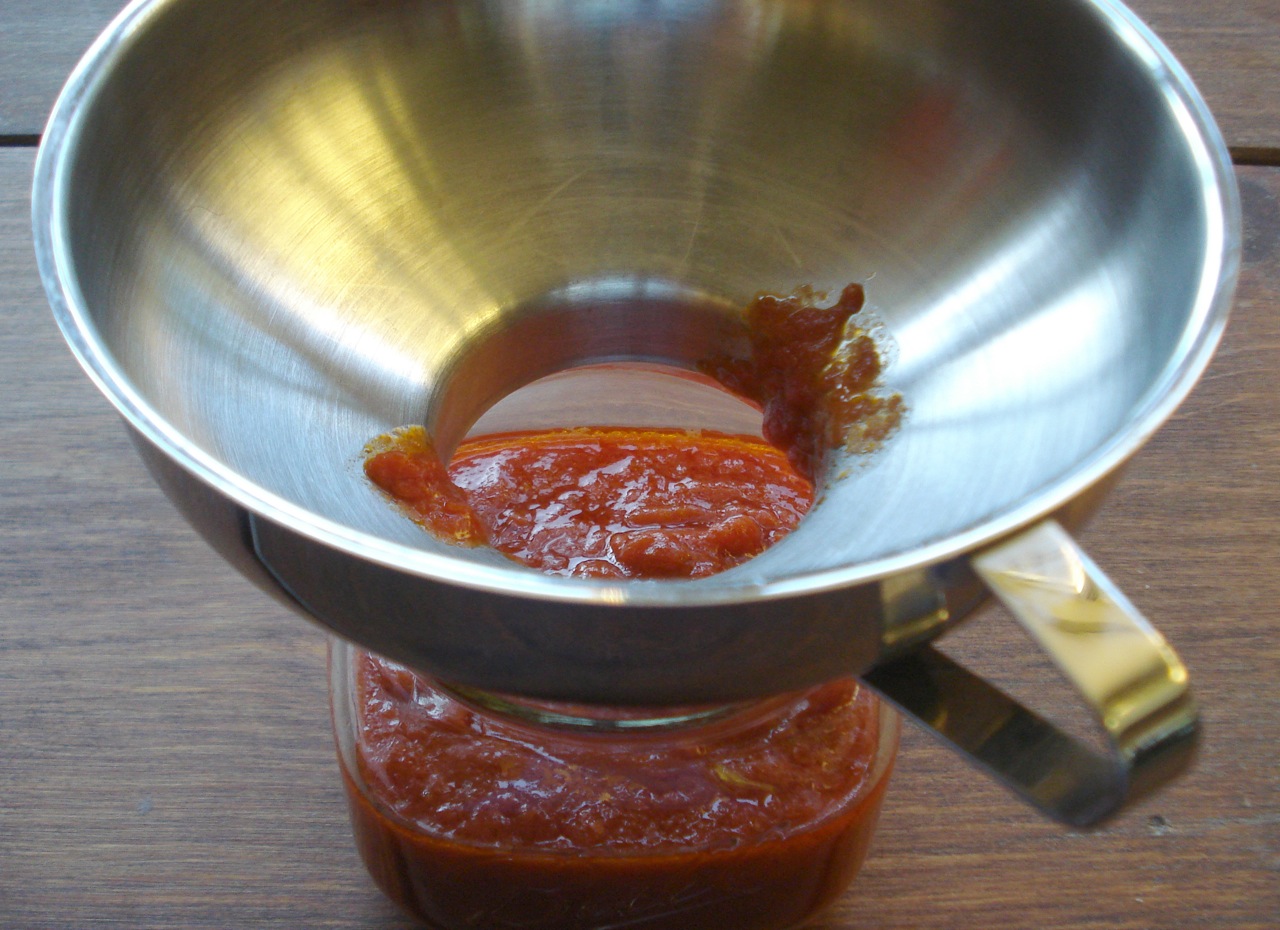
JAM FUNNEL
This gadget, called the “jam funnel”, is another one of my favorite kitchen tools. As you can see from the photo, it’s a funnel with a wide opening at the bottom. If you’ve ever tried to transfer sauce into a mason jar, you know what a sloppy mess it can be, with drips down all sides of the container & a mess on the counter. Without this tool, you end up having to use a really small spoon which is frustrating as it takes a long time (& still usually drips down the sides of the jar). I also use it to transfer almonds & other nuts/seeds into jars without worrying about spills. I’ve never actually used it for jam!
______________________________________________________________________
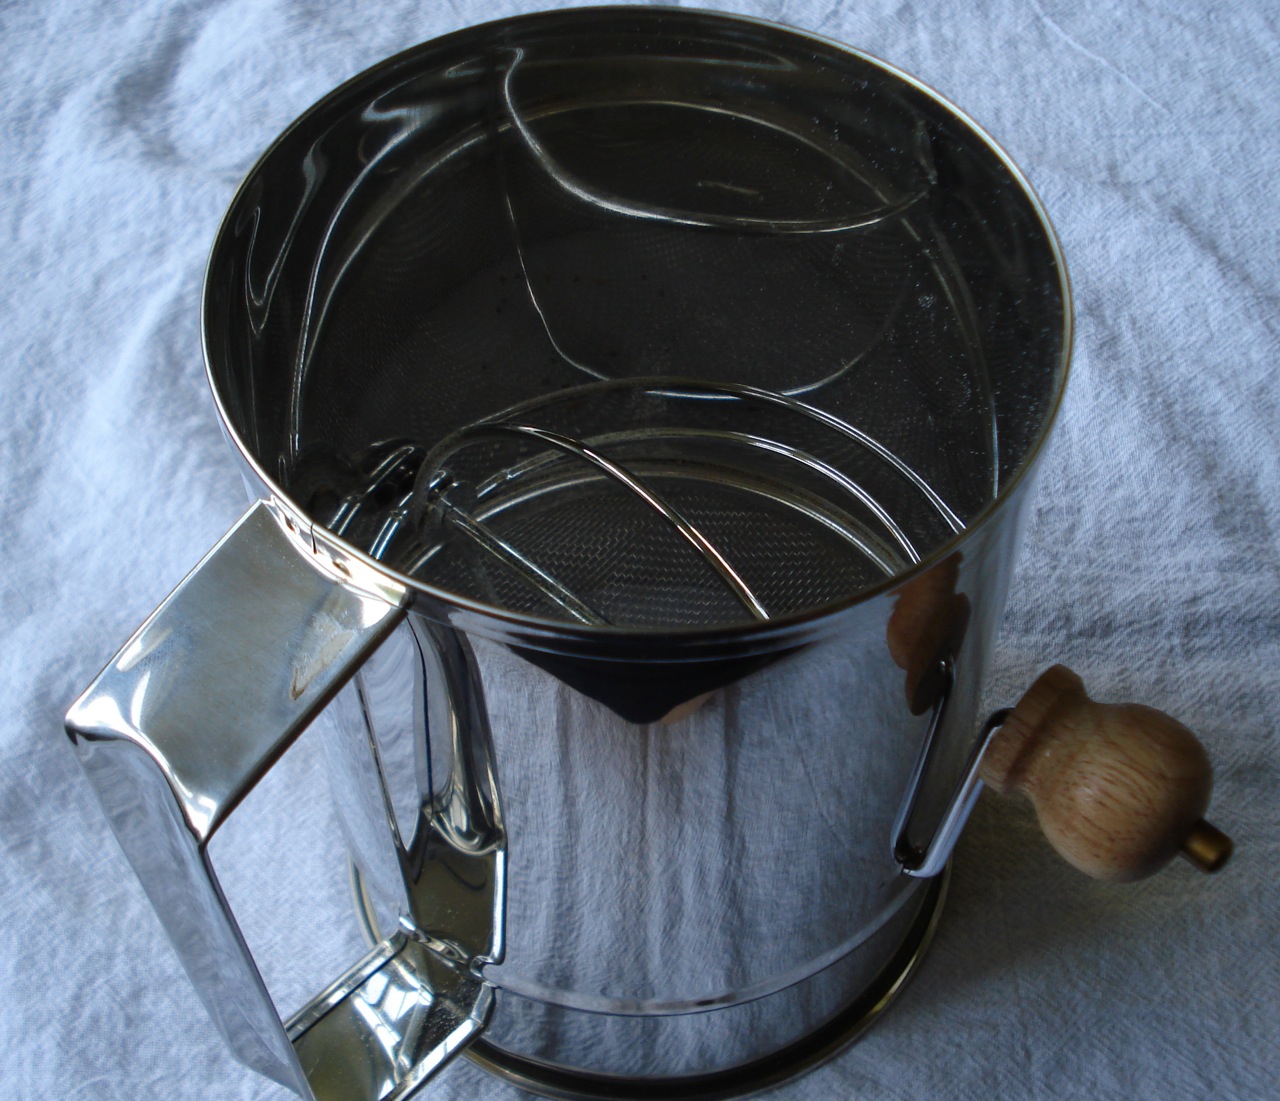
WILLIAMS SONOMA SIFTER
The sifter I had for many years was difficult to use. First, it hurt my hand (it was one of those squeeze sifters). Secondly, small clumps of flour would always become trapped in-between the 3 layers of mesh that the flour was pushed through. I could never get it out no matter what I did. Who wants to think about old clumps of flour at the bottom of their sifter every time they go to use it – gross! Since I got the williams sonoma sifter, a once dreaded deed is completely dreadless (is that a word?). It’s easy to use the rotating handle, and there’s only one layer of mesh at the bottom, so no food particles ever get trapped. Dishwasher safe too.
____________________________________________________________________________
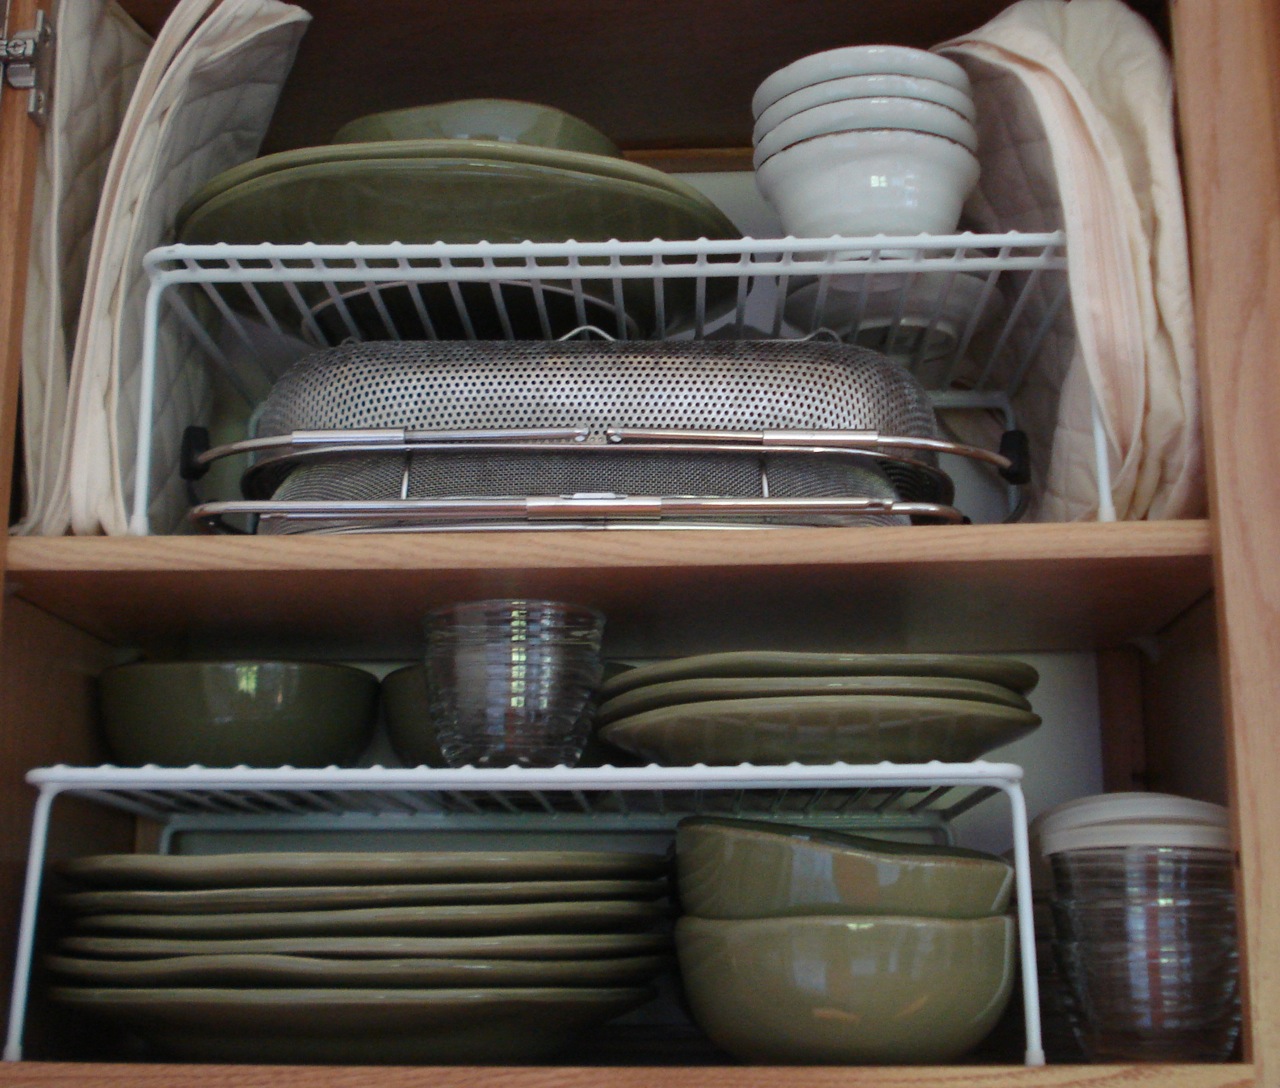
These shelves are available in a few different shapes & sizes. They come in so handy for kitchen cabinet organization. When I got them (a few years ago), they were 5 – 10 bucks, depending on what size you want, at BB&B.
_______________________________________________________________________________
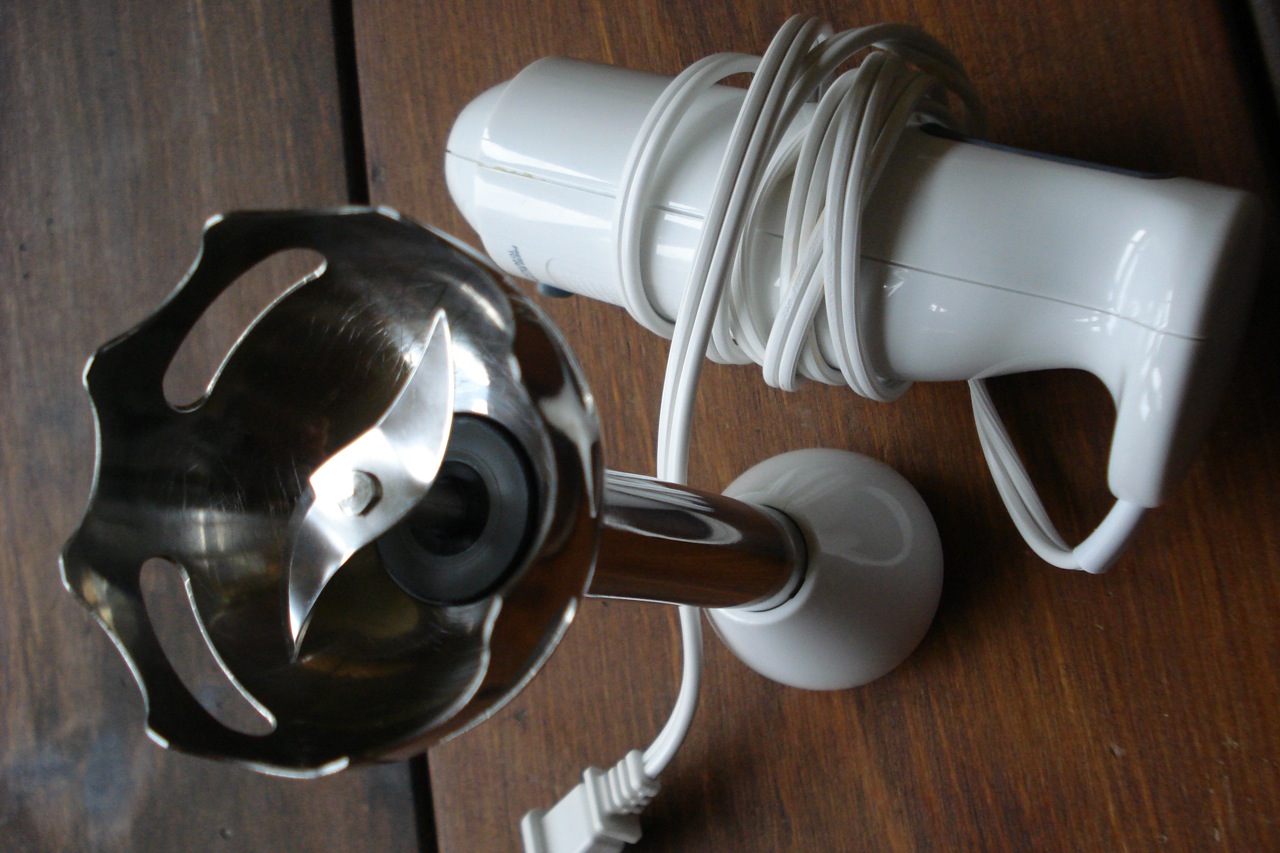
IMMERSION (STICK) BLENDER
I can’t say enough good things about this type of stick blender. They are so reasonably priced (my cuisinart smart stick was about $30), and accomplish so much at the flick of a switch. You just can’t beat them for pureeing soups and sauces – right in the pot. No need to slop things back & forth in batches to the regular blender. Making homemade mayo is also a snap using this tool (see recipe & demo video if interested). I use mine on a weekly basis, but even if you only use it once or twice a year, it’s still worth it – you’ll be happy when that one time comes around! There are at least a half-dozen creamy soups posted in which I use this stick blender. The kids don’t like a lumpy marinara sauce, but you like using lumpy ingredients?? In about 30 seconds, you can go from lumpy to smooth (yay). (For me, this comes in handy w/ my zucchini marinara and penne w/ rosemary & balsamic). When using on the stove top with hot soups/sauces, I recommend wearing oven mitts to avoid a burn, just in case there’s any splattering.
______________________________________________________________________________________
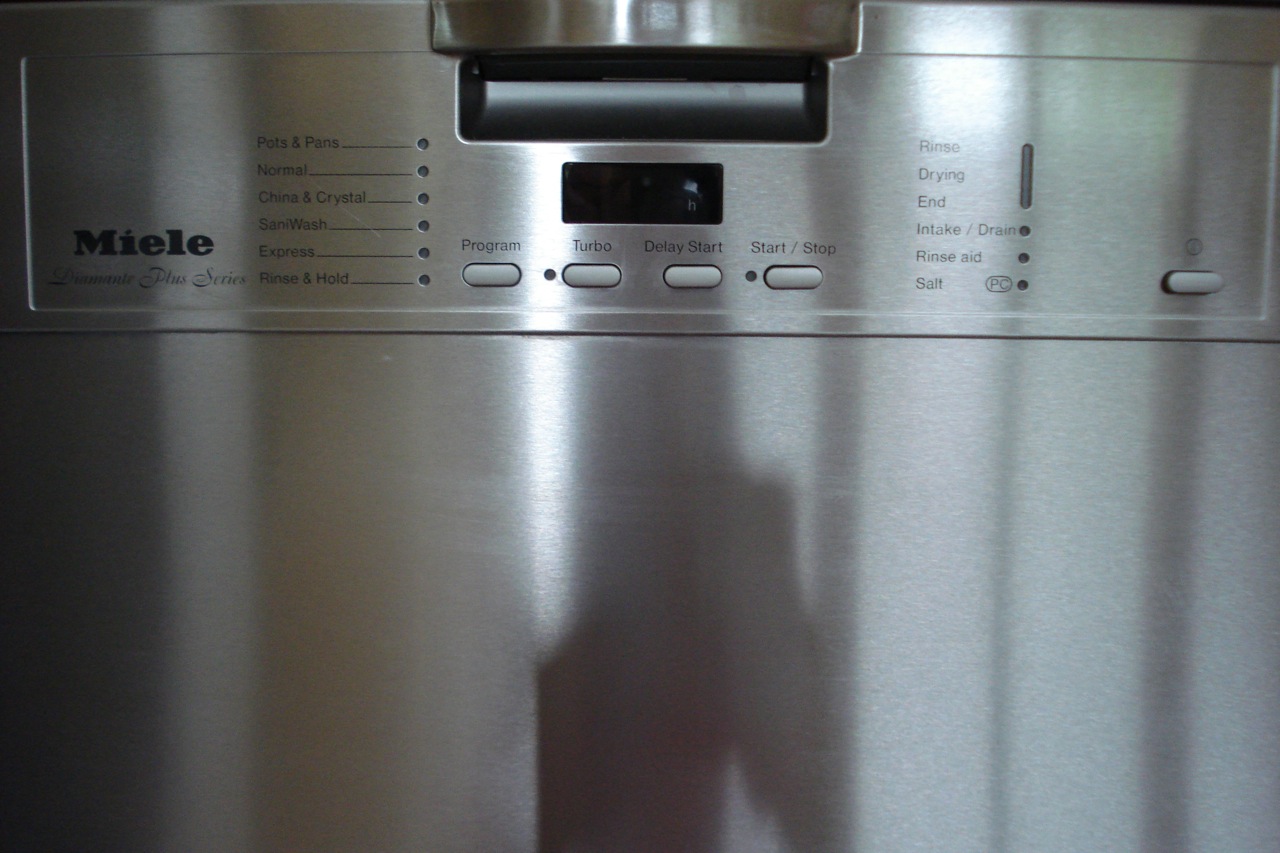
MIELE DISHWASHER w/ BUILT IN WATER SOFTENER
More than just a gadget I suppose, but a most important tool for anyone who cooks – A GOOD DISHWASHER!!! I struggled for years with an inferior brand/model, especially due to our hard water. We replaced the dishwasher once, early on. Made the wrong choice unfortunately, as it wasn’t long before my “clean” dishes were coming out covered in grit. What was happening was that the hard water was clogging the tiny water jets, and what was spraying out was essentially a combination of water, sediment, & small food particles (gross!). Once it went through the drying cycle, all that grit was almost cemented to my glasses & dishes. So…..I’d have to be sure I was going to be around whenever I started the dishwasher, as I had to stop it before the dry cycle & rinse everything by hand. Quite unpleasant to say the least. I was actually going bonkers, considering I run a full load of dishes twice a day. It probably would have been easier to just wash by hand, but psychologically, that was not a choice! Here’s where Miele comes in, as aside from being top-notch machines, some of their models come with a built-in water softener. We have a house water softener, but apparently that’s not enough. Now, with this back up system, built right into the dishwashing unit, I never have that grit problem. A red light indicates when it’s time to add more salt. It’s an excellent system that cleans well and is very quiet. Down side is that it’s expensive and the wash cycles are rather long. Incidentally, a few things you can try with your existing machine if you have a similar hard water/grit problem……Run the machine empty, but with a bowl of either white vinegar, CLR, or tang (believe it or not), sitting upright on the bottom rack. Try doing that 2 times in a row & then doing a normal wash & see if the situation improves. After several tries of this, if nothing changes, might mean time for a new machine.
____________________________________________________________________________________
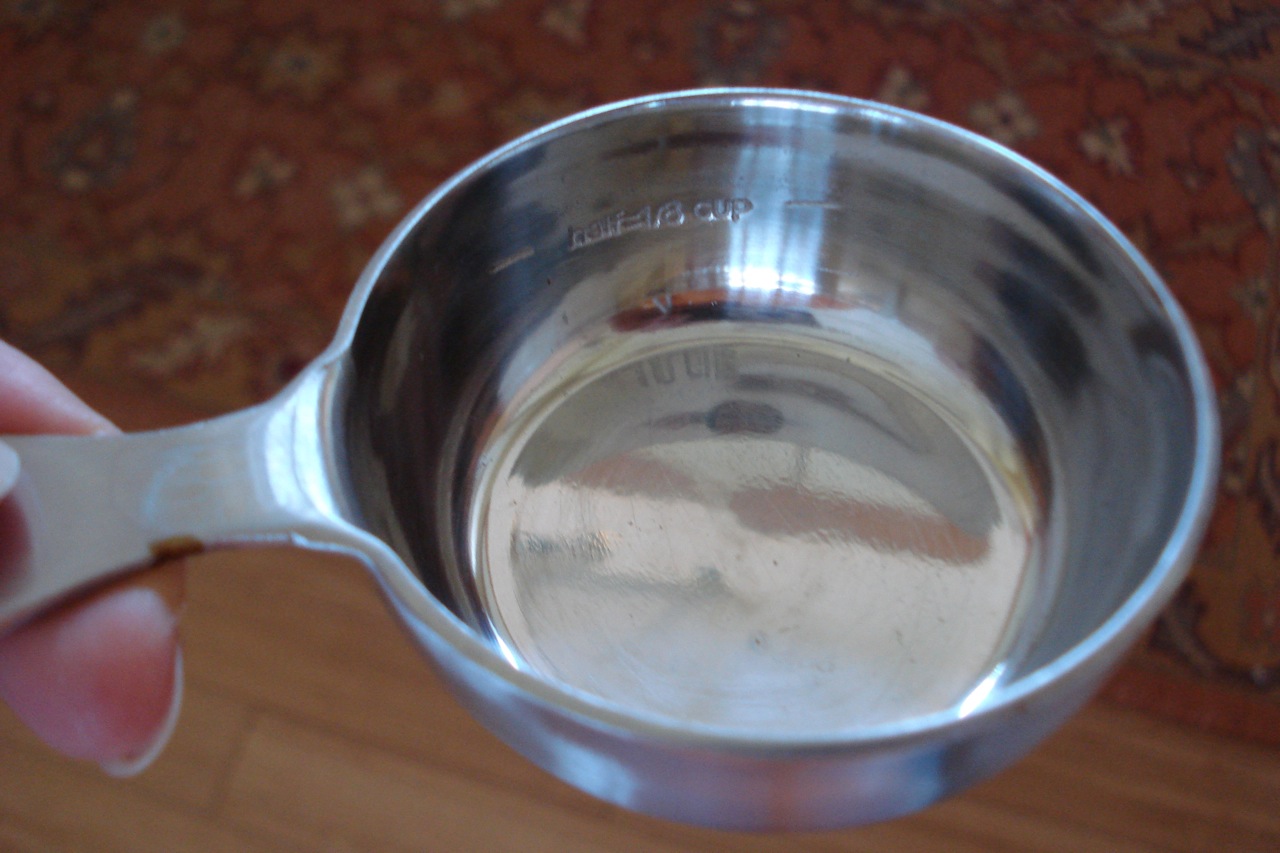
MARTHA STEWART MEASURING CUPS
The reasons I like these particular measuring cups is because 1 – they’re very heavy-duty (like tiny stainless steel pots), and 2 – they actually give you a half way line on the inside of the cup (I’ve never seen any others with this feature). For me, this comes in extremely handy when I’m melting coconut oil (or butter). If I need 2 TBSP of melted coconut oil, I’ve got an easy way to melt & measure at the same time. I can put the 1/4 cup measuring cup right on the burner, fill it up half way, & melt over low heat. Might seem like a trivial thing, but if you’ve looked through my recipes at all, you’ll notice I use coconut oil quite a bit, so these measuring cups are a very highly rated product in my kitchen. Comes in a set of 4 cups (1/4, 1/3, 1/2 & 1).
_______________________________________________________________________
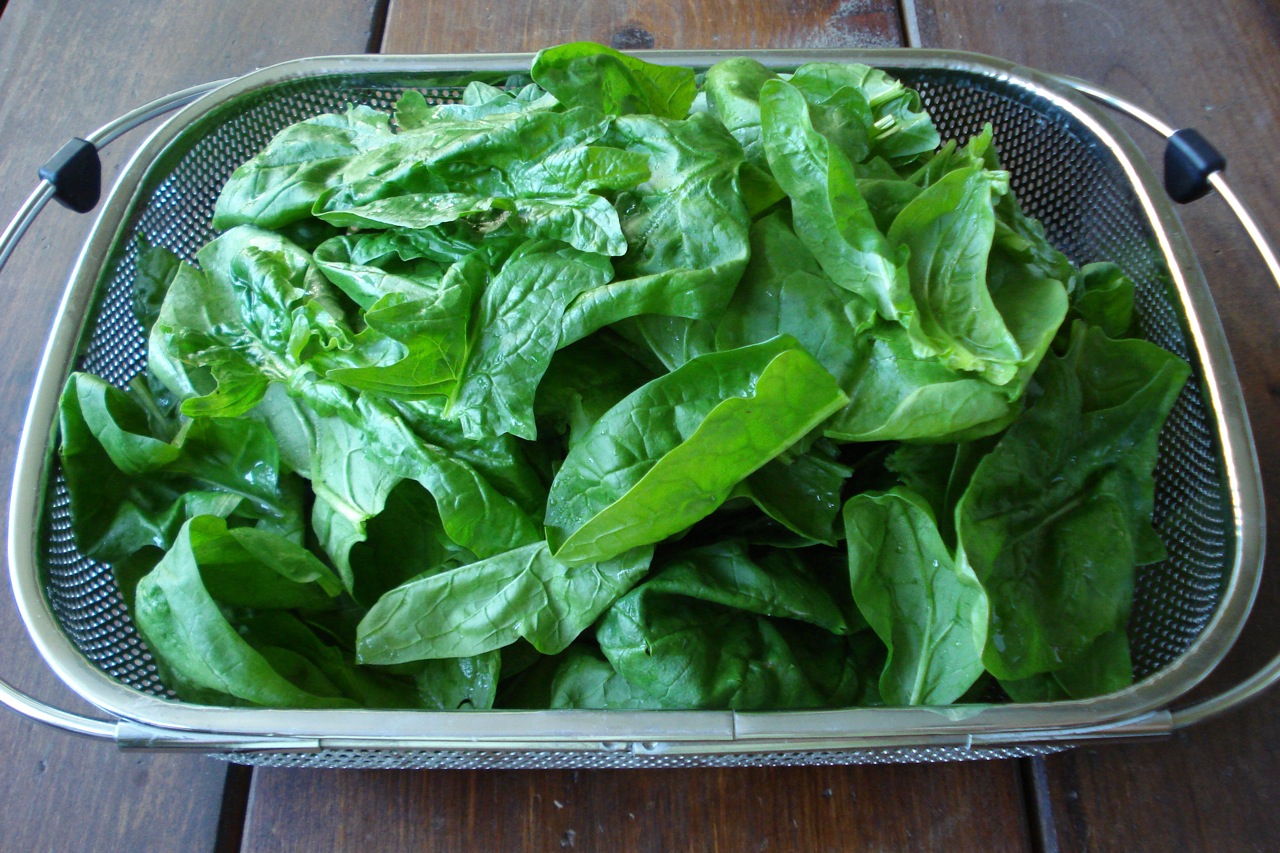
OVER THE SINK COLANDER
This kind of large, over-the-sink colander is great for washing a large amount of produce. For me, it comes in particularly handy for greens. The ends pull out as far as necessary to sit right over the sink.
________________________________________________________________________
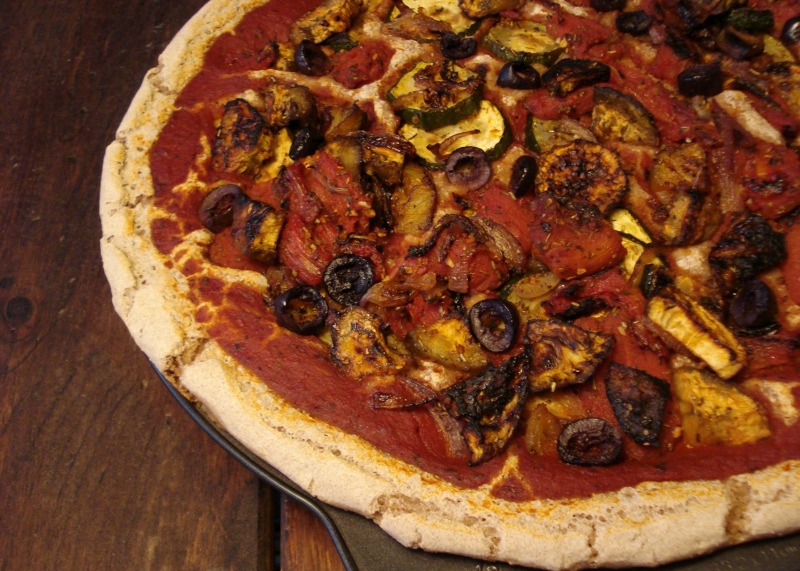
Will be adding to this page a few gadgets at a time, so check back if interested.
Roasted Veggie Pizza
1 recipe CHEWY-PIZZA-DOUGH
1 28 oz package peeled whole tomatoes
1 small eggplant, peeled, quartered & cut into 1/2 inch thick slices (about 2 cups)
2 small green or yellow zucchini sliced into rounds (about 2 cups)
1/2 large red onion, thinly sliced (about 1 cup)
2 TBSP extra virgin olive oil
3 cloves garlic, minced (about 1 TBSP)
1 TBSP herbes de Provence (or herb mixture of choice)
1/2 cup high quality pizza sauce
1/4 cup black olives or capers (optional)
- Preheat oven to 450.
- Drain tomatoes & discard liquid.
- Halve each tomato lengthwise.
- Toss together tomatoes, eggplant, squash, red onion, oil, garlic, & herbes de Provence in a large bowl, then transfer to large pyrex dish or baking sheet.
- Roast veggies 25 mins, or until beginning to brown, tossing every 5 – 10 mins.
- Cool 5 – 10 mins, or store in fridge up to 3 days.
- Meanwhile, prepare chewy pizza dough & spread on pizza pan (don’t forget to brush the pan with oil first).
- Spread sauce, and then roasted veggies on raw dough.
- Sprinkle with olives or capers if using.
- Place on middle rack in oven, and preheat oven to 350 with pizza in oven (do not preheat ahead of time).
- Once oven reaches 350, bake 25-30 mins longer or until it looks good.
______________________________________________________________________________________
SIDE NOTES:
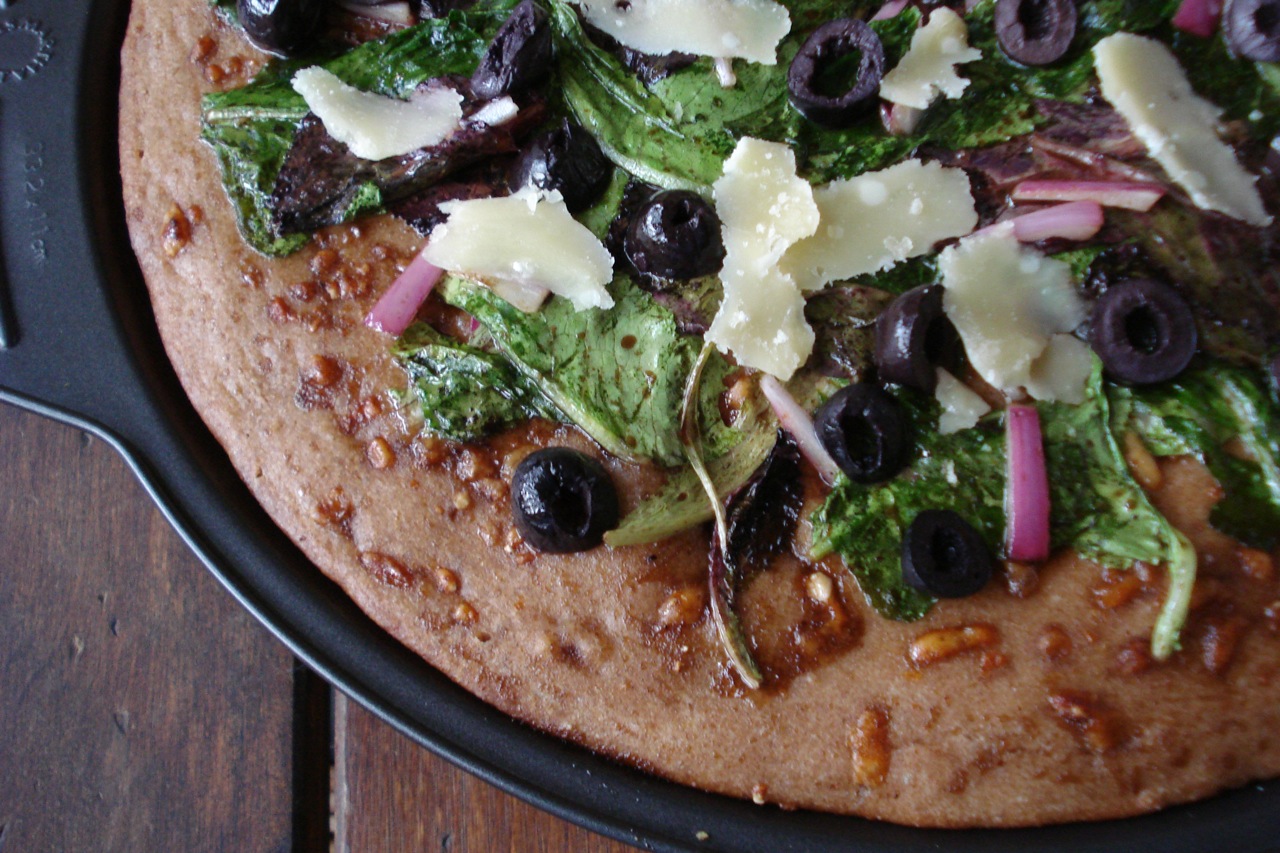
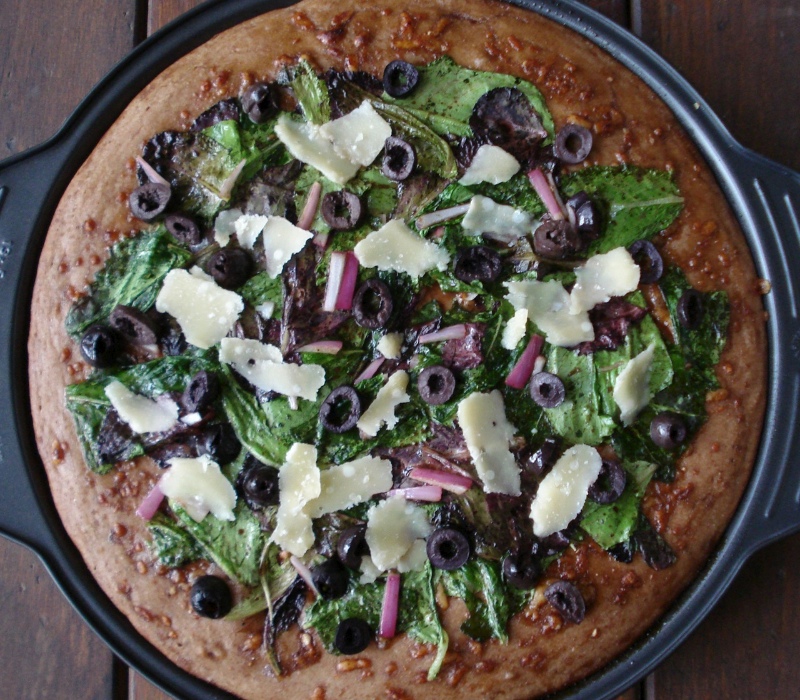
~ From Vegetarian Times Magazine. Any crust you like will do, and similarly, substitute any veggies you’d like. The crust looks different in this picture than it did for the SALAD-PIZZA, but it is the same. Brushing the crust with balsamic vinaigrette (as well as sprinkling with parm), as was done for the salad pizza, gives it a different appearance & texture. Can use a sugar free crust if avoiding sugar.
~ Herbs de Provence can be found in the spice aisle and is simply a mixture of several different herbs (usually some combination of basil, rosemary, sage, thyme, marjoram, savory, tarragon, oregano & fennel seeds). You can use your own mixture if you’d like.
~ If you’re roasting the veggies directly before making the pizza, remember to cool down the oven before putting pizza in, as the pizza is supposed to go into a room temp oven & brought to 350 slowly.
~ One could forget that cheese & pepperoni exist eating a pizza like this…..Seriously!
Dairy Free, Gluten Free, Egg Free, Nut Free, Sugar Free, Grain Free, Vegan, RawIf eating gluten and/or sugar free, be sure to check labels of any packaged products (such as tomato sauce, olives…etc). If eating sugar free, use a different (sugar free) crust.
Chewy Pizza Dough w/ Salad Topping
1 0.25-oz pkg of active dry yeast
1 TBSP honey
1 cup potato starch (health food store in flour aisle)
1/2 cup brown rice flour
1/2 cup teff flour
2 tsp guar gum or xanthan gum
1 tsp pure salt
1/2 tsp garlic powder
1/2 tsp onion powder
3 TBSP extra virgin olive oil, plus more for coating pan
- Combine yeast, honey & 1 & 1/2 cups warm water in measuring cup.
- Let stand 10 to 15 mins, or until liquid is cloudy & bubbly.
- Whisk together potato starch, brown rice flour, teff flour, guar gum, salt, garlic powder, & onion powder in large bowl.
- Stir in yeast mixture.
- Stir in oil.
- Cover & let rise in warm place 20 mins.
- Brush or rub pizza pan w/ oil.
- Scoop dough onto pizza pan & press dough flat to cover pan.
SALAD TOPPING (egg free, gluten free)
for vinaigrette:
2 TBSP balsamic vinegar (or vinegar of choice)
2 tsp honey
1 tsp dijon mustard
1 small clove garlic, minced (about 1/2 tsp)
3 TBSP extra virgin olive oil
pure salt & freshly ground black pepper to taste
3 TBSP grated parmesan cheese
3 cups mixed salad greens of choice (I used a mix of arugula, & green & red romaine)
1/2 cup thinly sliced red onion
1/2 cup thinly sliced fresh fennel (we skipped this & threw on some black olives) (not that olives have anything to do w/ fennel!)
shaved parmesan for garnish (optional)
- Whisk together vinegar, honey, mustard & garlic.
- Whisk in oil & season w/ salt & pepper if desired.
- Let rest 30 mins (or not).
- Sprinkle raw pizza dough with grated parmesan.
- Place pizza in oven on middle rack, and begin to preheat the oven to 350 (do not pre-heat ahead of time).
- Once oven reaches 350, bake about 25 mins longer (until it looks good).
- Remove from oven & adjust setting to broil.
- Brush crust with about 3 TBSP of the vinaigrette.
- Toss together salad greens, onions, olives & remaining vinaigrette.
- Top pizza w/ salad mixture & place under broiler anywhere from 1 to 3 mins – just until greens wilt (I usually take mine out after 1 minute).
- Serve garnished w/ parmesan curls if using.
SIDE NOTES:
~ From Vegetarian Times magazine.
~ Very yummy! I have been making a lot of different pizzas lately. Of course, you can use a regular wheat pizza dough with this salad topping, but for those who are gluten sensitive, this dough is awesome & not too much of a big deal to make. The only big deal is having to have so many different types of flour on hand. All of these combined give it the right texture & taste. What I like to do when making this crust, is to mix together all the flours into the right proportions separately for several pizzas & put them in individual ziplock baggies in the freezer. This way, for the next few times I want to make a pizza, all the flour is already mixed together & ready to go.
~ There are 2 kinds of yeast – active dry or rapid rise. So, don’t just put “yeast” down on your shopping list like I did the first time and then stand there staring at the 2 kinds dumbfounded. It’s the active dry you want!
Dairy Free, Gluten Free, Egg Free, Nut Free, Sugar Free, Grain Free, Vegan, RawIf eating gluten free, be sure to use a gluten free tamari. If you’re vegan and don’t use honey, substitute another sweetener such as maple syrup.
~ UPDATE: I’m not a big fan of guar gum and/or xanthan gum anymore. In general, I don’t recommend them.
Pizza w/ Brown Rice Crust
3 cups water
few pinches pure salt
1& 1/2 cups short grain brown rice
1 TBSP extra virgin olive oil
2 tsp dried basil
1/4 tsp garlic powder
1/4 tsp pure salt
1/2 tsp crushed red pepper (more or less to taste)
good quality pizza sauce
- Combine rice, water & a few pinches of salt in a saucepan & bring to boil.
- Reduce heat to low, cover & simmer 45 mins.
- Preheat oven to 375.
- Once rice is cooked, mix in the olive oil, herbs, salt & pepper.
- On a lightly oiled pizza pan, spread out the rice mixture & use the back of a spoon to press evenly onto pan.
- Bake rice crust for 8 – 10 mins.
- Remove from oven & add pizza sauce (spreading evenly with the back of a spoon).
- Add toppings of choice & bake about 10 mins longer, (more or less depending on what toppings you use & how well done you like it).
- Let cool for a few mins before serving.
Topping choices:
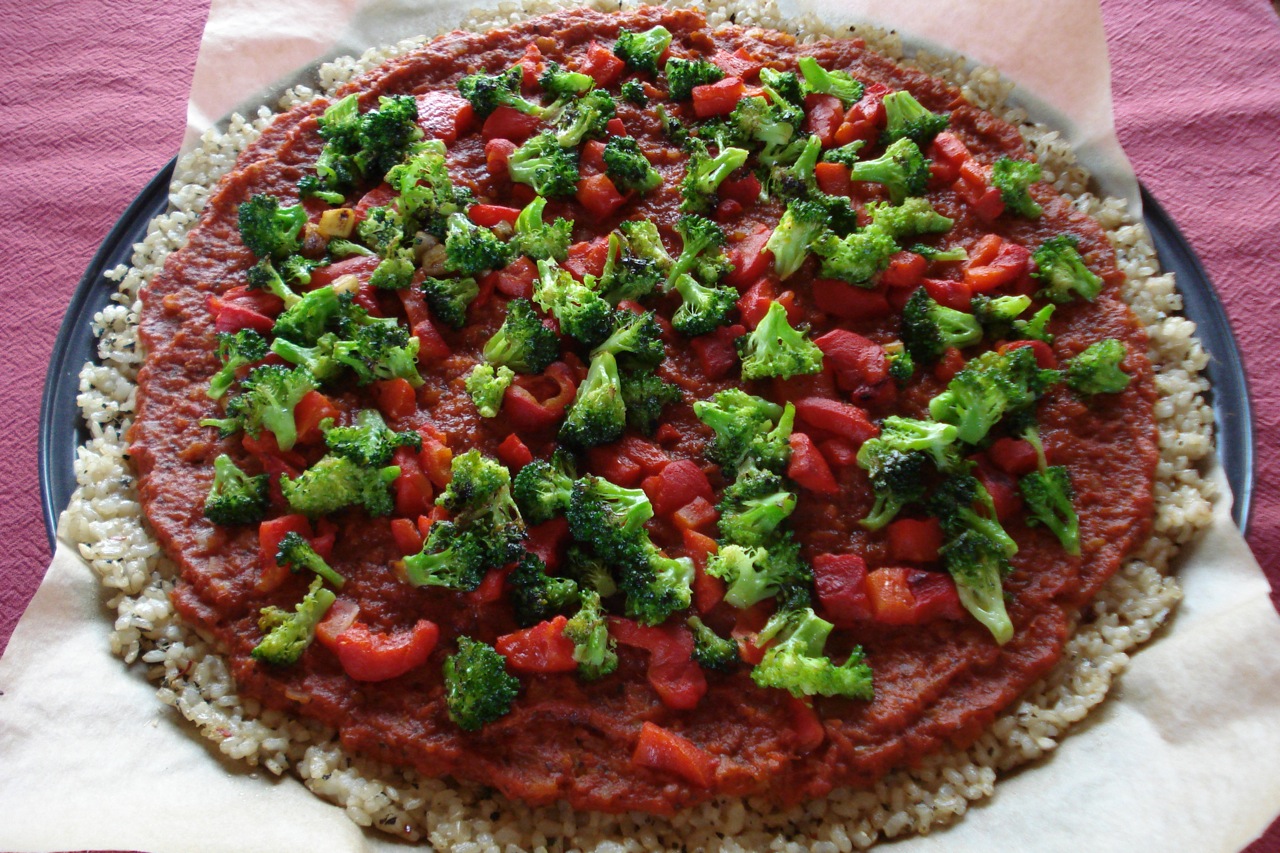
I most often make this with a topping of roasted red peppers, broccoli & garlic as follows: Cut pepper in half, remove pith & seeds & roast under broiler 5 – 10 mins – until quite charred. Turn peppers over & roast just a few mins more on the other side. Remove from oven & let cool in a dish. The skin should slip off pretty easily once cooled. Slice peppers to desired size. While the peppers are roasting, saute a few chopped garlic cloves with broccoli (chopped into pretty small florets). Add this on top of the pizza sauce & put back in the oven for 7 – 10 mins. Fresh basil is nice over the top.
I’ve also made this with roasted eggplant, zucchini & red onion slices. (see “roasted veggie pizza” for detailed instructions)
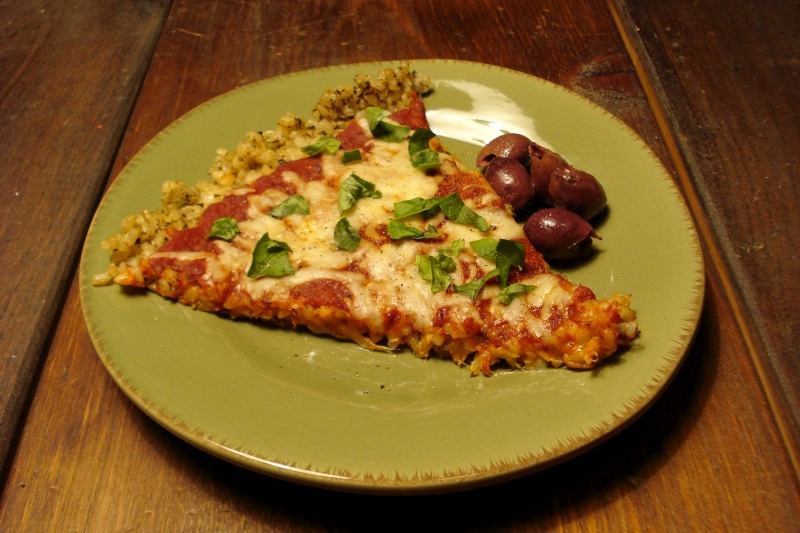
If we’re in a cheesy mood, I top with shredded mozzarella & fresh basil (as shown in photo at top of page). I don’t add the basil until the pizza is done – just tear up & sprinkle fresh basil over the top.
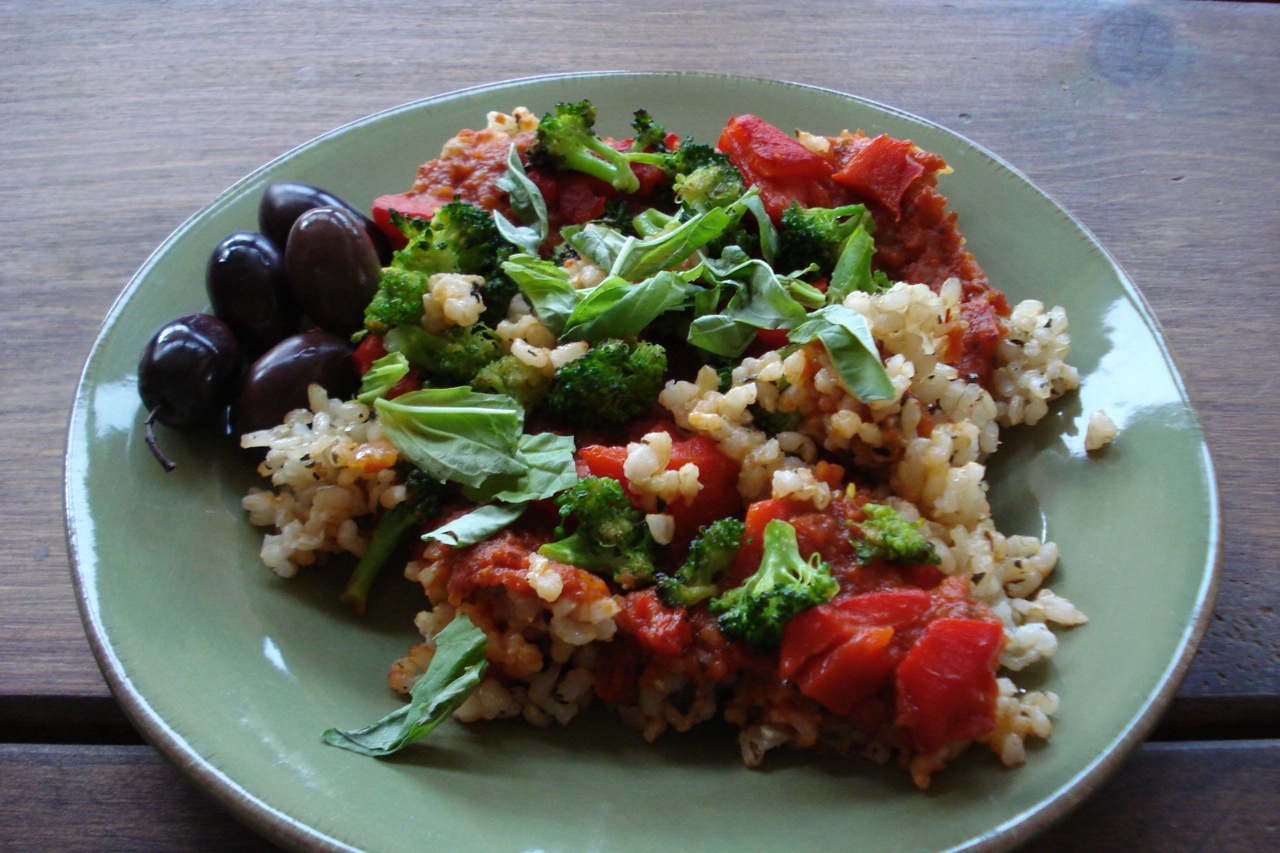
Whatever topping we use, we enjoy a few nice olives on the side. Of course, the topping can be whatever you’re in the mood for – sun-dried tomatoes, fresh tomato slices, jalapeno peppers, spinach…etc.
______________________________________________________________________________________
SIDE NOTES:
~ Adapted from “Vive La Vegan.” The kids say “Yay” when the answer to “What’s for dinner?” is this.
~ Using short grain brown rice works well w/ this recipe as it’s sticky & holds together nicely.
~ If you try to cut slices & serve as soon as it comes out of the oven, the “slices” will look more like this….
…..which of course doesn’t make any difference taste wise so it’s up to you. If you let it cool for 5 or so mins, you have a greater chance of retaining a triangle shape. This pizza is eaten with a fork anyway, so if it’s late & you’re all starving, just scoop it onto plates & enjoy!
~ The author uses a different spice mixture for the crust which is as follows: 2 tsp dried oregano, 2 tsp dried basil, 1/2 tsp dried marjoram, 1/4 tsp salt, few pinches of black pepper. I didn’t care too much for this mixture so made a few changes. You can really add anything you want (parsley, rosemary, onion powder…).
~ If you’re going to buy a pizza pan to try out this recipe….Some pizza pans have holes in them to let traditional type dough breathe while cooking. You don’t want one of those for this recipe as some of the rice falls through & it gets messy. A 12 or 14 inch pan works well. I usually line the pizza pan w/ a piece of unbleached parchment paper.
Dairy Free, Gluten Free, Egg Free, Nut Free, Sugar Free, Grain Free, Vegan, RawIf eating gluten and/or sugar free, be sure to double check labels of any packaged goods (such as tomato sauce).
Potatoes w/ Swiss Chard, Rosemary & Garlic
3 TBSP (more or less) coconut oil, butter, or ghee
3 pounds peeled, cubed, yellow potatoes
6 cloves garlic, left whole, or cut into large chunks
2 TBSP fresh rosemary, chopped
2 cups greens of choice, washed, stemmed, & chopped
pure salt & freshly ground black pepper to taste
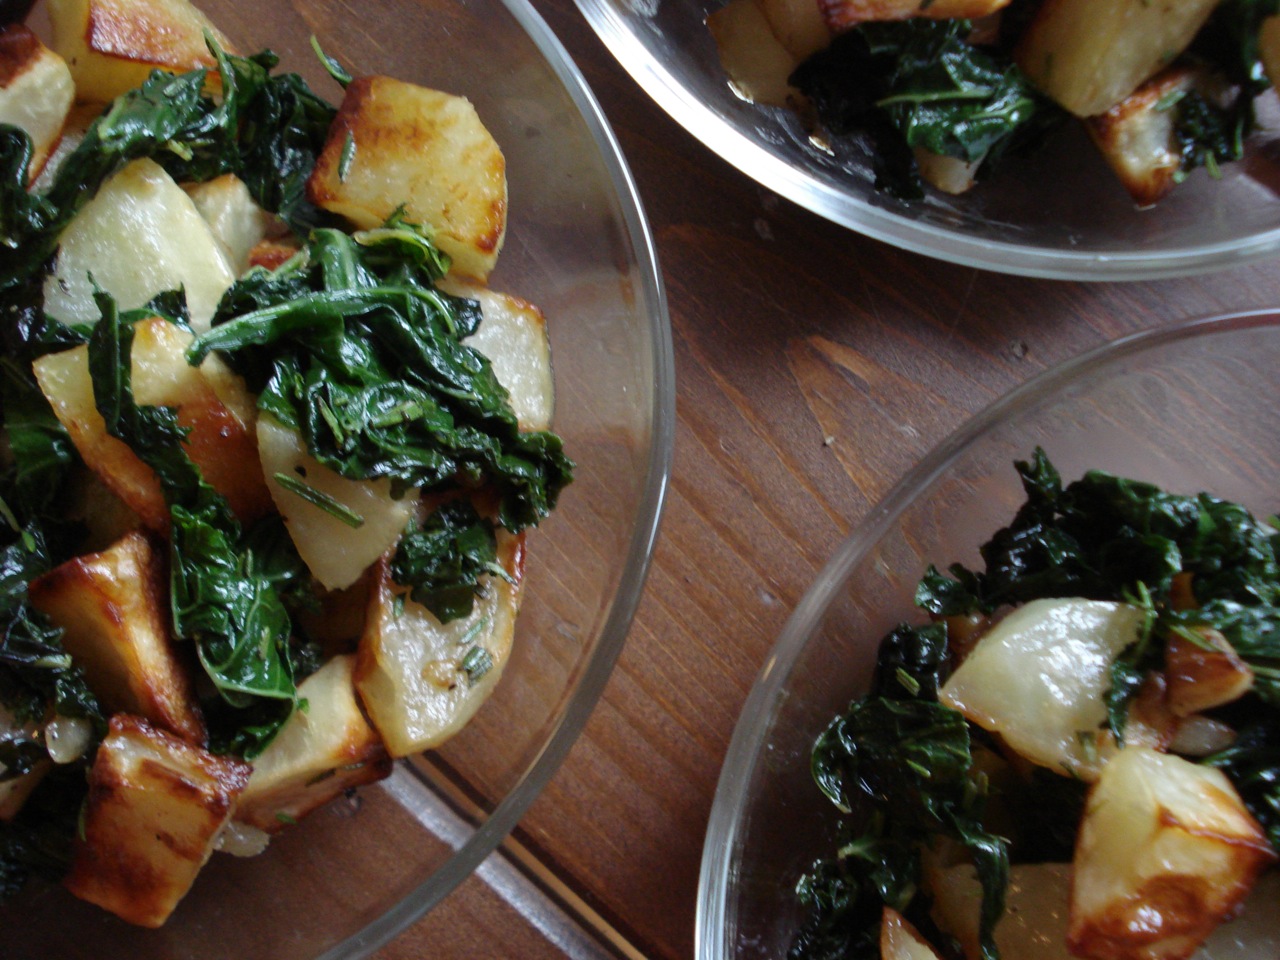
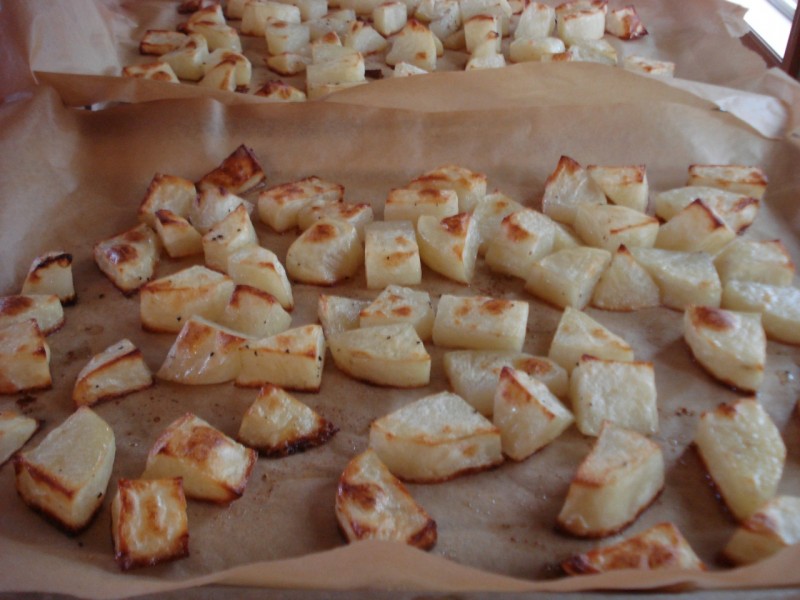
- Toss the potatoes with melted ghee, sprinkle with salt & pepper, and roast on 2 parchment paper covered cookie sheets @ 400 degrees for about 45 minutes (or until done to your liking)
- When the potatoes are close to being done, in a large skillet, heat remaining oil over medium heat and saute garlic and rosemary for 1- 2 mins until just beginning to color.
- Add greens, sprinkle with salt and pepper to taste, and saute until cooked to your liking.
- Remove potatoes from the oven and add to the pan with greens.
- Toss to combine and serve immediately
Serves 4
______________________________________________________________________________________
SIDE NOTES:
~ Yellow potatoes are also called “boiling” or “waxy” potatoes. They don’t fall apart or dissolve the way baking potatoes do. Red bliss, new potatoes, or russet will work too.
~ Technically, you can brown the potatoes in a pan stove-top or roast them in a glass baking dish. In fact, I used to simply fry them, stove-top, in the same pan I’d eventually add the greens to, but I found they always stuck to the bottom of the pan that way. and like the parchment paper method much better (I used to just fry them in the same pan I’d eventually add the greens to, but as mentioned, they always stuck to the pan & it was annoying).
~ You can use 2 tsps dried rosemary if need be, but get the fresh if you can as this is what makes the dish so YUMeeee!
Dairy Free, Gluten Free, Egg Free, Nut Free, Sugar Free, Grain Free, Vegan, RawIf eating dairy free, use coconut oil instead of butter or ghee.
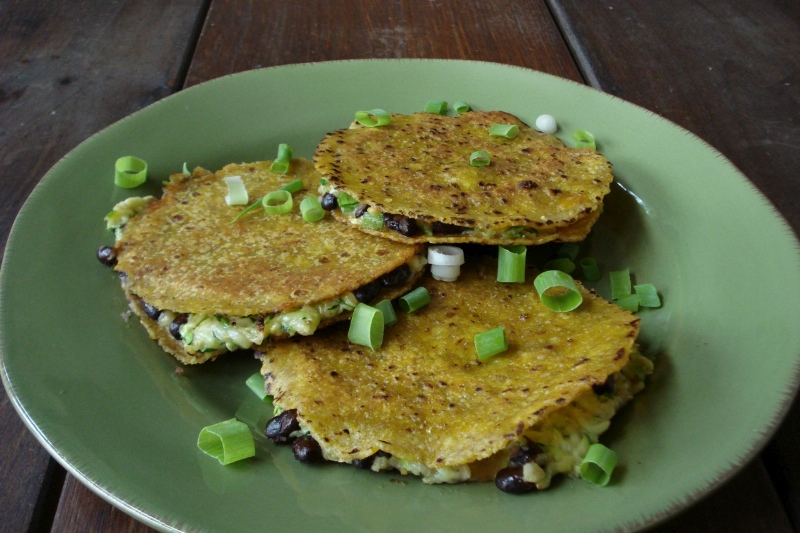
Black Bean & Zucchini Quesadillas
1 pound zucchini, coarsely grated
3/4 tsp pure salt
1 (15 oz) can Eden organic black beans, rinsed & drained
6 oz grated cheese (cheddar, monetary jack, Colby or a combo)
1 scallion, chopped (or chives)
1/2 jalapeno pepper, with seeds, finely chopped (or 1 whole small one)
16 – 20 small corn (or whole grain) tortillas (or 8 large)
melted butter or coconut oil for brushing the tortillas
salsa (optional)
- In a colander set inside a bowl, toss together the grated zucchini & salt (let sit while you prep the other veggies).
- Press the zucchini with the back of a large spoon to remove as much liquid as you can.
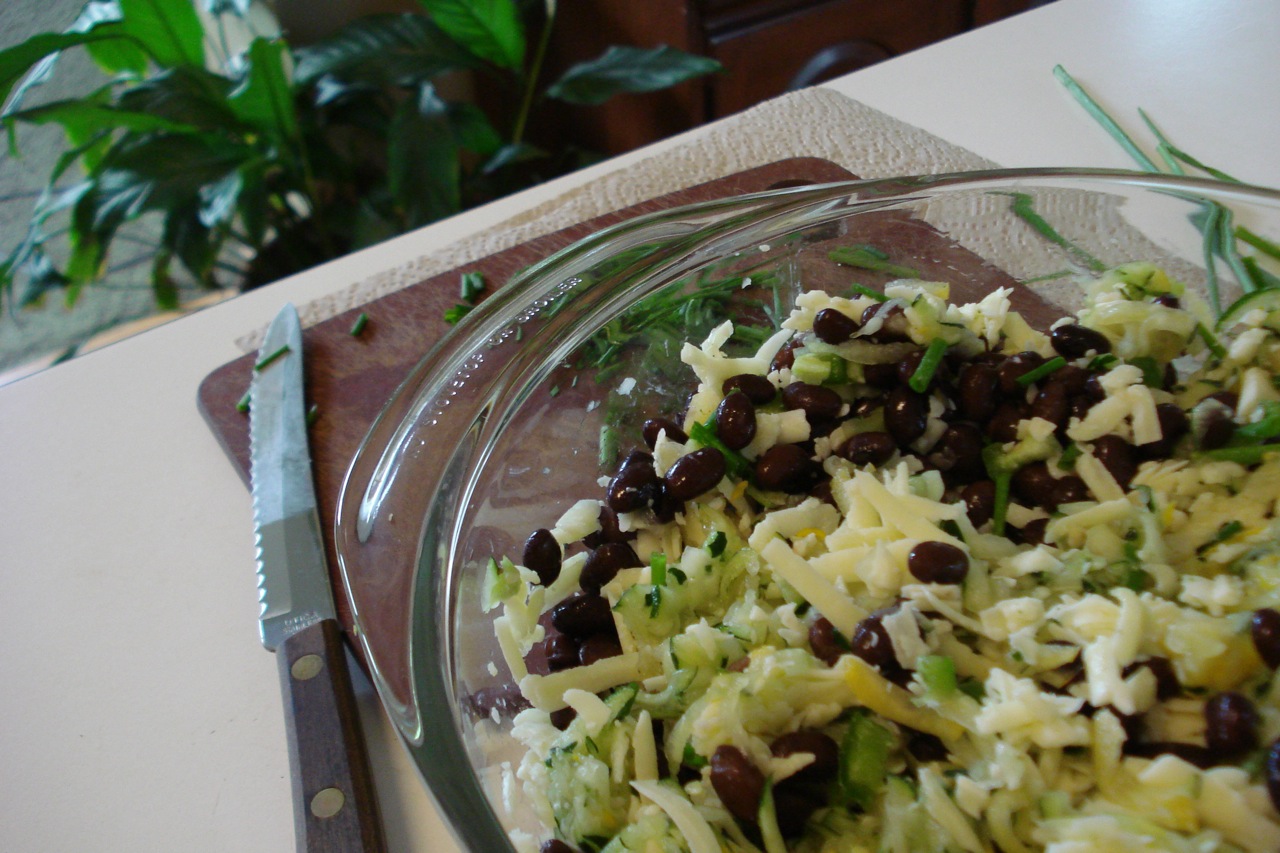
- In a large bowl, combine the zucchini, beans, cheese, scallions (or chives) & jalapeno.
- Brush 1/2 of the tortillas with butter or oil on one side. Place as many of them as you can (depending on the size of your cooking surface), oil side down in a heated pan.
- Top with zucchini mixture (spread evenly and don’t over-do it).
- Place the dry tortillas on top, and now brush the sides that are facing up with oil.
- Cook over medium heat until golden brown, approx 3 – 4 minutes on each side.
- Repeat with remaining tortillas.
Serve with salsa if using. Serves 4.
______________________________________________________________________________________
SIDE NOTES:
~ Adapted from “Fresh Food Fast.” I make this recipe most often in the summer during zucchini season. So delicious!
Dairy Free, Gluten Free, Egg Free, Nut Free, Sugar Free, Grain Free, Vegan, RawIf eating gluten free, be sure to use corn tortillas (not multi-grain or brown rice) and double check labels of any packaged ingredients you may be using (beans, salsa).
~ I sometimes use my large food processor (with the grating blade) to first grate the zucchini, then the cheese. It takes only a few seconds this way. A hand grater also works well & gives your arm a good work out =)
~ Keep in mind, as you press the liquid out of the zucchini, you can’t get it all out, so just press it for a minute or 2 & move on.
~ I’ve come to learn that large tortillas are hard to flip without the insides falling out. Try smaller tortillas for more successful flipping. Our favorites are “Food For Life” sprouted corn tortillas (which are small & easy to flip). If using this size tortilla, this recipe will yield 8 to 10 quesadillas (depending on how much you stuff them) so you’ll need 2 packages of tortillas (12 tortillas per package).
~ Remember, over-stuffing the tortillas makes them harder to flip, so go lightly with the filling.
~ If you have young children, you might want to make the first one or two before you mix in the jalapenos (& maybe scallions too depending on your kids).
~ A dollop of sour cream would probably be nice if you’re in the mood (especially if the jalapeno is particularly fiery!)
~ If you’re only cooking for two, you can freeze half of the filling for use on a later date. It’s always nice to have something like this to pull from the freezer when you want a home cooked meal, but don’t have the time or the energy.
~ A large griddle works well for something like this. Just leave yourself some room to flip (don’t squeeze too many tortillas on at once). My griddle of choice is “Green Gourmet” by Cuisinart (not coated with teflon).
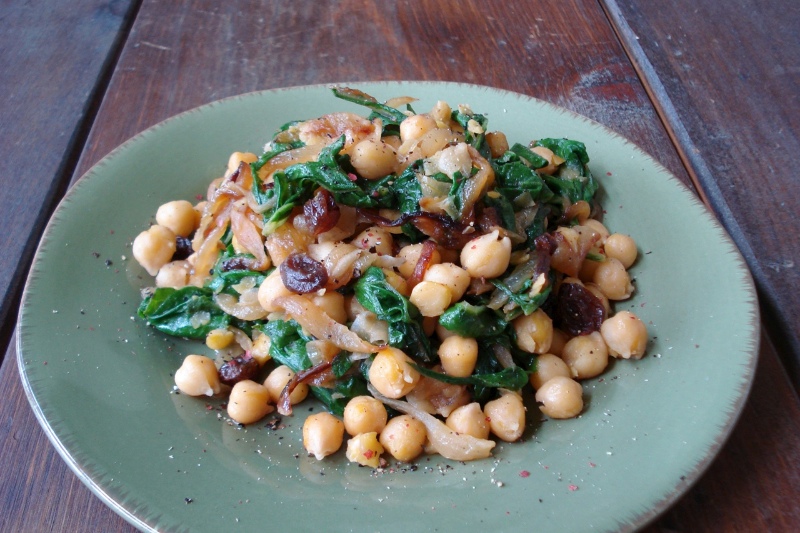
Sicilian Chickpeas w/ Escarole & Caramelized Onions
1 large head of escarole (or greens of preference)
4 TBSP butter, ghee, or extra virgin olive oil
2 medium onions, thinly sliced
2 tsps natural sugar (or 4 drops liquid stevia)
1/4 cup raisins
pure salt & freshly ground black pepper
8 oz dried chickpeas (or 2 cans, rinsed & drained)
1/3 cup of the cooking liquid from the chickpeas (or veg broth if using canned)
If using Dried Beans:
- Place 8 oz dried chick peas in glass bowl (or jar) & fill with cold water.
- Soak for at least 8 hours or overnight.
- Rinse/drain chickpeas & place them in a saucepan with plenty of cold water.
- Add 2 cloves of garlic (whole) and 1 bay leaf & bring to a boil.
- Reduce heat to a simmer & cook until the chickpeas are still a little firm, tender, but not falling apart – 35 – 60 mins, depending on the variety of chickpeas & how long they were soaked.
- Add salt to taste, turn off heat & allow chickpeas to cool in their cooking liquid while you prepare the greens.
- When you’re ready to drain the chickpeas, discard the garlic & bay leaf & remember to reserve 1/3 cup of the cooking liquid.
To Prepare the Greens:
- Remove the stems from the greens, cut into bite sized pieces, rinse & set aside.
- Heat butter or oil in a large saute pan.
- Add the onions & cook, stirring often, over medium-low heat until golden – about 15 mins.
- Stir in the sweetener & continue cooking about 5 mins (but don’t let the onions burn – lower heat if necessary).
- Add the raisins & greens to the pan.
- Cook, working in the greens until they’re wilted & tender – about 5 mins.
- Season w/ salt & pepper to taste.
- Stir in the chickpeas (prepared or canned) & 1/3 cup cooking liquid (or veggie broth).
- Simmer, stirring occasionally until the flavors have blended – about 3 mins.
______________________________________________________________________________________
SIDE NOTES:
~ Adapted from “The Complete Italian Vegetarian Cookbook” – a phenomenal dish (& book).
~ Soaking the beans only takes about 5 mins hands on work – they basically just have to sit there in water. It just takes a little advanced planning if you’re in the mood. (The cooled chickpeas & cooking liquid can be poured into an airtight container & refrigerated for up to 3 days. Or, divide among several smaller airtight containers & freeze for up to several months.)
~ You can use whatever type of greens you want. I usually can’t get escarole, so use swiss chard.
Dairy Free, Gluten Free, Egg Free, Nut Free, Sugar Free, Grain Free, Vegan, RawIf eating dairy free, use olive oil instead of butter. If eating sugar free, use stevia instead of sugar. If eating gluten free, be sure to double check labels of any packaged ingredients you may be using (beans, broth).
1-Minute Ice Cream (w/ demo vid)
For four servings:
4 large bananas, sliced & frozen
1/2 cup milk of choice
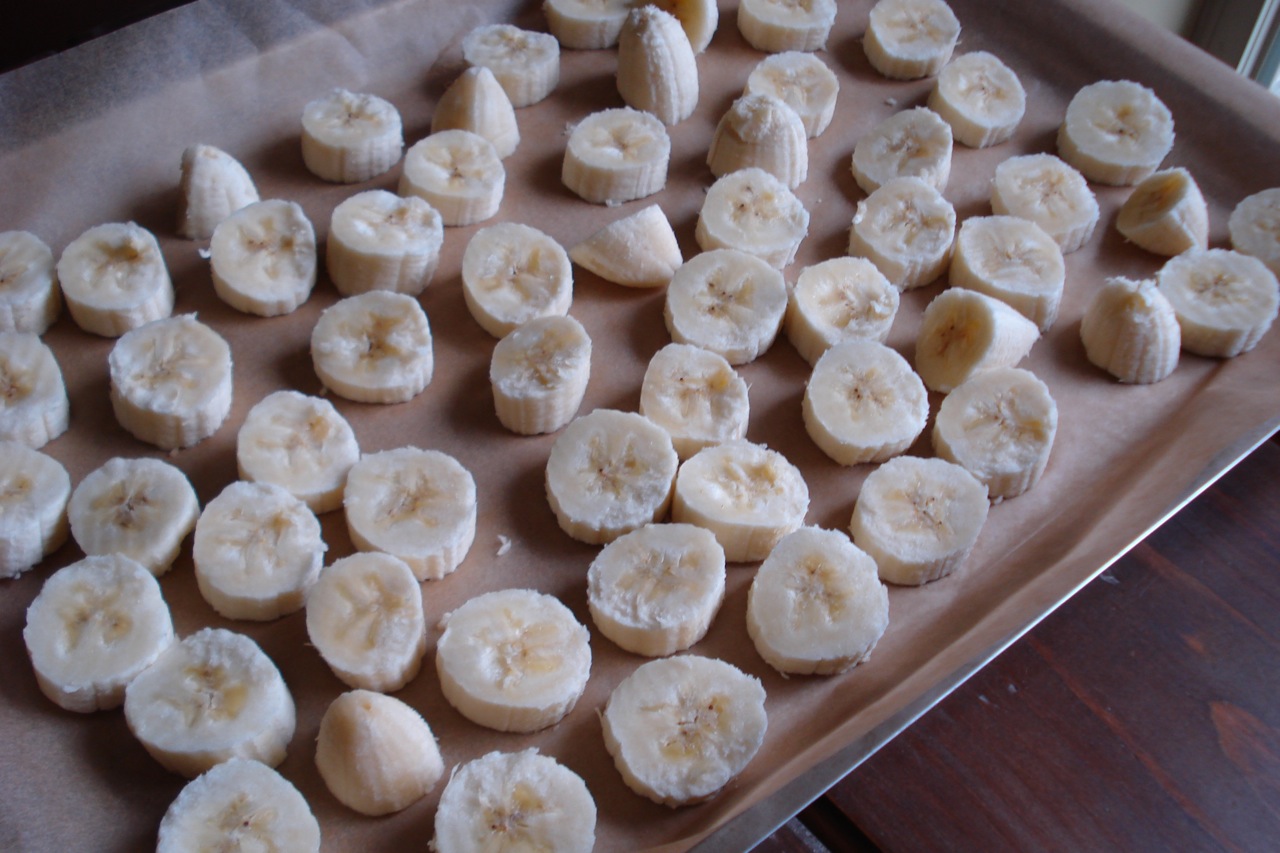
- Cut bananas into rounds and place in single layer on a wax (or parchment) paper covered cookie sheet.
- Put cookie sheet in freezer for several hours or overnight.
Vitamix blender method:
- Place frozen bananas in blender, add milk, and blend on high, using the tamper to continually push banana chunks into the blade area.
Within 1 minute, you’ll have creamy ice cream. Blender will be loud as it’s doing it’s thing, but this is normal.
Food processor method:
- Make sure work bowl is fitted with steel S blade.
- Add banana chunks and start processing.
- While the machine is running, slowly drizzle in the milk.
- You’ll need to stop the food processor several times to reposition the banana chunks (they often end up stuck and sitting on top of the blades).
Within 5 to 10 minutes, you should have creamy ice cream.
___________________________________________________________
Make a caribbean version by adding pineapple (frozen or fresh) (or pineapple juice instead of milk), unsweetened shredded coconut (or a few dollops of coconut butter) and/or coconut milk.
Make peanut butter ice cream by adding about 1/4 cup of natural peanut butter (may need to add a little extra milk)
Make strawberry ice cream by adding a handful of fresh or frozen strawberries.
Make chocolate ice cream by adding a handful of high quality chocolate chips/nibs or cocoa powder
Maple pecan ice cream? Peach ice cream? You get the idea – add anything you want. Keep in mind however, whatever you add has to be in addition to the bananas, as the bananas are what makes this ice cream ice cream! The liquid component is essential as well. After that, use your imagination =)
________________________________________________________________________
SIDE NOTES:
~ You will absolutely not believe how creamy and delicious this is. It is jaw dropping considering how easy & healthy it is. Who needs all the corn syrup, liquid sugar, carrageenan, milk fat, partially hydrogenated soybean oil, guar gum….etc. Who even needs an ice cream maker! Once your bananas are frozen, this takes only one measly minute to make in the Vitamix (or a bit longer if using a food processor).
~ If there’s no room for a big cookie tray in your freezer, you can use one of those small trays for the toaster oven, or a large plate. If you run out of room, lay down another piece of wax paper over the top & keep making as many layers as you need.
~ If you’re not using the frozen bananas right away, or want to freeze a whole bunch extra for future use, once frozen, transfer to a freezer bag. Alternately, you can skip the tray part & just dump the banana rounds directly into a ziplock freezer bag if you don’t mind fighting a little (or a lot) to unstick them from each other. They should last a few months in the freezer without getting freezer burn (their color may change, but they should taste fine).
~ Use ripe bananas! If they have any green on them, the ice cream won’t taste good. Even when I’ve used bananas that were all yellow (no green or brown), it didn’t taste quite as good as it had in the past. SPECKLED BANANAS ARE BEST!! Also, they must be thoroughly frozen or the ice cream won’t turn out.
~ If your bananas are small, use less milk. You want to be careful not to use too much liquid or it will end up more like a shake (though worse things could happen in this world). My rule of thumb when pulling banana chunks out of my freezer to make this ice cream – 15 chunks equals 1 large banana. The most I ever make at one time in my large Vitamix container is 4 servings (which would be 60 banana chunks and 1/2 cup of milk).
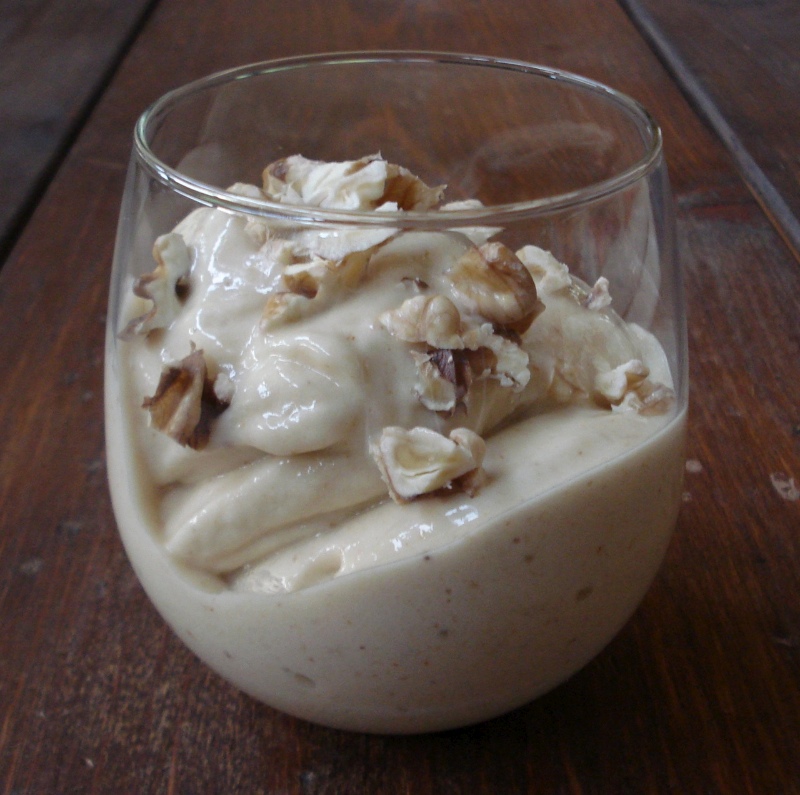
~ This ice cream is best eaten right away, so try not to make more than you’ll want. If you do end up with extra (this is hard to do!), you can freeze it, but let it thaw before you eat. (What you see in the photo is this recipe cut in half – 2 bananas worth. My daughter & I shared it & it was PLENTY.)
~ For the liquid, I’ve used coconut milk, almond milk, raw milk, pineapple juice, and [cold] coffee with great results.
Dairy Free, Gluten Free, Egg Free, Vegan, Nut Free, Sugar Free, Grain Free, Raw
If avoiding milk products, use coconut milk, pineapple juice, or another dairy free option. If eating raw, simply use raw cow milk or other raw, homemade milk (almond, hemp, coconut, etc…).
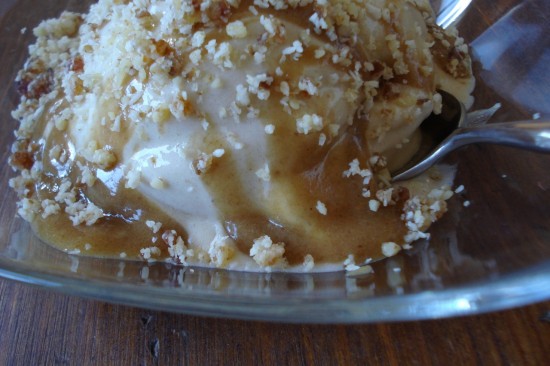
~ Some topping suggestions…. chopped walnuts, almonds or cashews, shredded coconut, granola, fresh berries, a dollop of natural peanut butter, natural chocolate chips, a sprinkle of nutmeg, cinnamon or ginger, mashed up cookies…! Shown below with CARAMEL-SAUCE and SHORTBREAD-CRUST sprinkled over the top.
~ If you’re considering buying a Vitamix blender, you will not be sorry. This tool is a great investment & this ice cream will be even easier to make. My distributor code is 06-004158. Use it to receive free shipping (& this gives me credit for the referral) (thx!) You do have a 30 day money back guarantee, so it’s easy to test out without obligation. That little cushion is what pushed me over the edge years ago.


