Meatballs

1 free range egg, lightly beaten
1 pound grass-fed ground beef
1/2 cup high quality breadcrumbs (see below for alternatives)
2 tsps dried minced onion (or 2 TBSP finely chopped fresh onion)
1 tsp dried basil
1 tsp dried oregano
1 tsp dried thyme
1 tsp dried rosemary
1/2 tsp pure salt
1/2 tsp Worcestershire sauce
2 TBSP butter, ghee, or coconut oil
METHOD 1 — FRYING:
- Lightly beat the egg in a bowl large enough to hold the rest of the ingredients.
- Mix the remaining ingredients except for the butter (or oil) with the egg.
- Shape into 1 & 1/2 inch balls.
- Saute meatballs in ghee (or oil of choice) over medium heat, turning occasionally, for about 15 – 20 mins, until browned on all sides and cooked through.
METHOD 2 — BAKING:
- Lightly beat the egg in a bowl large enough to hold the rest of the ingredients.
- Mix the remaining ingredients except for the butter (or oil) with the egg.
- Shape into 1 & 1/2 inch balls.
- Bake the meatballs on a parchment paper covered cookie sheet at 350 degrees for 30 minutes (in this case, you can omit the butter or oil).
Makes approximately 20 – 24 meatballs, depending on size.
______________________________________________________________________________________
SIDE NOTES:
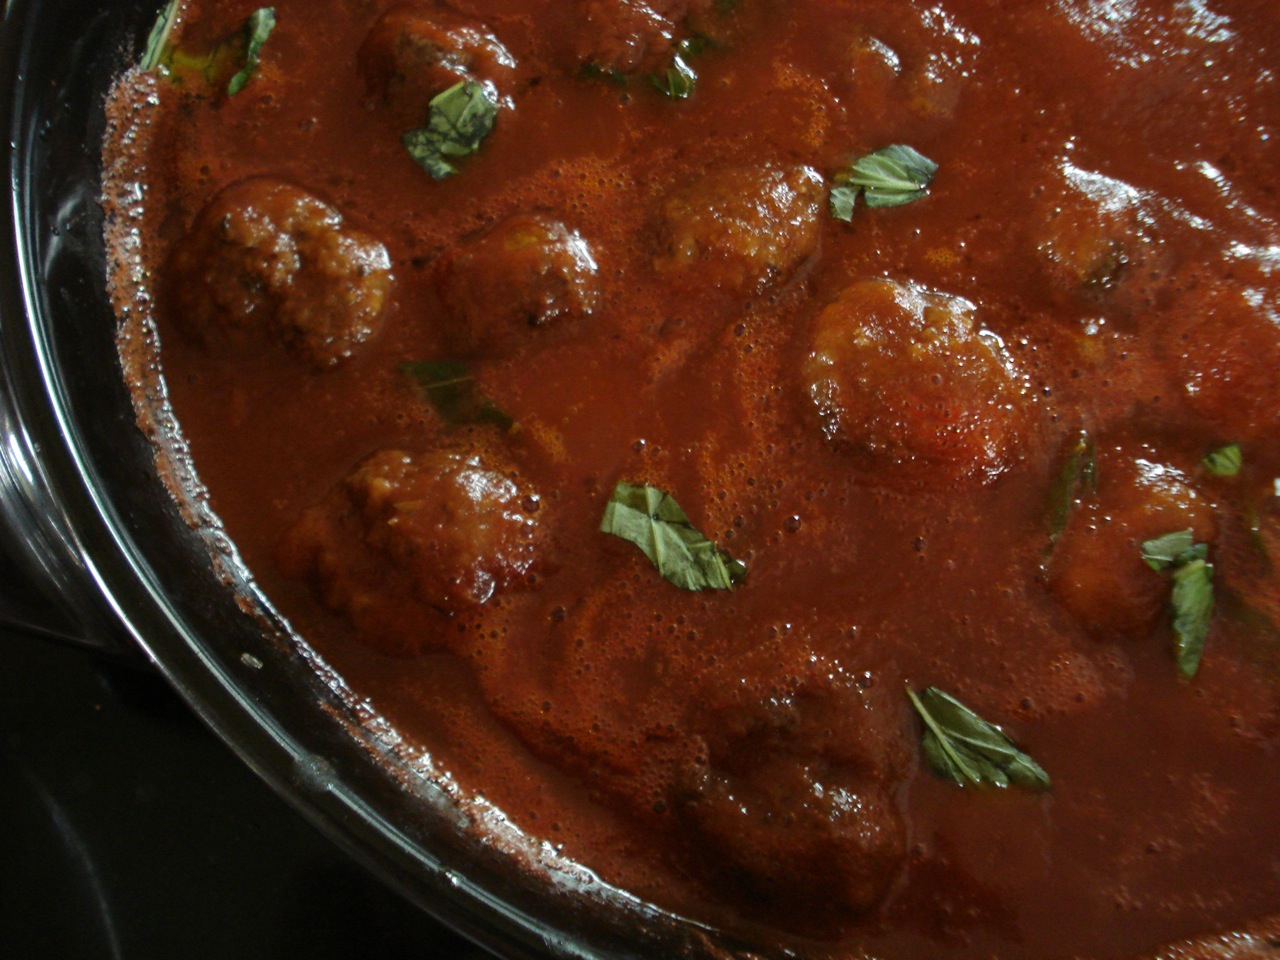
~ After frying the meatballs, I sometimes add them to my 10-MINUTE-MARINARA (as shown above). Melting a little natural mozzarella over the top (meatball parm) is delicious. Saute some greens with garlic on the side, or make a nice big salad for a satisfying meal.
~ It’s easy to make your own, quality breadcrumbs at home if interested (click HERE for details). I make a big batch every once in a while, and store in a large glass mason jar in the freezer.
~ If you don’t have breadcrumbs on hand and don’t want to make them, instead, tear apart a few pieces of high-quality bread into small pieces (1 cup – packed) and toss the bread with 6 TBSP milk. Let soak a few minutes until softened and combine with the meat mixture. (We like this version a lot.)
~ If you’re avoiding grains completely, simply replace the breadcrumbs with an equal amount of almond meal (tip from friend and fellow real food advocate – Sharon Shiner).
~ I know there are tons of variations on how to make meatballs. You can add 1/2 cup freshly grated parmesan cheese to the mix, or vary the spices. If anyone has any meatball secrets they’d like to share, feel free to comment below!

Dairy Free, Gluten Free, If eating gluten free, use gluten free breadcrumbs, and be sure to check labels of packaged ingredients if eating gluten and/or sugar free (omit the Worcestershire sauce if necessary). If eating grain free, use almond flour instead of breadcrumbs. Egg Free, Nut Free, Sugar Free, Grain Free, Vegan, Raw
Crustless Cheesecake

1 pound (16 oz) high-quality cream cheese
3 free range eggs
1/2 cup sugar of choice
1/8 tsp pure vanilla extract
For the Topping:
1/2 pint (8 oz) high-quality sour cream
1 tsp pure vanilla extract
3 TBSP sugar of choice
- Preheat oven to 325 degrees.
- Beat cream cheese with an electric mixer.
- Add eggs one at a time, beating well after each.
- Add sugar and vanilla, and beat again until just combined.
- Pour batter into an 8 x 8 inch, coconut oil-greased, square, baking dish.
- Bake for 40 minutes, or until lightly browned.
- Let cool.
- Combine topping ingredients and spread over pie to within 1/2 inch of plate edge.
- Allow topping to firm in the refrigerator for at least 4 hours (overnight is best).
Enjoy!
_____________________________________________________________________________
SIDE NOTES:
~ Not much to say here really, except grab a fork! Of course, if you’re eating gluten and/or grain free – this is a sweet treat, and in general, a nice dessert for Thanksgiving.
~ Personally, I like using mascarpone cream cheese for this.
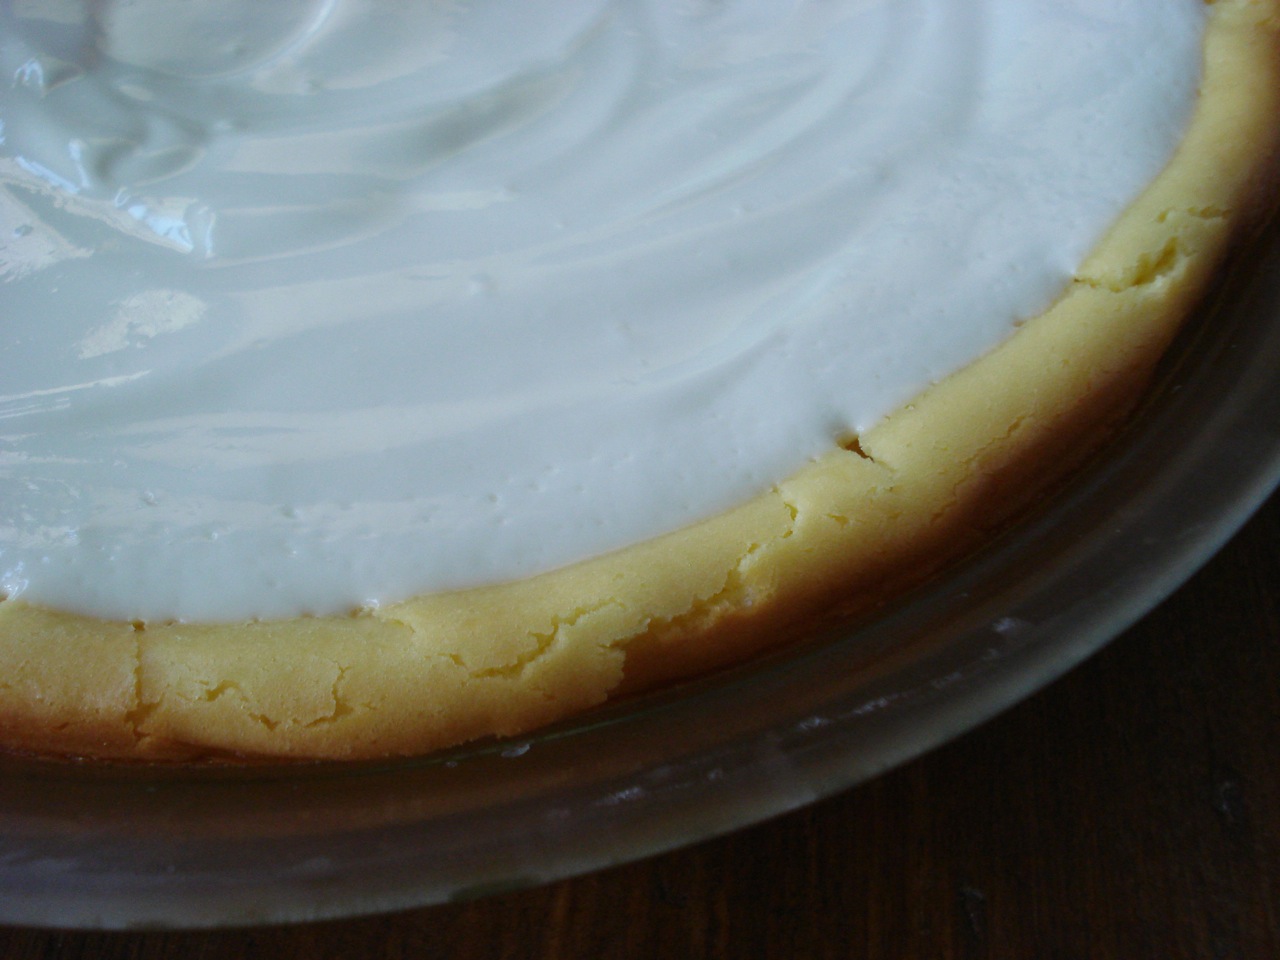
~ For me, it overflowed in the oven twice – first when I used a 9-inch round pie plate, and again when I tried it with a larger, 10-inch plate. Once I started using the 8 x 8 square dish, there was no mess to clean up in my oven afterward. I know the photo shows round, but if you saw the side of the pie that’s not in the photo, it wouldn’t be such a pretty picture. FYI – mascarpone cream cheese is lighter/fluffier than regular cream cheese, and I have a feeling this could be the cause of the overflow. In other words, this might work fine for you in a round pie plate using regular cream cheese. I have just never been able to find a regular cream cheese that didn’t have a bunch of undesirable additives – even the organic varieties – so using mascarpone is my personal preference. Do what works for you.
~ Make sure you let it cool enough before you try to spread on the topping (otherwise, some of the top layer of cake will break up as you spread, and the topping will be a little lumpy – not the worst thing in the world – but worth a mention.
Happy Thanksgiving everyone…. Enjoy each other =)
Dairy Free, Gluten Free, Egg Free, Nut Free, Sugar Free, Grain Free, Vegan, Raw
Baked BBQ Chicken

2 lbs chicken (on bone – legs, thighs, wings, breasts, or boneless breasts – whatever you have)
garlic pepper (see notes below)
6 oz (3/4 cup) high quality BBQ-sauce
For skinless breasts or cutlets:
- Place chicken in a 9×13 pyrex and sprinkle both sides generously with garlic pepper.
- Coat both sides of the chicken with BBQ sauce (simply pour into the pyrex and toss).
- Bake in the oven at 375 for 20 – 30 mins until cooked through.
For bone in / skin on chicken parts:
- Melt some butter in a large skillet.
- Add chicken parts and roll in melted butter to coat on all sides.
- Sprinkle with garlic pepper on both sides.
- Brown chicken on both sides (roughly 5 – 7 minutes per side).
- Add BBQ sauce and toss to coat.
- Bake in the oven at 375 for about 30 mins.
________________________________________________________________________________________
SIDE NOTES:
~ Easy and Good! Prepare one or two simple side dishes while the chicken is cooking and enjoy =)
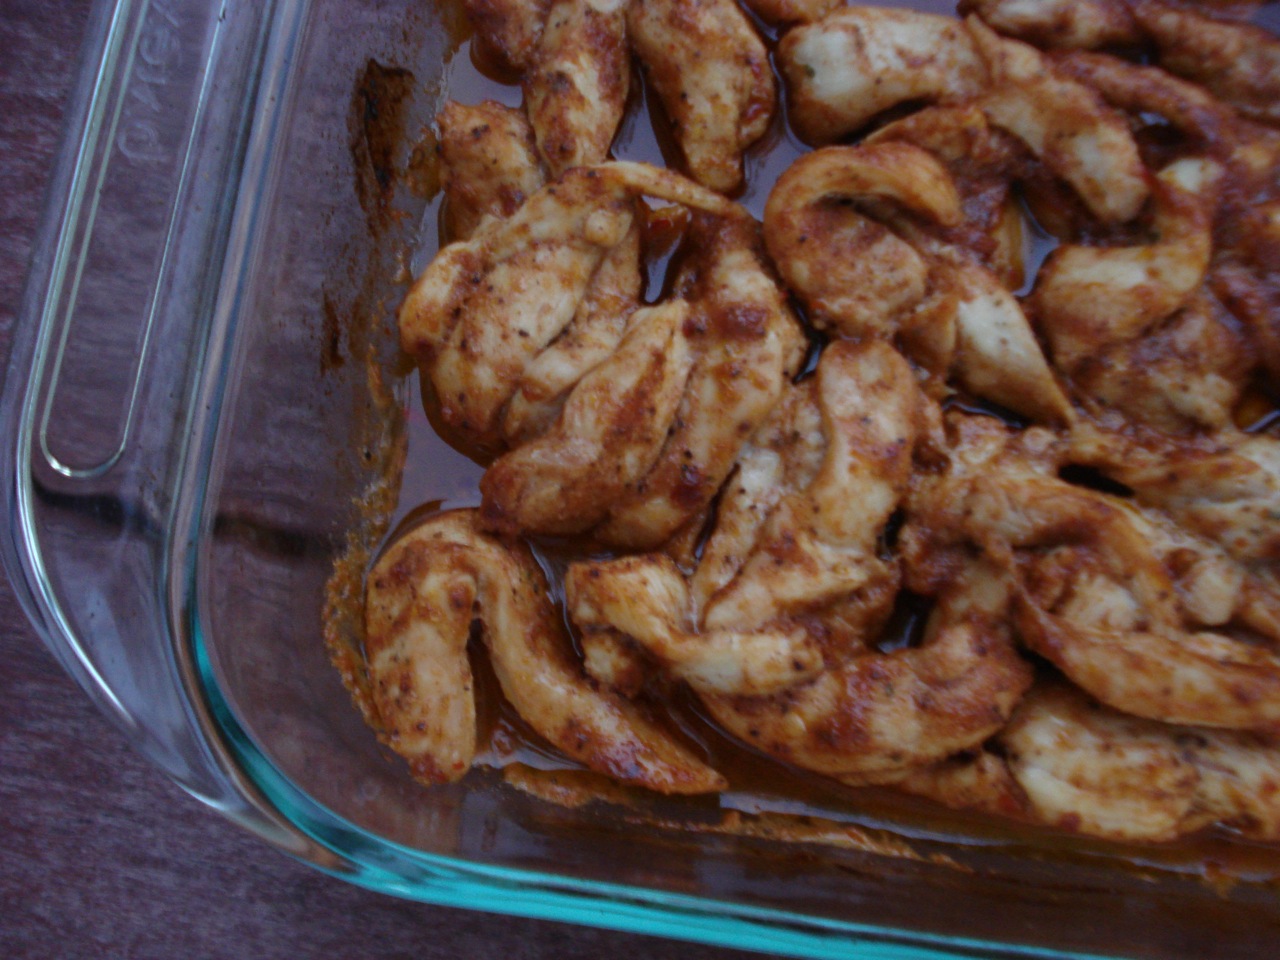
~ This time, I had boneless chicken strips on hand, so that’s what I used. With smaller chicken pieces like this, baking for 20 – 25 minutes is all that’s needed. If you have larger cutlets or a whole cut up chicken, you will likely need a longer bake time – but begin checking at 25 minutes to avoid drying out the chicken.
~ For the garlic pepper, simply mix together 4 tsps garlic powder, 2 tsps black pepper, and 1/2 TBSP dried parsley flakes, and store in an empty spice shaker.
~ If you’d like to try a HOMEMADE BBQ SAUCE, simply melt the coconut oil (or butter or ghee) and mix together all of the following ingredients (this yields the exact amount needed for this recipe – 3/4 cup):
- 1/4 cup high quality ketchup
- 3 TBSP natural sugar of choice (or 18 drops liquid stevia)
- 2 TBSP apple cider vinegar
- 2 TBSP coconut oil, butter, or ghee, melted
- 1 TBSP lemon juice
- 1/2 TBSP Worcestershire sauce
- 1 to 1 & 1/2 tsps pure salt (to taste)
- 1 tsp high quality mustard
- 1 tsp chili powder
- 1 tsp paprika
- 1/2 tsp red pepper flakes
- 1 cup high quality ketchup
- 3/4 cups natural sugar of choice (or 72 drops liquid stevia)
- 1/2 cup apple cider vinegar
- 1/2 cup coconut oil, butter, or ghee, melted
- 1/4 cup lemon juice
- 2 TBSPs Worcestershire sauce
- 4 to 6 tsps pure salt (to taste)
- 4 tsp high quality mustard
- 4 tsp chili powder (I use 3 tsp regular chili powder and 1 tsp chipotle powder)
- 4 tsp paprika
- 2 tsps red pepper flakes

Dairy Free, Gluten Free, Egg Free, Nut Free, Sugar Free, Grain Free, If eating gluten and/or sugar free, be careful choosing a BBQ sauce or simply make your own. Click HERE for instructions on how to make a gluten and sugar free BBQ sauce. Vegan, Raw
Recipe adapted from http://divascancook.com/2012/
Homemade Marshmallows

1/2 cup water
3 TBSP non-hydrolyzed gelatin
1/2 cup water
2 cups sugar
1/2 TBSP pure vanilla extract
- Pour 1/2 cup of water into a large mixing bowl and sprinkle gelatin over the top.
- Let sit about 30 minutes.
- Gently boil remaining 1/2 cup water and sugar until liquid turns clear, about 12 – 15 minutes (stirring occasionally).
- Transfer melted sugar to bowl with gelatin.
- Add vanilla and blend with electric mixer for about 10 minutes, until a sticky marshmallow consistency is reached.
- Transfer to an 8 x 12 baking dish, cover, and refrigerate for 12 hours.
- Cut into squares and enjoy.
SIDE NOTES:
~ I myself have always hated marshmallows, even as a kid, so have never tasted these, but I make them for the kids from time to time and they really LOVE them. Apparently, they taste like a true marshmallow but the consistency is slightly heavier, a little more gummy & less airy (I’m sure this is due to the fact that no chemicals are used in this version!). They have also been tested on the kids’ friends with great success.
~ Don’t try this with any type of fancy, natural sugar – won’t work.
~ I typically use two 8 x 6 pyrex baking dishes. Just use whatever you have that’s close – doesn’t have to be that exact size.
~ Homemade marshmallows will stay fresh for at least a month in a sealed container. Apparently you can keep them at room temp (as long as the container is sealed), but I prefer to keep them in the fridge and cut them as needed.
~ If as a parent, you’re looking for ways to reduce the candy load this time of year, feel free to read through one of my older posts from this time last year: HALLOWEEN-CANDY-DILEMA
~ It’s always interesting to compare ingredients with commercially made versions:
JET PUFFED MARSHMALLOW INGREDIENTS:
Corn Syrup, Sugar, Dextrose, Corn Starch Modified, Water, Gelatin, Tetrasodium Pyrophosphate A Whipping Aid, Flavor(s) Artificial, Color(s) Artificial (Blue 1)
Dairy Free, Gluten Free, Egg Free, Nut Free, If eating gluten free, be sure to choose a gluten free vanilla extract.Sugar Free, Grain Free, Vegan, Raw
Chocolate Syrup
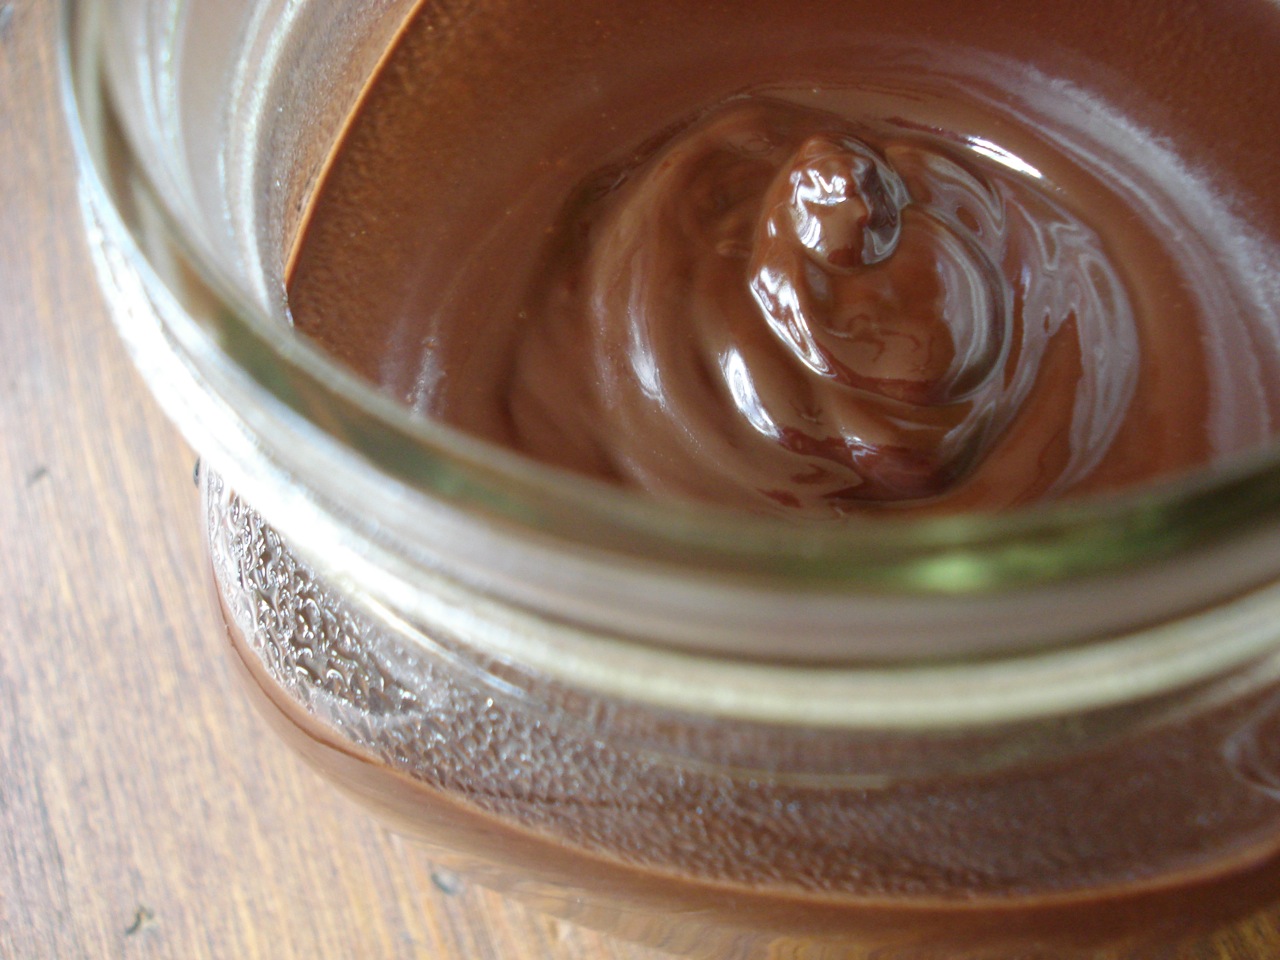

- Bring water and sugar to a boil, whisking until sugar is dissolved.
- Add cocoa and salt and simmer, whisking, until slightly thickened – about 3 minutes.
- Remove from heat, add vanilla, then cool (syrup will continue to thicken as it cools).
Yields about 1 & 1/2 cups. Store refrigerated in a sealed container.
__________________________________________________________________________
SIDE NOTES:
~ This syrup makes delicious chocolate milk, hot chocolate, and of course is a yummy topping for ice cream. We use 1 TBSP syrup to 1 cup milk for chocolate milk. To make hot chocolate – we use slightly more syrup than that (the original recipe from epicurious.com recommended 1/3 cup syrup to 1 cup milk, but we found it way too strong at that ratio).
~ In any event, it sure beats the squeeze bottle of chocolate you’d find at the store.
For comparison, here are the ingredients in HERSHEY’S CHOCOLATE SYRUP:
HIGH FRUCTOSE CORN SYRUP; CORN SYRUP; WATER; COCOA; SUGAR; CONTAINS 2% OR LESS OF: POTASSIUM SORBATE (PRESERVATIVE); SALT; MONO- AND DIGLYCERIDES; XANTHAN GUM; POLYSORBATE 60; VANILLIN, ARTIFICIAL FLAVOR
~ Speaking of ice cream, here are a few other toppings to consider if you’re in the mood for the works: CARAMEL-SAUCE and/or SHORTBREAD-CRUMBLE. Also, here’s an easy ice cream recipe (no ice cream machine required) if intetested: 1-MINUTE-ICE-CREAM
Dairy Free, Gluten Free, Egg Free, Nut Free, If eating dairy or gluten free, be careful choosing a chocolate powder, and use a gluten free vanilla extract.Sugar Free, Grain Free, Vegan, Raw
Fresh Whipped Cream
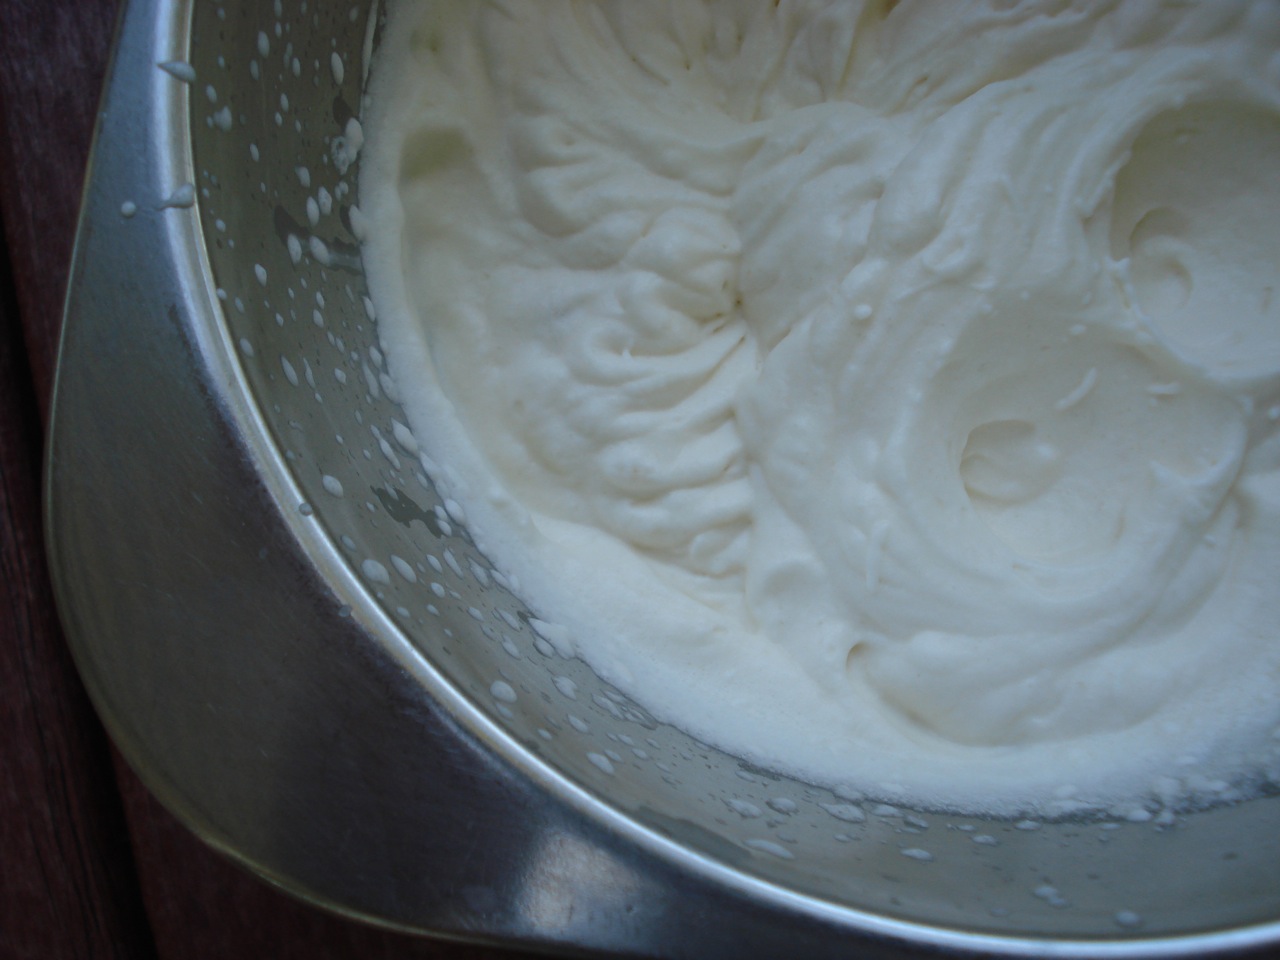

1 cup high quality cream
1 – 2 TBSP sweetener of choice (to taste), or 6 – 12 drops liquid stevia
1 tsp vanilla extract
Use an electric mixer to blend the cream. Once it thickens, add sweetener, vanilla, and blend just a bit more to combine.
__________________________________________________________________________
SIDE NOTES:
~ There’s nothing like homemade whipped cream. It’s delicious with fresh fruit of any kind. I’m lucky enough to have a farm near by where I can pick up fresh, raw cream to keep on hand. If this is an option for you, I highly recommend it!
~ Of course, it’s easier to buy whipped cream at the store, but do you really want to eat someone’s chemistry experiment?
COOL WHIP ingredients: WATER, HYDROGENATED VEGETABLE OIL, HIGH FRUCTOSE CORN SYRUP, CORN SYRUP, SKIM MILK, LIGHT CREAM, SODIUM CASEINATE, NATURAL AND ARTIFICIAL FLAVOR, XANTHAN AND GUAR GUMS, POLYSORBATE 60, SORBITAN MONOSTEARATE, BETA CAROTENE (COLOR).
REDDI WHIP ingredients: CREAM, WATER, SUGAR, CORN SYRUP, NONFAT MILK, NATURAL AND ARTIFICIAL FLAVORS, MONO AND DIGLYCERIDES, CARRAGEENAN, NITROUS OXIDE.
If eating sugar free, use stevia. If eating raw, use fresh cream from a local farm and add ground vanilla bean instead of extract.Dairy Free, Gluten Free, Egg Free, Nut Free, Sugar Free, Grain Free, Vegan, Raw

Orange Gelatin
VERSION 1:

2 cups fresh orange juice, cold
2 cups fresh orange juice, near boiling
3 TBSP non-hydrolyzed gelatin
- Begin heating 2 cups of the juice.
- Pour cold juice in a bowl, dissolve gelatin in juice by stirring gently, and let sit for 3 minutes.
- Slowly add hot juice to cold juice mixture, stirring until gelatin is completely dissolved.
- Cover and refrigerate until set, several hours or overnight.
Serve as is or with heavy cream or fresh whipped cream.
Dairy Free, Gluten Free, Egg Free, Nut Free, Sugar Free, Grain Free, Vegan, Raw
_____________________________________________________________________
VERSION 2:
2 cups orange juice, near boiling
1 cup cold orange juice
1 cup plain greek yogurt
3 TBSP sugar
3 TBSP non-hydrolyzed gelatin
- Begin heating 2 cups of the juice.
- Whisk the cold juice, yogurt, and sugar in a bowl until well combined.
- Add gelatin powder, gently / briefly whisk, and let sit for 3 minutes.
- Slowly add hot juice to cold juice mixture, stirring until gelatin is completely dissolved.
- Cover and refrigerate until set, several hours or overnight.
Serve as is or with heavy cream or fresh whipped cream.
Dairy Free, Gluten Free, Egg Free, Nut Free, Sugar Free, Grain Free, Vegan, Raw
_____________________________________________________________________
SIDE NOTES:
~ I thought it made sense to post these gelatin recipes after last week’s broth recipe, as all that high quality protein inherent in homemade broth is where powdered gelatin comes from.
~ I recommend using a pulp free juice, or strain if making homemade.
~ If possible, use a non-metal pot (ceramic/corningware or glass) for heating the orange juice, as citrus juice (like tomato) is acidic with the tendency to leach metals.
~ Click HERE to view 2 versions of grape gelatin.
(It seems all the Jell-O brand flavors have the same ingredients, except for the varying artificial coloring & artificial flavoring.)
SUGAR, GELATIN, ADIPIC ACID (FOR TARTNESS), CONTAINS LESS THAN 2% OF NATURAL AND ARTIFICIAL FLAVOR, DISODIUM PHOSPHATE AND SODIUM CITRATE (CONTROL ACIDITY), FUMARIC ACID (FOR TARTNESS), YELLOW 6, RED 40, BHA (PRESERVATIVE).
Grape Gelatin
VERSION 1:

2 cups high quality, 100%, grape juice, cold
2 cups high quality 100%, grape juice, near boiling
3 TBSP non-hydrolyzed gelatin
- Begin heating 2 cups of the juice.
- Pour cold juice in a bowl, dissolve gelatin in juice by stirring gently, and let sit for 3 minutes.
- Slowly add hot juice to cold juice mixture, stirring until gelatin is completely dissolved.
- Cover and refrigerate until set (several hours or overnight).
Dairy Free, Gluten Free, Egg Free, Nut Free, Sugar Free, Grain Free, Vegan, Raw
_____________________________________________________________________________________________________
VERSION 2:

2 cups grape juice, near boiling
1 cup cold grape juice
1 cup plain yogurt
3 TBSP natural sugar of choice
3 TBSP non-hydrolyzed gelatin
- Whisk together yogurt, sugar, and cold grape juice until smooth.
- Gently mix in the gelatin and let sit for 3 minutes.
- Slowly pour the hot juice into the gelatin mixture and whisk until gelatin is completely dissolved.
- Cover and refrigerate until set (several hours or over night).
Dairy Free, Gluten Free, Egg Free, Nut Free, Sugar Free, Grain Free, Vegan, Raw
_____________________________________________________________________________________________________
SIDE NOTES:
~ I thought it made sense to post these gelatin recipes after last week’s broth recipe, as all that high quality protein inherent in homemade broth is where powdered gelatin comes from.
~ Click HERE to view recipe for orange gelatin (same as grape – version 1 except using OJ).
(It seems all the Jell-O brand flavors have the same ingredients except for the varying artificial colorings & artificial flavorings.)
SUGAR, GELATIN, ADIPIC ACID (FOR TARTNESS), CONTAINS LESS THAN 2% OF ARTIFICIAL FLAVOR, DISODIUM PHOSPHATE AND SODIUM CITRATE (CONTROL ACIDITY), FUMARIC ACID (FOR TARTNESS), TANNIC ACID, RED 40, BLUE 2.
Chicken or Beef Broth

Homemade broth – one of the most nourishing foods there is!
5 – 6 pounds animal bones and parts (see notes below)
5 – 6 quarts filtered water (1 qt for every 1 lb animal parts)
2 TBSP apple cider vinegar (or 3 TBSP orange juice)
onion, carrots, potatoes (optional)
- Place animal parts in a large stock pot.
- Cover with appropriate amount of water.
- Add vinegar (or juice) and any optional vegetables for flavor if desired.
- Cover pot and bring to boil.
- Skim away and discard thick residue that rises to the top (see photo below).
- Simmer over low heat partially covered for at least 5 – 6 hours (liquid will reduce).
- Remove animal parts and vegetable solids from broth with a slotted spoon or strainer, and set them aside.
- To really get your money’s worth, you can use the same animal parts to repeat the entire process, but use 3/4 the amount of water.
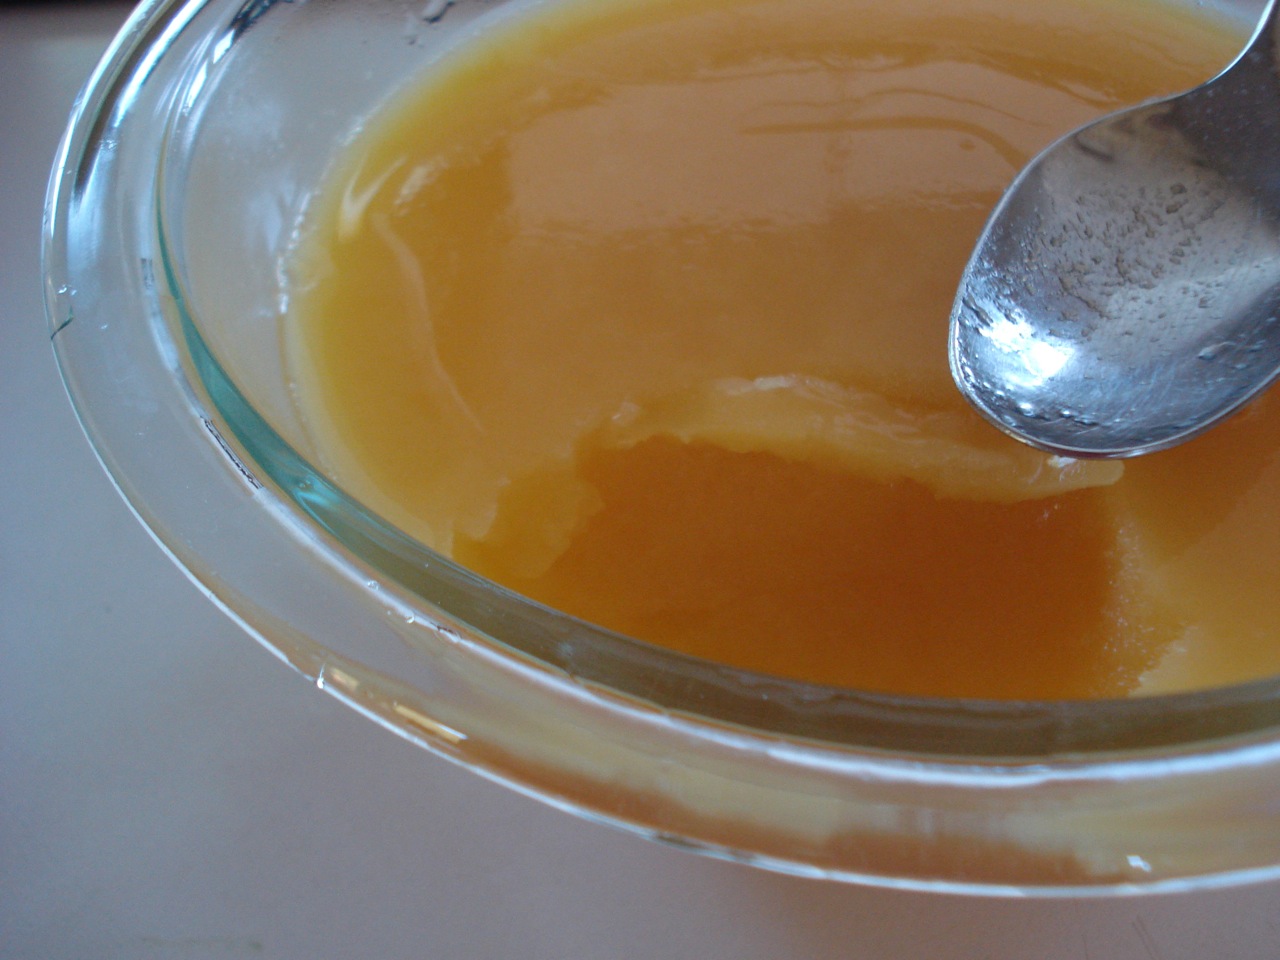
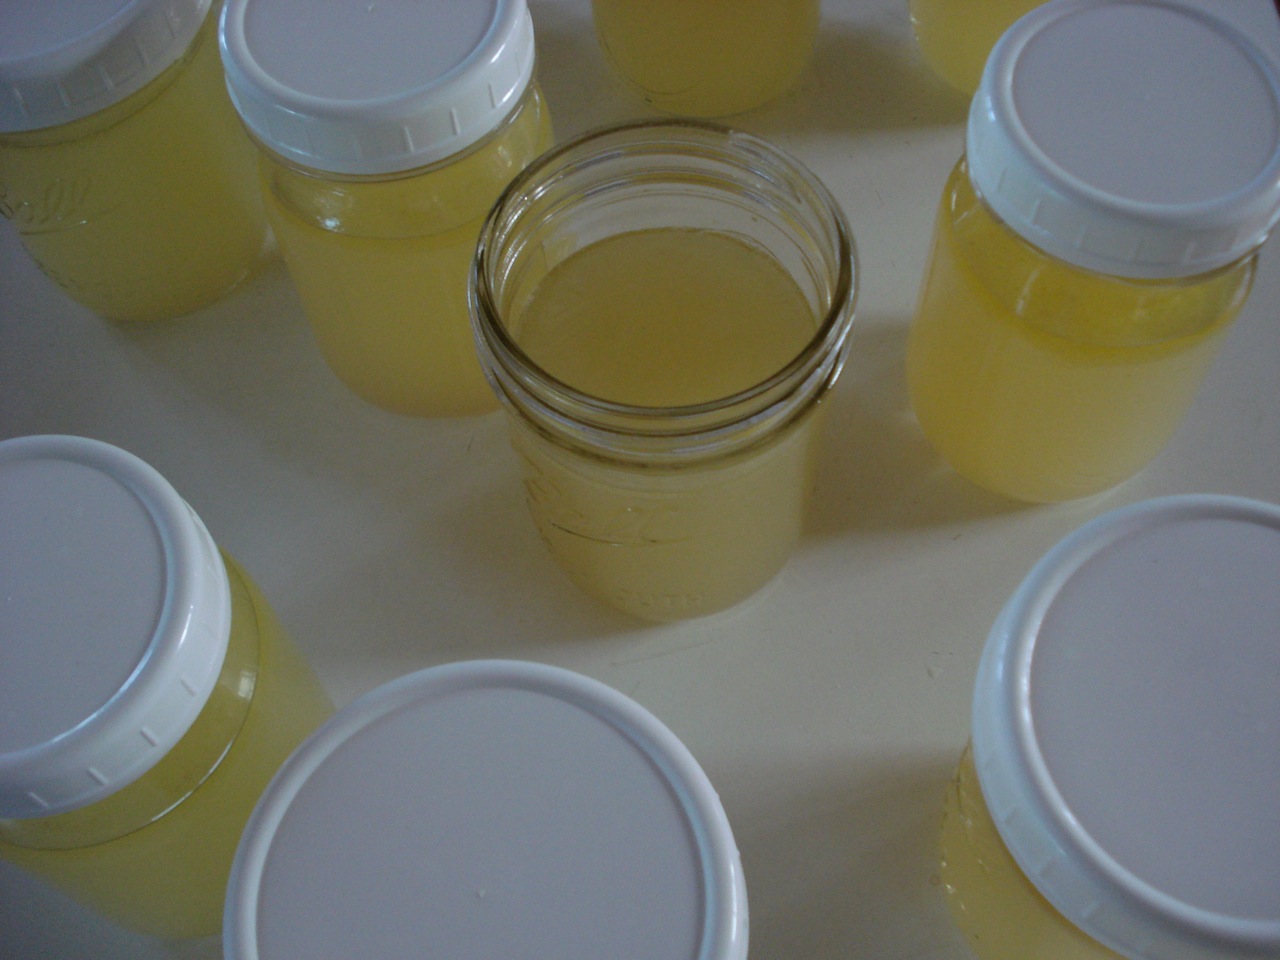
- Place strained broth in a bowl and refrigerate until fat has risen to the top (this may take 24 hours).
- Skim and discard fat off the top before re-heating the broth.
Broth will keep in the refrigerator for 4 – 5 days. Freeze in glass mason jars to store longer (only fill the jars 3/4 full since broth will expand as it freezes).
_____________________________________________________________________________
SIDE NOTES:
~ Animal parts: Oxtail, lamb neck, and chicken feet make the richest broth, but other perfectly acceptable parts to use are chicken/turkey backs, chicken/turkey necks, bones from any animal (cooked or uncooked), beef or lamb ribs, or any part of any animal that contains connective tissue, and bones. I often use chicken backs and necks or oxtail/marrow bones, simply because that’s what’s usually available locally.
~ Sometimes chicken feet are soaked in chlorine or other disinfectants. To avoid ingesting toxins, be sure the ones you’re buying are not.
~ When I make broth with 6 lbs animal parts, I tend to throw in 1 onion & 3 carrots – roughly chopped. This amount makes approx 3 & 3/4 quarts broth.
~ Noteworthy when trying to decide how big of a pot you need to use…. For a large batch (6 lbs parts / 6 qts water) it just fits into my 10 quart pot. So adjust your pot size based on that ratio (for 3 lbs of parts, use a 5 quart pot, etc…).
~ Keep in mind that there are many ways to make broth. Some simmer it only for a few hours. Some cook at the lowest simmer possible for 24 hours. You’ll just have to figure out what works best for you. This recipe is a basic starting point.
~ Refrigerated broth should be thick and jiggle like Jell-O. This consistency means the broth is full of gelatin and high in protein. It will thin to a water consistency once re-heated. If broth does not gel (remains watery when refrigerated), the animal parts used were not full of gelatin, or too much water was added to the recipe. Do not discard watery broth, as it will still be rich in minerals.
_____________________________________________________________________________
As the broth cools in the fridge, the fat will rise to the top as pictured below:

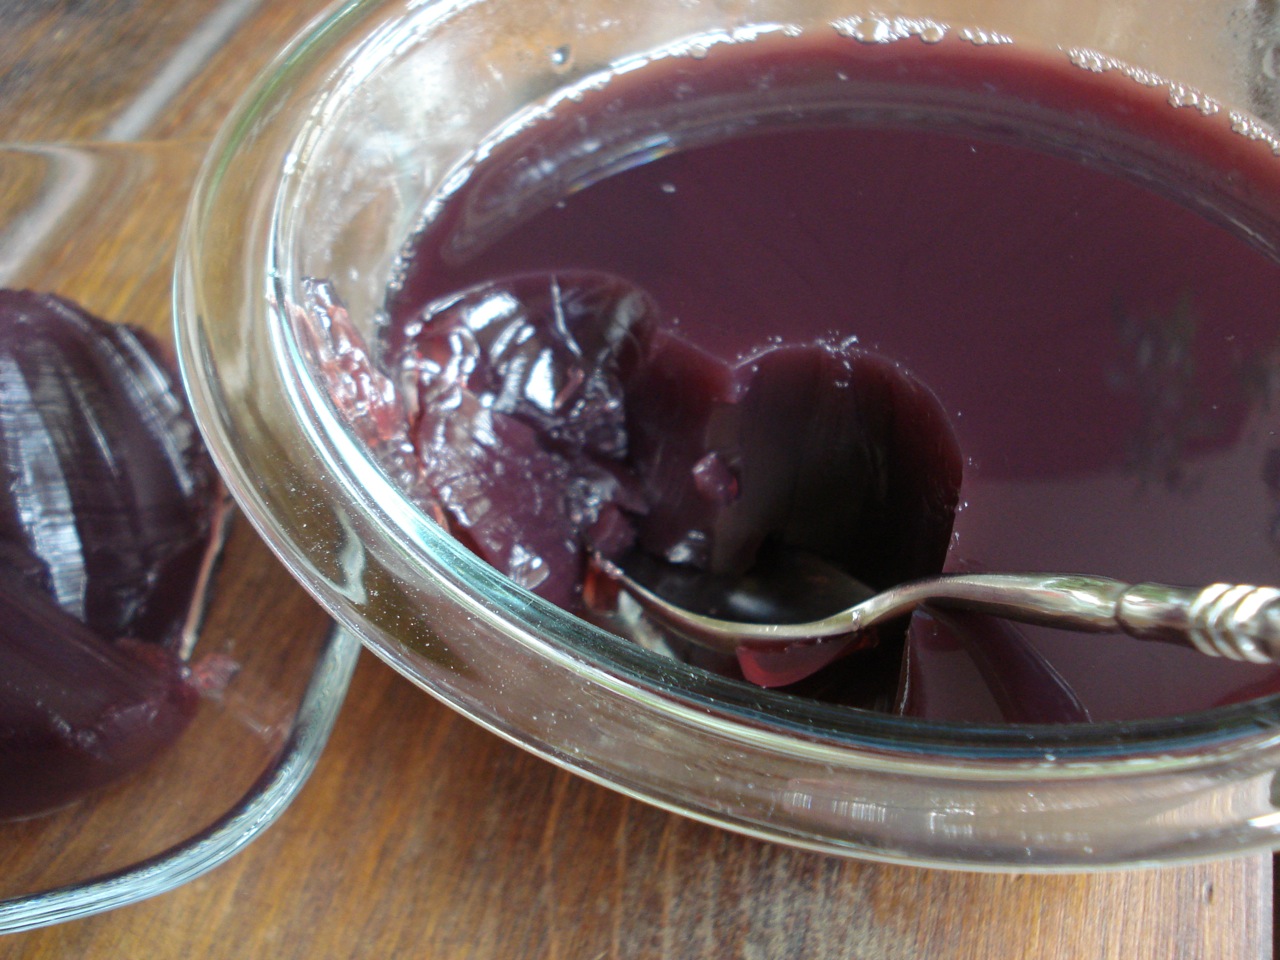
It’s easy to scoop out the fat, as it’s semi-solid. The broth underneath is Jell-O like – full of protein!

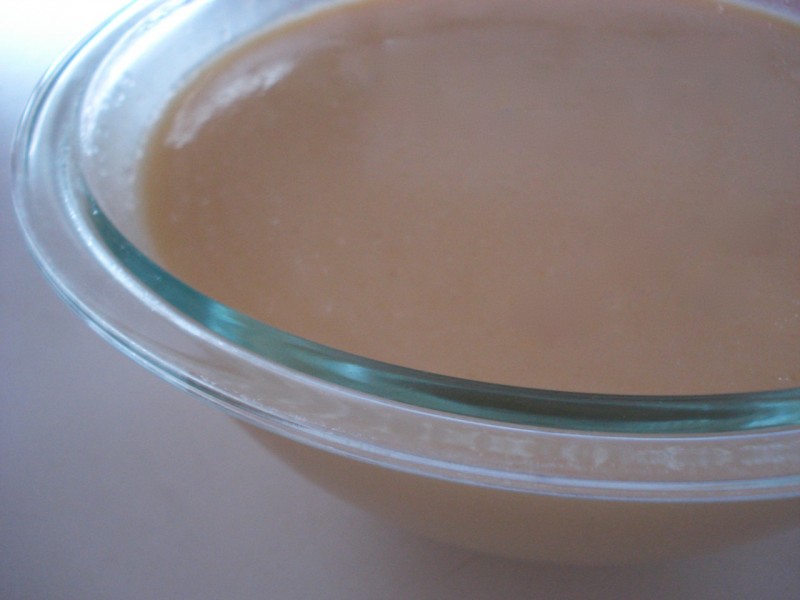
This is the thick residue that needs to be skimmed off the top and discarded while cooking:

After skimming:

Dairy Free, Gluten Free, Egg Free, Nut Free, Sugar Free, Grain Free, Vegan, Raw
How to Prep a Leek
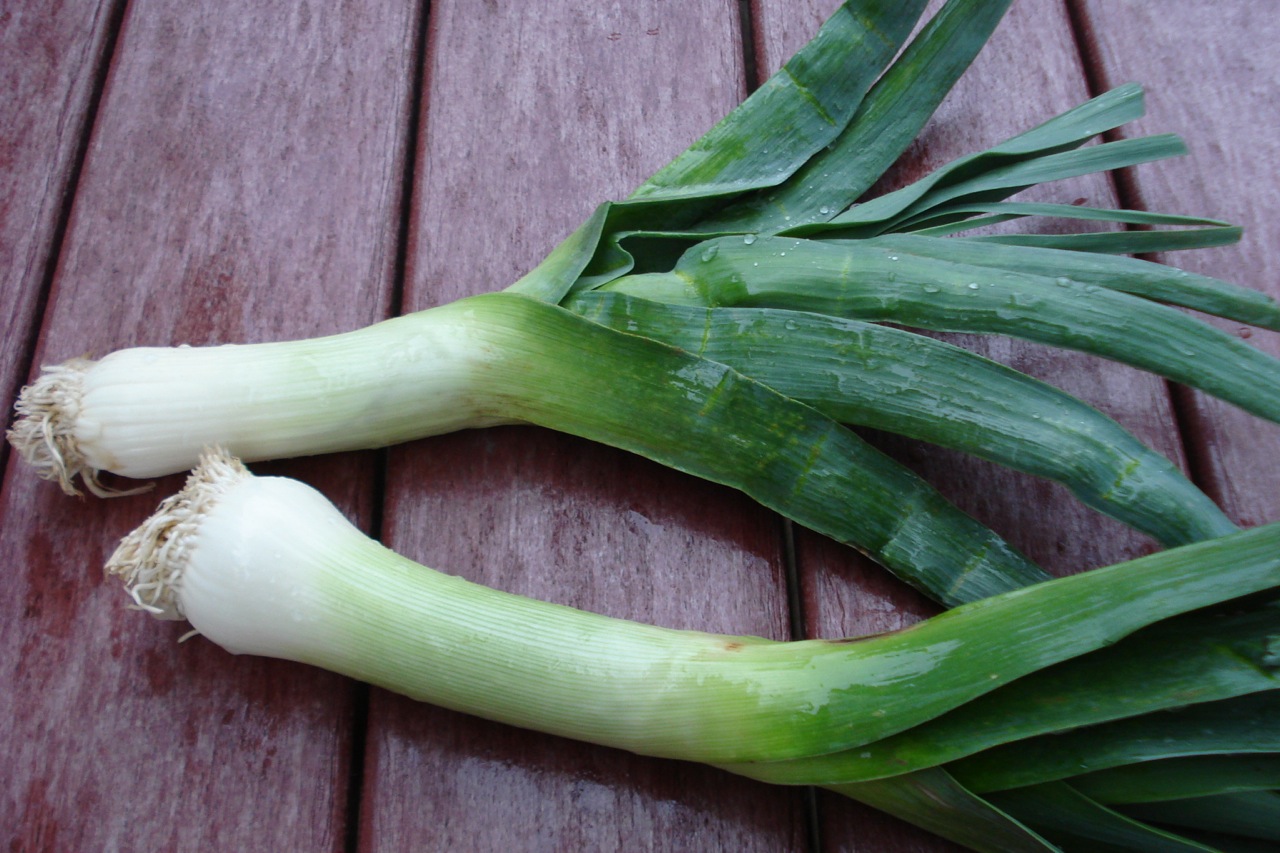

Years ago, I was very stand-of-ish with leeks, as I didn’t quite understand them. What I failed to realize back then is that they’re pretty much just big, fat scallions, and thinking of them this way made them a lot less intimidating. They have a mild, sweet, onion flavor when sautéed, and pair really well with eggs (try adding sautéed leeks to an omelette or frittata), are great in soups/stir fries, or as a topping for home-made pizza. You can really use them any way you’d use regular onions. Interestingly enough, my daughter will not go near an onion (unless it’s pureed and visually undetectable), but likes leeks. Go figure.
________________________________________________________________________________________
DIRECTIONS:
- Trim and discard the stem ends, dark green tops, and tough outer leaves.
- Halve the remaining core, lengthwise.

- While holding under cool running water, gently spread apart (but do not separate) the inner layers to remove all traces of soil. If the leeks are particularly dirty, you can soak them in several changes of clean water if that’s easier.

- Shake off excess water and slice the cleaned leeks crosswise to desired thickness.


- Saute in butter or coconut oil and use as you would onions.